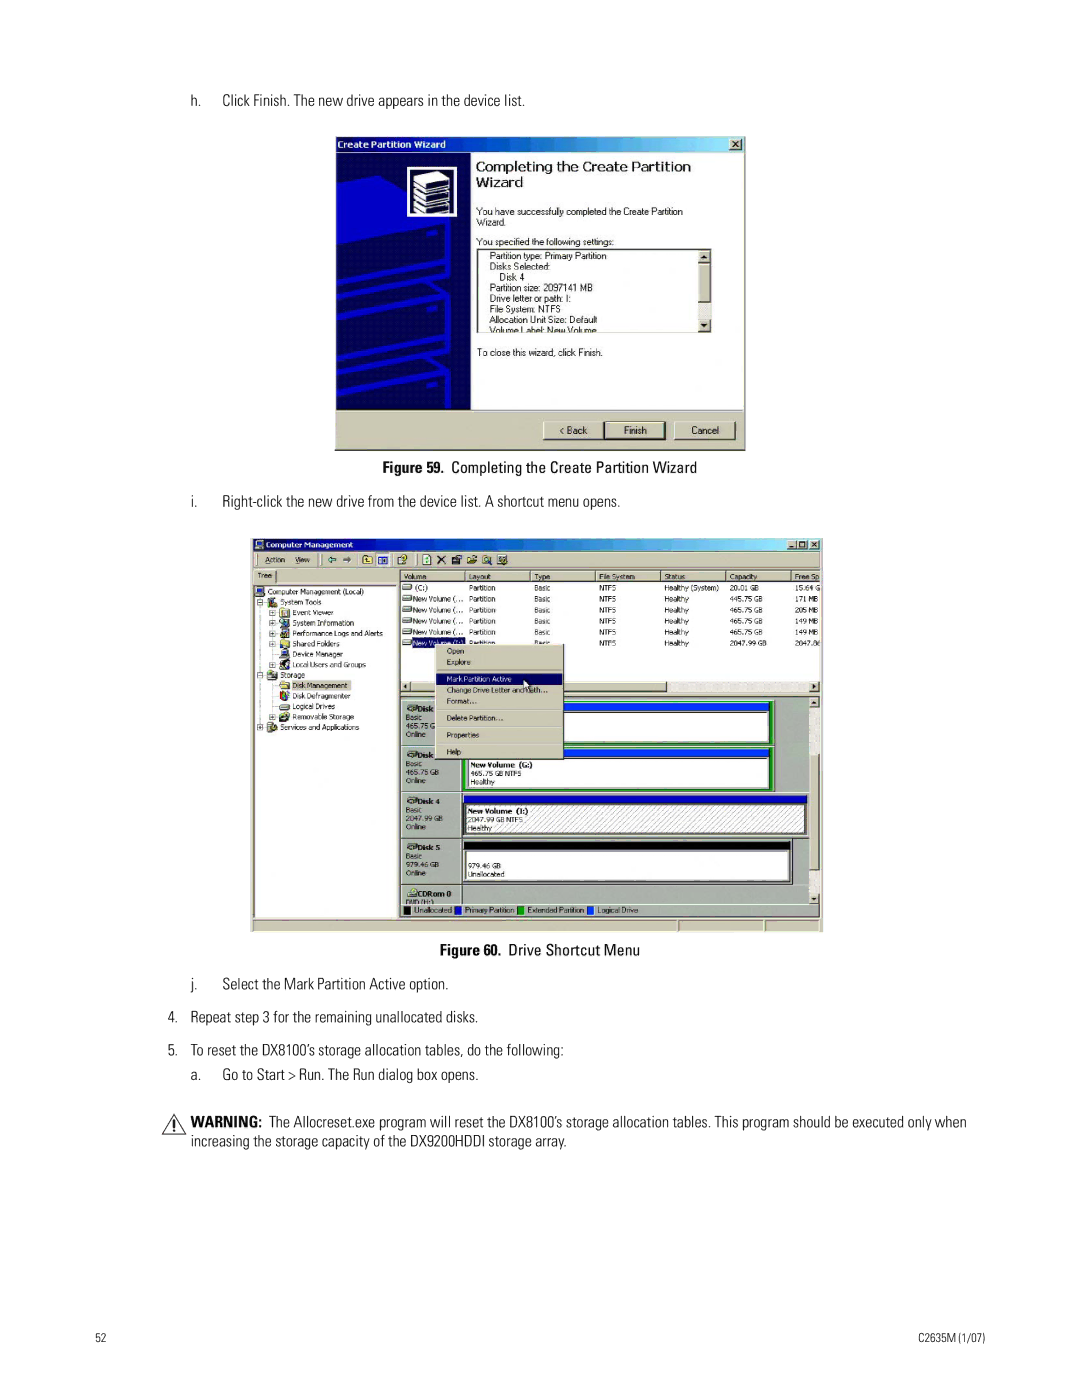
h.Click Finish. The new drive appears in the device list.
Figure 59. Completing the Create Partition Wizard
i.Right-click the new drive from the device list. A shortcut menu opens.
Figure 60. Drive Shortcut Menu
j.Select the Mark Partition Active option.
4.Repeat step 3 for the remaining unallocated disks.
5.To reset the DX8100’s storage allocation tables, do the following:
a.Go to Start > Run. The Run dialog box opens.
![]() WARNING: The Allocreset.exe program will reset the DX8100’s storage allocation tables. This program should be executed only when increasing the storage capacity of the DX9200HDDI storage array.
WARNING: The Allocreset.exe program will reset the DX8100’s storage allocation tables. This program should be executed only when increasing the storage capacity of the DX9200HDDI storage array.
52 | C2635M (1/07) |
