Setting Up the DX9200HDDI
This section describes how to install the hard drives in the DX9200HDDI and configure the DX9200HDDI to operate with the DX8100 DVR. After the DX9200HDDI is configured, the next step is to connect the DX9200HDDI to the DX8100 DVR, and finally, configure the DX8100 DVR’s Basic Input Output System (BIOS) to recognize the DX9200HDDI. For information about installing additional drives, refer to the documentation that accompanies the DX9200HDDI.
INSTALLING THE HARD DRIVES
To install the hard drives in the DX9200HDDI:
1.Do the following:
a.Remove the hard drive tray by lowering the panel that houses the LCD display.
b.Push down on the release latch to remove the tray from the DX9200HDDI.
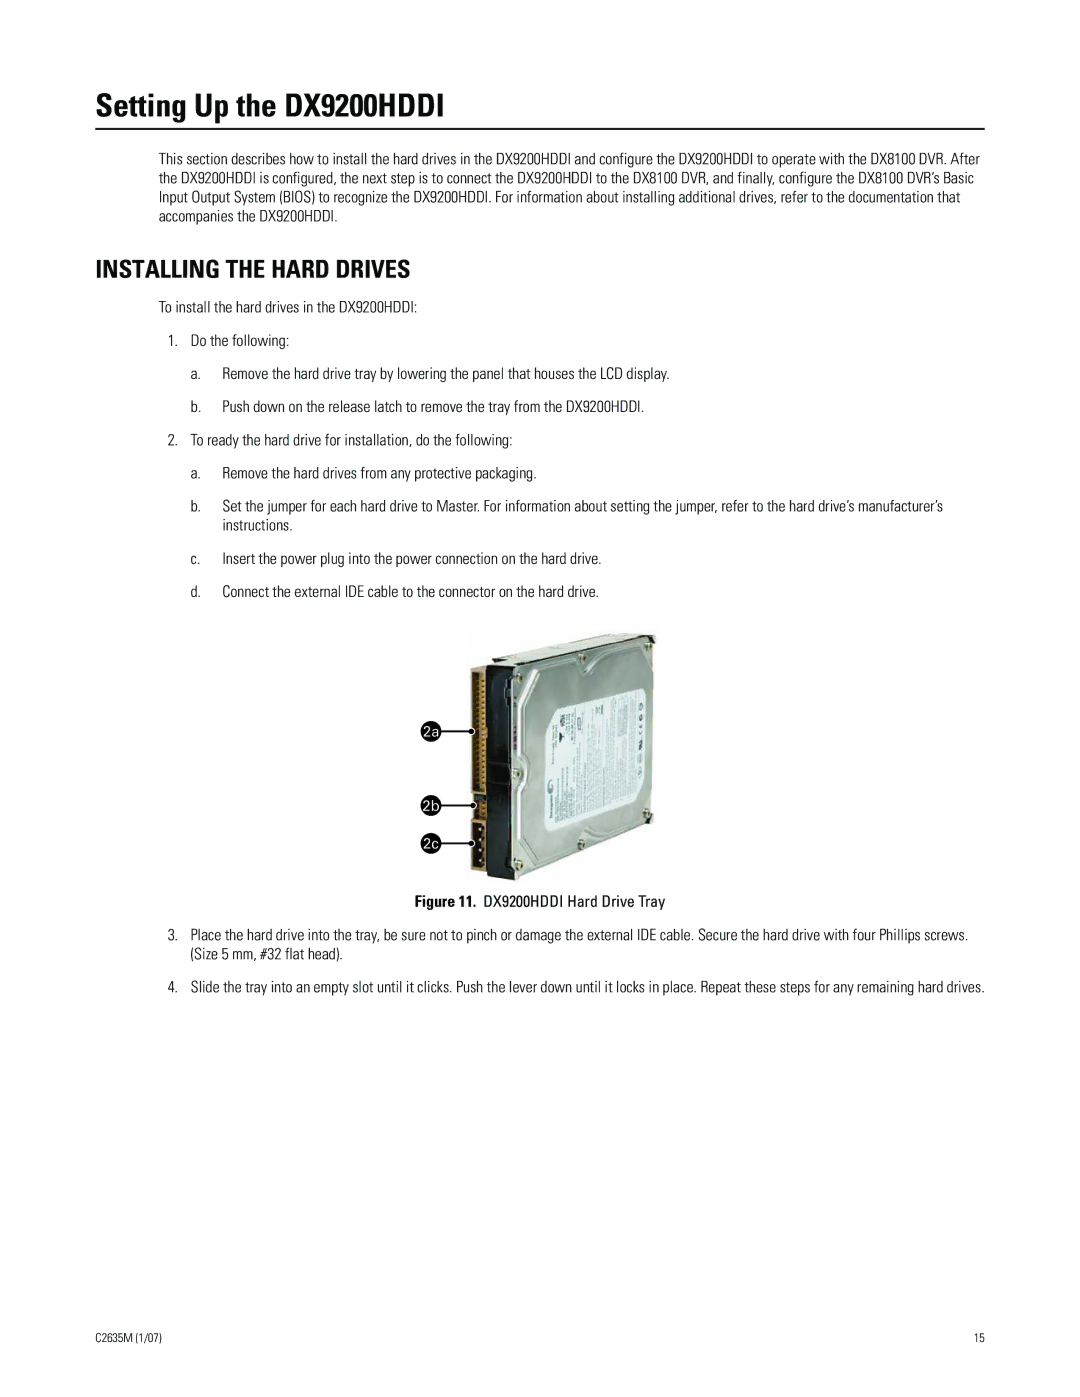
2.To ready the hard drive for installation, do the following:
a.Remove the hard drives from any protective packaging.
b.Set the jumper for each hard drive to Master. For information about setting the jumper, refer to the hard drive’s manufacturer’s instructions.
c.Insert the power plug into the power connection on the hard drive.
d.Connect the external IDE cable to the connector on the hard drive.
Figure 11. DX9200HDDI Hard Drive Tray
3.Place the hard drive into the tray, be sure not to pinch or damage the external IDE cable. Secure the hard drive with four Phillips screws. (Size 5 mm, #32 flat head).
4.Slide the tray into an empty slot until it clicks. Push the lever down until it locks in place. Repeat these steps for any remaining hard drives.
C2635M (1/07) | 15 |