Hookups (cont’d) 15
Connecting to Other Equipment (optional)
| EXT 3 |
|
| COMPONENT VIDEO | PROG |
|
| SCAN |
Y | Y | Y |
|
| L |
PB | PB | PB |
PR | PR | PR |
|
| R |
EXT 2 | EXT 1 |
VIDEO OUT RIGHT AUDIO OUT
LEFT AUDIO OUT
2
24
EXT 3
L
L
R
R
IN RC 6
1
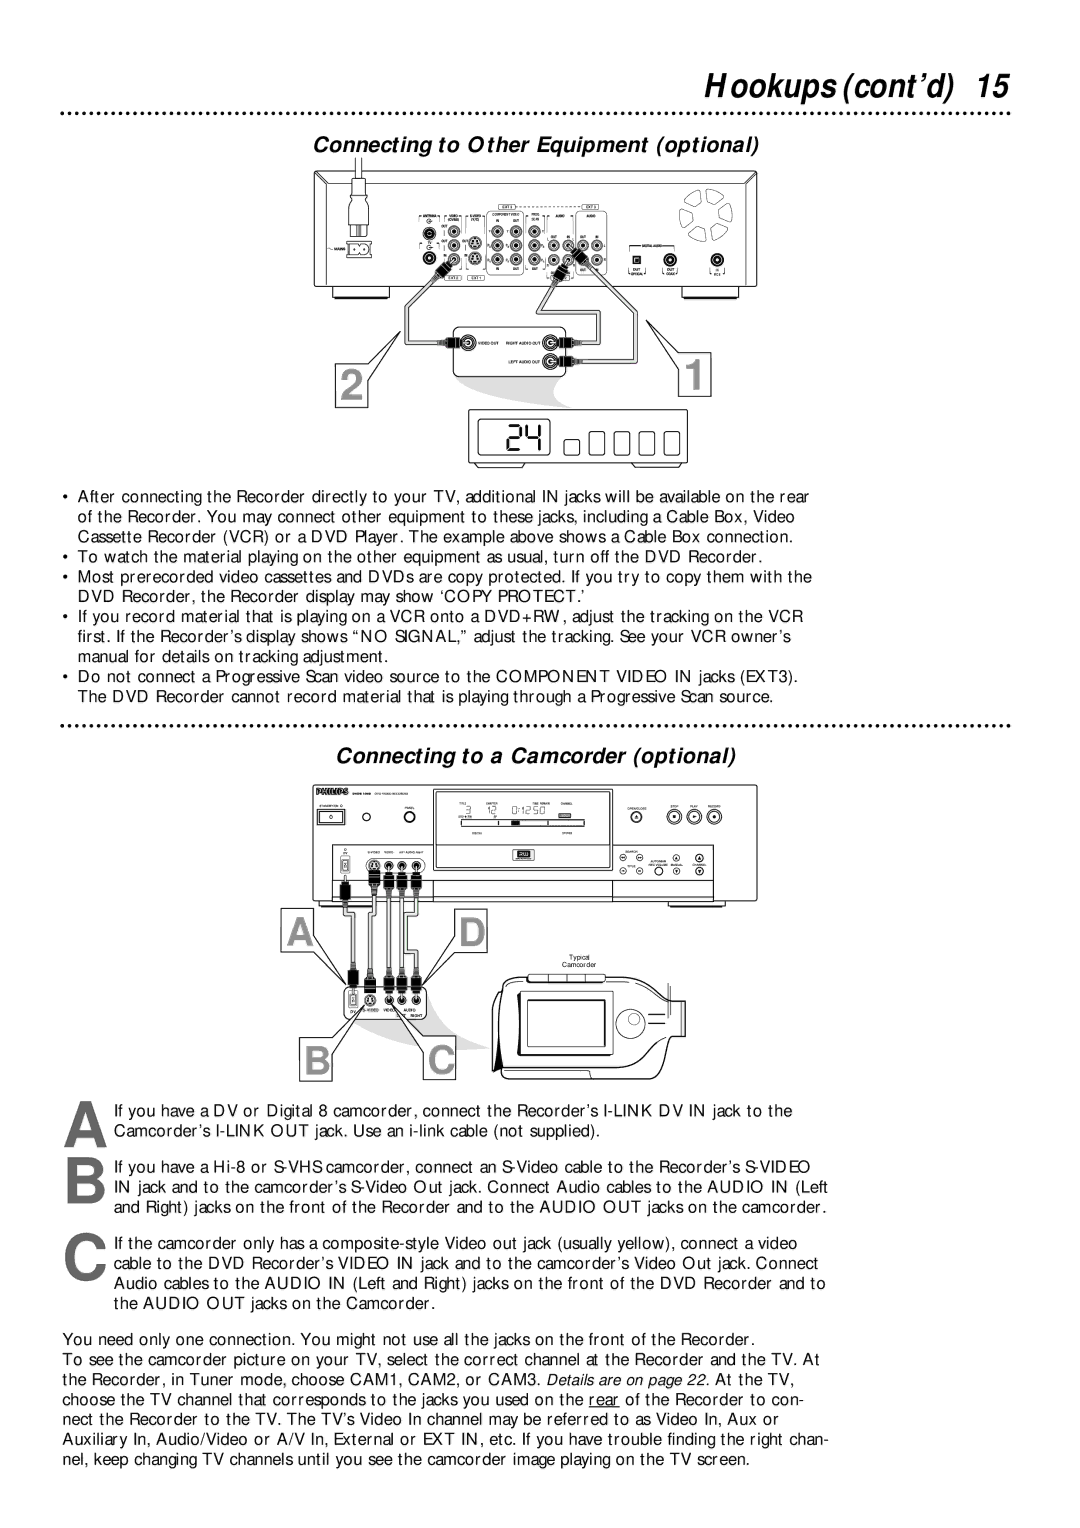
•After connecting the Recorder directly to your TV, additional IN jacks will be available on the rear of the Recorder. You may connect other equipment to these jacks, including a Cable Box, Video Cassette Recorder (VCR) or a DVD Player. The example above shows a Cable Box connection.
•To watch the material playing on the other equipment as usual, turn off the DVD Recorder.
•Most prerecorded video cassettes and DVDs are copy protected. If you try to copy them with the DVD Recorder, the Recorder display may show ‘COPY PROTECT.’
•If you record material that is playing on a VCR onto a DVD+RW, adjust the tracking on the VCR first. If the Recorder’s display shows “NO SIGNAL,” adjust the tracking. See your VCR owner’s manual for details on tracking adjustment.
•Do not connect a Progressive Scan video source to the COMPONENT VIDEO IN jacks (EXT3). The DVD Recorder cannot record material that is playing through a Progressive Scan source.
Connecting to a Camcorder (optional)
A
D
Typical
Camcorder
DV
RIGHT
B C
AIf you have a DV or Digital 8 camcorder, connect the Recorder’s
B
CIf the camcorder only has a
You need only one connection. You might not use all the jacks on the front of the Recorder.
To see the camcorder picture on your TV, select the correct channel at the Recorder and the TV. At the Recorder, in Tuner mode, choose CAM1, CAM2, or CAM3. Details are on page 22. At the TV, choose the TV channel that corresponds to the jacks you used on the rear of the Recorder to con- nect the Recorder to the TV. The TV’s Video In channel may be referred to as Video In, Aux or Auxiliary In, Audio/Video or A/V In, External or EXT IN, etc. If you have trouble finding the right chan- nel, keep changing TV channels until you see the camcorder image playing on the TV screen.