Chapter 1 Installation
Validator
(Rear View)
Validator
A
Hash 
Marks 
Lower
Bracket
Upper
Bracket
A
4 in. 6 in. 8 in. Printer
(Front View)
![]() Adjustment
Adjustment
Screw (2)
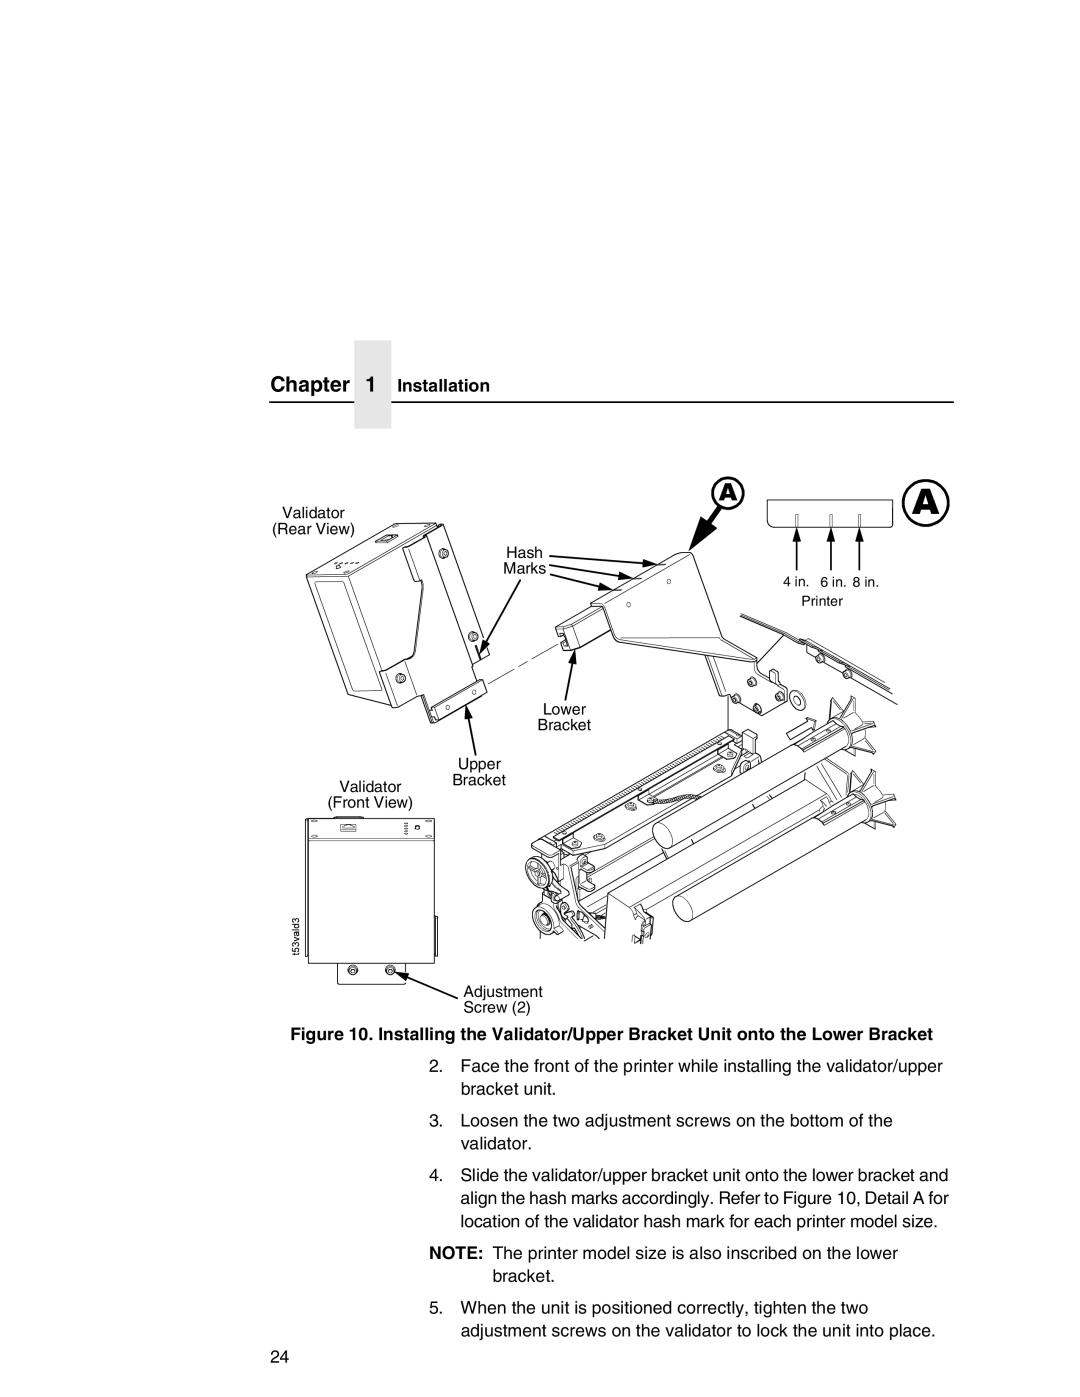
Figure 10. Installing the Validator/Upper Bracket Unit onto the Lower Bracket
2.Face the front of the printer while installing the validator/upper bracket unit.
3.Loosen the two adjustment screws on the bottom of the validator.
4.Slide the validator/upper bracket unit onto the lower bracket and align the hash marks accordingly. Refer to Figure 10, Detail A for location of the validator hash mark for each printer model size.
NOTE: The printer model size is also inscribed on the lower bracket.
5.When the unit is positioned correctly, tighten the two adjustment screws on the validator to lock the unit into place.
24