Starter Kit Instruction Manual | Maintenance | 38 | ||
8.2 | Replacement procedures |
|
|
|
8.2.1 Quantum Cascade Laser replace- |
|
| ||
| ment |
|
|
|
Before beginning |
|
|
| |
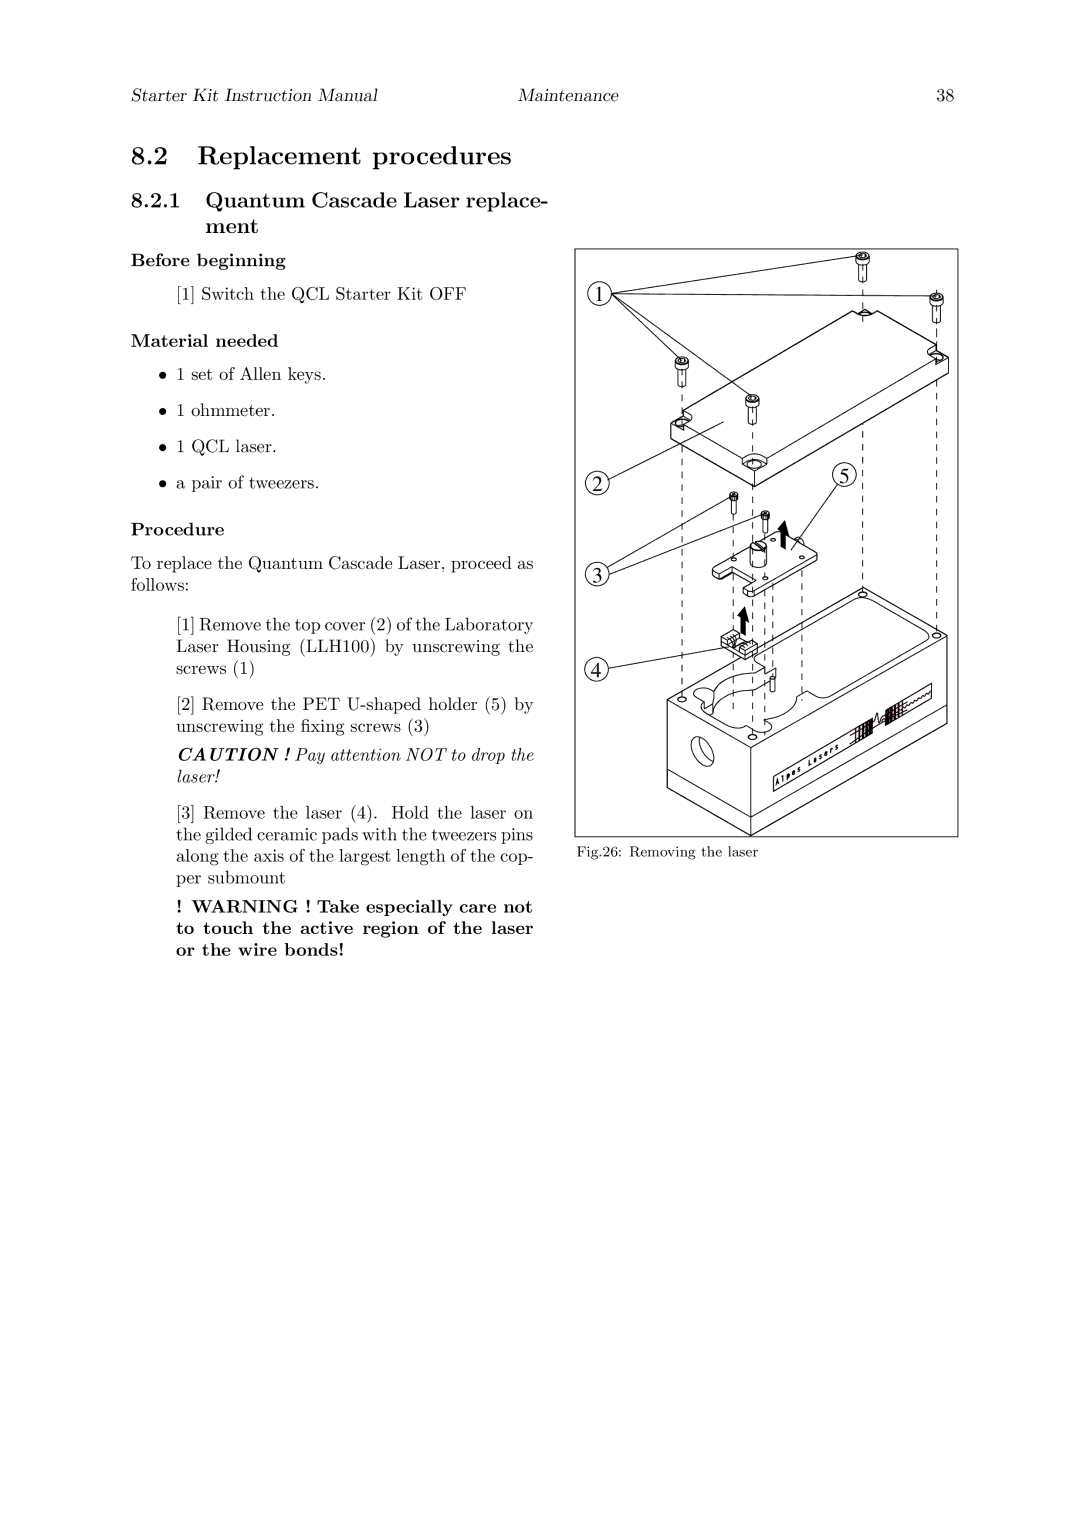
| [1] Switch the QCL Starter Kit OFF |
| 1 |
|
Material needed |
|
|
| |
• 1 set of Allen keys. |
|
|
| |
• 1 ohmmeter. |
|
|
| |
• 1 QCL laser. |
|
| 5 | |
• a pair of tweezers. |
| 2 | ||
|
| |||
Procedure |
|
|
| |
To replace the Quantum Cascade Laser, proceed as | 3 |
| ||
follows: |
|
| ||
|
|
| ||
| [1] Remove the top cover (2) of the Laboratory |
|
| |
| Laser Housing (LLH100) by unscrewing the |
|
| |
| screws (1) |
| 4 |
|
| [2] Remove the PET |
|
| |
| unscrewing the fixing screws (3) |
|
|
|
| CAUTION ! Pay attention NOT to drop the |
|
| |
| laser! |
|
|
|
| [3] Remove the laser (4). Hold the laser on |
|
| |
| the gilded ceramic pads with the tweezers pins |
|
| |
| along the axis of the largest length of the cop- | Fig.26: Removing the laser |
| |
| per submount |
|
|
|
!WARNING ! Take especially care not to touch the active region of the laser or the wire bonds!