Chapter 3  The Remote Control
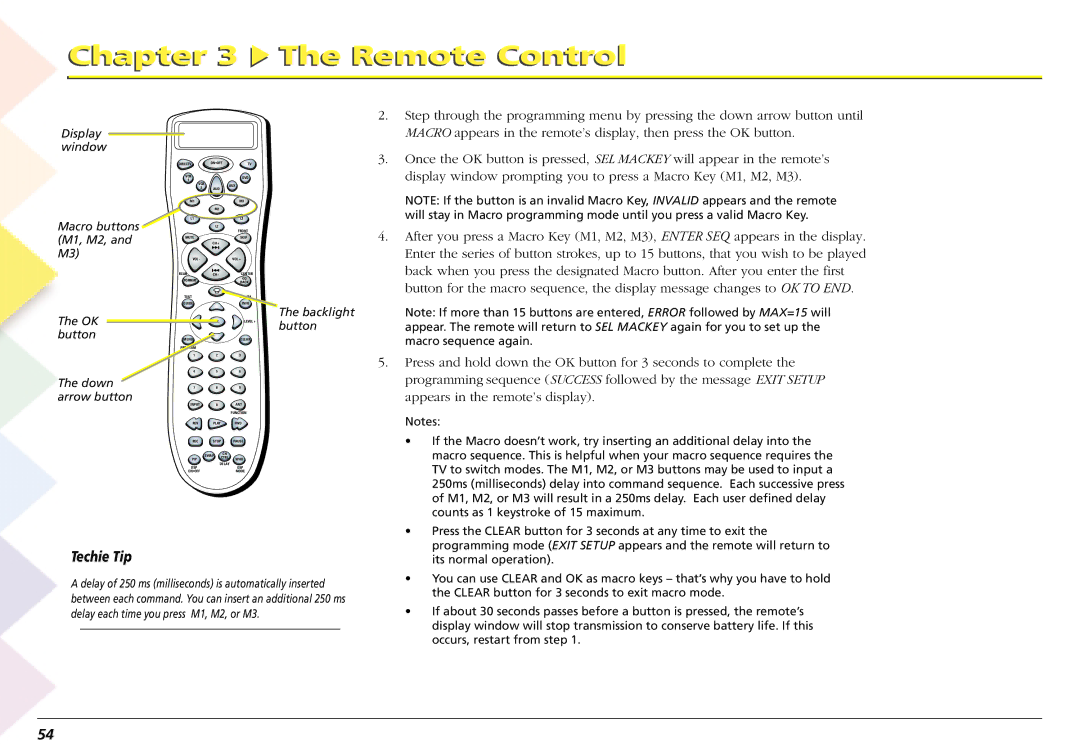
Display window
| DIRECTV | ON•OFF | TV |
| |
| VCR |
|
| DVD |
|
| 1 |
|
|
|
|
| VCR |
|
| AUX |
|
| 2 | AUD |
|
| |
|
|
|
| ||
| M1 |
|
| M3 |
|
|
| M2 |
|
|
|
Macro buttons | L1 |
|
| L3 |
|
| L2 |
| FRONT |
| |
(M1, M2, and | MUTE | CH + |
| SKIP |
|
M3) | VOL - |
|
| VOL + |
|
| REAR | CH - |
| CENTER |
|
| FORMAT |
|
| GO |
|
|
|
| BACK |
| |
|
|
|
|
| |
| TEST |
|
| AM•FM |
|
| GUIDE |
|
| INFO | The backlight |
The OK |
|
|
|
| |
LEVEL - | OK |
| LEVEL + | button | |
button |
|
|
|
| |
MENU |
|
| CLEAR |
| |
| PROGRAM |
|
|
|
|
| 1 | 2 |
| 3 |
|
| 4 | 5 |
| 6 |
|
The down | 7 | 8 |
| 9 |
|
arrow button | INPUT | 0 |
| ANT |
|
|
|
| |||
|
|
|
| FUNCTION |
|
| REV | PLAY |
| FWD |
|
| REC | STOP |
| PAUSE |
|
|
| SWAP | CH |
|
|
| PIP | CTRL | WHO |
| |
|
|
| |||
|
| DELAY |
| ||
| DSP |
|
| DSP |
|
| ON•OFF |
|
| MODE |
|
Techie Tip
A delay of 250 ms (milliseconds) is automatically inserted between each command. You can insert an additional 250 ms delay each time you press M1, M2, or M3.
2.Step through the programming menu by pressing the down arrow button until MACRO appears in the remote’s display, then press the OK button.
3.Once the OK button is pressed, SEL MACKEY will appear in the remote’s display window prompting you to press a Macro Key (M1, M2, M3).
NOTE: If the button is an invalid Macro Key, INVALID appears and the remote will stay in Macro programming mode until you press a valid Macro Key.
4.After you press a Macro Key (M1, M2, M3), ENTER SEQ appears in the display. Enter the series of button strokes, up to 15 buttons, that you wish to be played back when you press the designated Macro button. After you enter the first button for the macro sequence, the display message changes to OK TO END.
Note: If more than 15 buttons are entered, ERROR followed by MAX=15 will appear. The remote will return to SEL MACKEY again for you to set up the macro sequence again.
5.Press and hold down the OK button for 3 seconds to complete the programming sequence (SUCCESS followed by the message EXIT SETUP appears in the remote’s display).
Notes:
•If the Macro doesn’t work, try inserting an additional delay into the macro sequence. This is helpful when your macro sequence requires the TV to switch modes. The M1, M2, or M3 buttons may be used to input a 250ms (milliseconds) delay into command sequence. Each successive press of M1, M2, or M3 will result in a 250ms delay. Each user defined delay counts as 1 keystroke of 15 maximum.
•Press the CLEAR button for 3 seconds at any time to exit the programming mode (EXIT SETUP appears and the remote will return to its normal operation).
•You can use CLEAR and OK as macro keys – that’s why you have to hold the CLEAR button for 3 seconds to exit macro mode.
•If about 30 seconds passes before a button is pressed, the remote’s display window will stop transmission to conserve battery life. If this occurs, restart from step 1.
54