OSD (On Screen Display) Controls

Setting the screen size for S1/S2 video input

If the S-Video signal contains screen size information, the image will be automatically adjusted to fit the screen when this S1/S2 is set to AUTO.

This feature is available only when an S-Video signal is input via the VIDEO3 terminal. Example: Setting the “S1/S2” to “AUTO”

Perform the following operations.

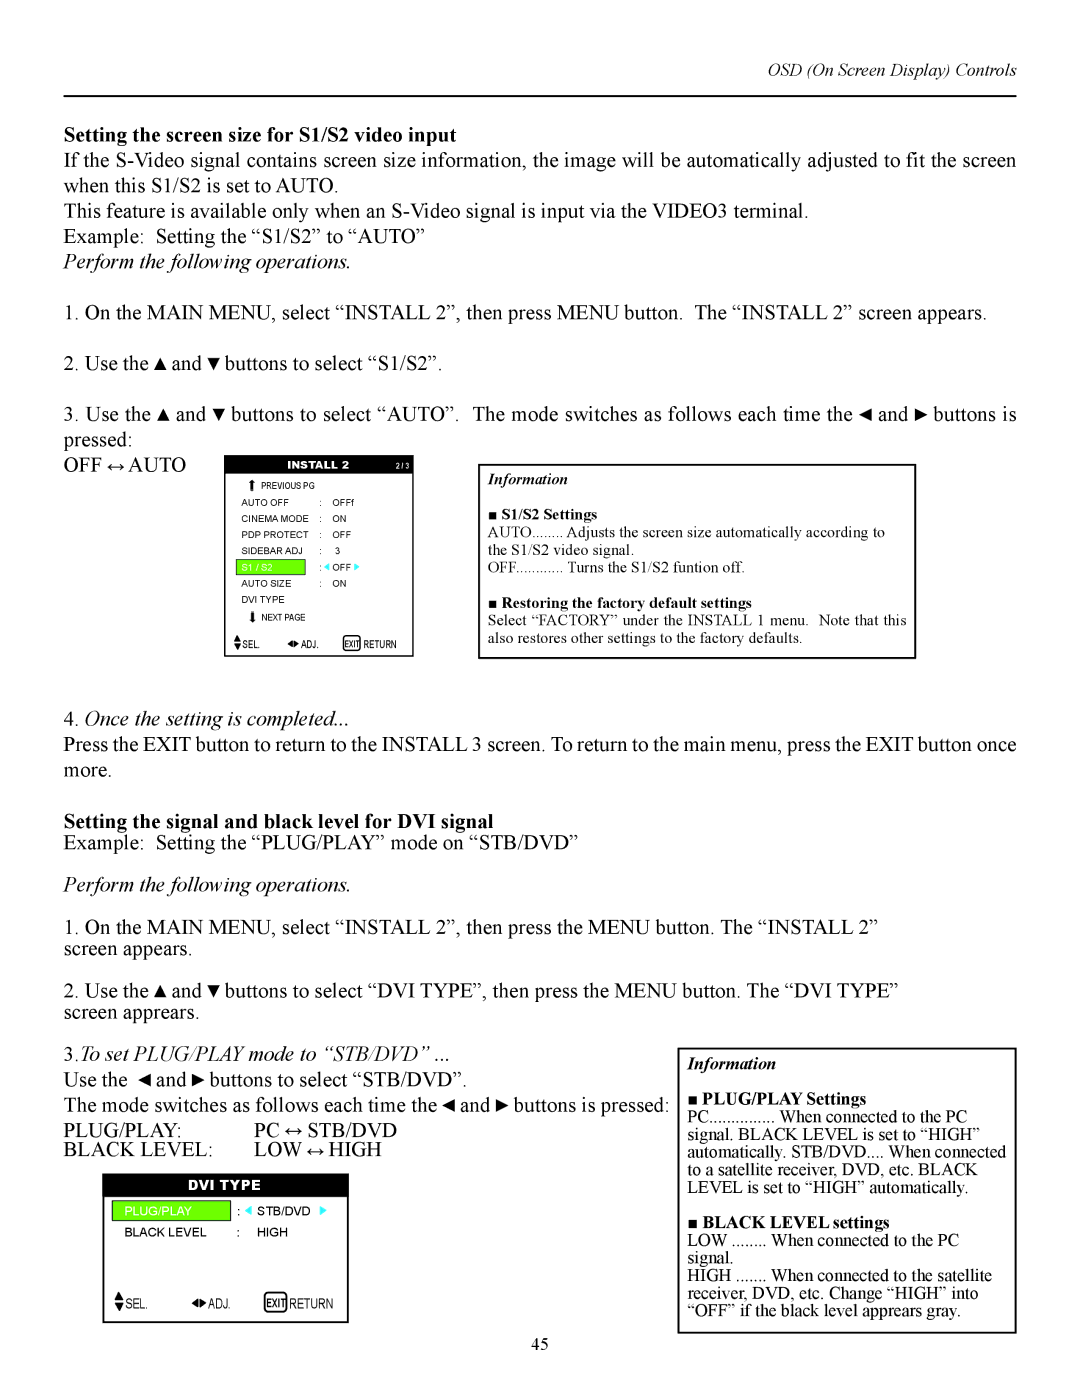
1.On the MAIN MENU, select “INSTALL 2”, then press MENU button. The “INSTALL 2” screen appears.

2.Use the and buttons to select “S1/S2”.

3.Use the and buttons to select “AUTO”. The mode switches as follows each time the and buttons is pressed:

OFF

AUTO


INSTALL 2

2 / 3


Information


PREVIOUS PG


AUTO OFF

:

OFFf


■ S1/S2 Settings


CINEMA MODE

:

ON


PDP PROTECT

:

OFF


AUTO........ Adjusts the screen size automatically according to


SIDEBAR ADJ

:

3


the S1/S2 video signal.


S1 / S2


:

OFF


OFF............ Turns the S1/S2 funtion off.


AUTO SIZE

:

ON


DVI TYPE


■ Restoring the factory default settings


NEXT PAGE


Select “FACTORY” under the INSTALL 1 menu. Note that this


SEL.

ADJ.


EXIT RETURN


also restores other settings to the factory defaults.


4.Once the setting is completed...

Press the EXIT button to return to the INSTALL 3 screen. To return to the main menu, press the EXIT button once more.

Setting the signal and black level for DVI signal

Example: Setting the “PLUG/PLAY” mode on “STB/DVD”

Perform the following operations.

1.On the MAIN MENU, select “INSTALL 2”, then press the MENU button. The “INSTALL 2” screen appears.

2.Use the and buttons to select “DVI TYPE”, then press the MENU button. The “DVI TYPE” screen apprears.

3.To set PLUG/PLAY mode to “STB/DVD” ...

Use the and buttons to select “STB/DVD”.

The mode switches as follows each time the and buttons is pressed:

PLUG/PLAY:


PC

STB/DVD

BLACK LEVEL:


LOW

HIGH


DVI TYPE


PLUG/PLAY


:

STB/DVD


BLACK LEVEL


:

HIGH


SEL.

ADJ.


EXIT RETURN


45

Information

■ PLUG/PLAY Settings

PC............... When connected to the PC

signal. BLACK LEVEL is set to “HIGH” automatically. STB/DVD.... When connected

to a satellite receiver, DVD, etc. BLACK LEVEL is set to “HIGH” automatically.

■ BLACK LEVEL settings

LOW ........ When connected to the PC

signal.

HIGH ....... When connected to the satellite

receiver, DVD, etc. Change “HIGH” into “OFF” if the black level apprears gray.

Page 47
Image 47
Runco CW-42i manual Setting the screen size for S1/S2 video input, Perform the following operations

CW-42i specifications

The Runco CW-42i is a standout model in the realm of high-definition displays, known for its impressive performance and sleek design. As part of Runco's commitment to offering high-quality visual experiences, the CW-42i integrates advanced technologies tailored for both home theater enthusiasts and design-conscious consumers.

At its core, the Runco CW-42i boasts a stunning 42-inch diagonal screen, providing an optimal viewing experience for various settings, from intimate living rooms to dedicated home theaters. The display utilizes plasma technology, known for its ability to deliver deep blacks and vibrant colors, resulting in a rich and immersive viewing experience. With a native resolution of 1080p, the CW-42i ensures that visuals are sharp and detailed, whether you're watching movies, playing video games, or enjoying television shows.

One of the key features of the Runco CW-42i is its exceptional color accuracy and calibration capabilities. The display incorporates Runco's proprietary color processing technology, enabling it to reproduce colors with remarkable fidelity. Additionally, the CW-42i comes equipped with advanced calibration tools, allowing users to fine-tune their viewing experience to perfection. This level of customization ensures that every image looks as the creators intended, regardless of the content being viewed.

The CW-42i also distinguishes itself with its aesthetic appeal. With a modern and minimalistic design, it seamlessly integrates into any interior décor. The display features a slim profile and can be wall-mounted or placed on a stand, providing flexibility in installations. The bezels are narrow, offering a more immersive viewing area, ensuring that the attention remains on the screen rather than the frame.

In terms of connectivity, the Runco CW-42i is well-equipped to handle a variety of devices. It includes multiple HDMI ports, component inputs, and other essential connections, making it easy to link with Blu-ray players, gaming consoles, and set-top boxes. This versatility is crucial for users looking to build a comprehensive entertainment system.

Lastly, the CW-42i incorporates advanced sound technology, providing a comprehensive audio experience that complements the stunning visuals. Whether paired with an external audio system or used standalone, the display’s sound quality enhances the overall cinematic experience.

In summary, the Runco CW-42i is an exceptional display that combines cutting-edge technologies, versatile connectivity options, and a stylish design. Whether for home entertainment or professional presentations, the CW-42i is engineered to impress with stunning visuals and superior performance.