ENGLISH
ESPAÑOL
PictBridgeTM
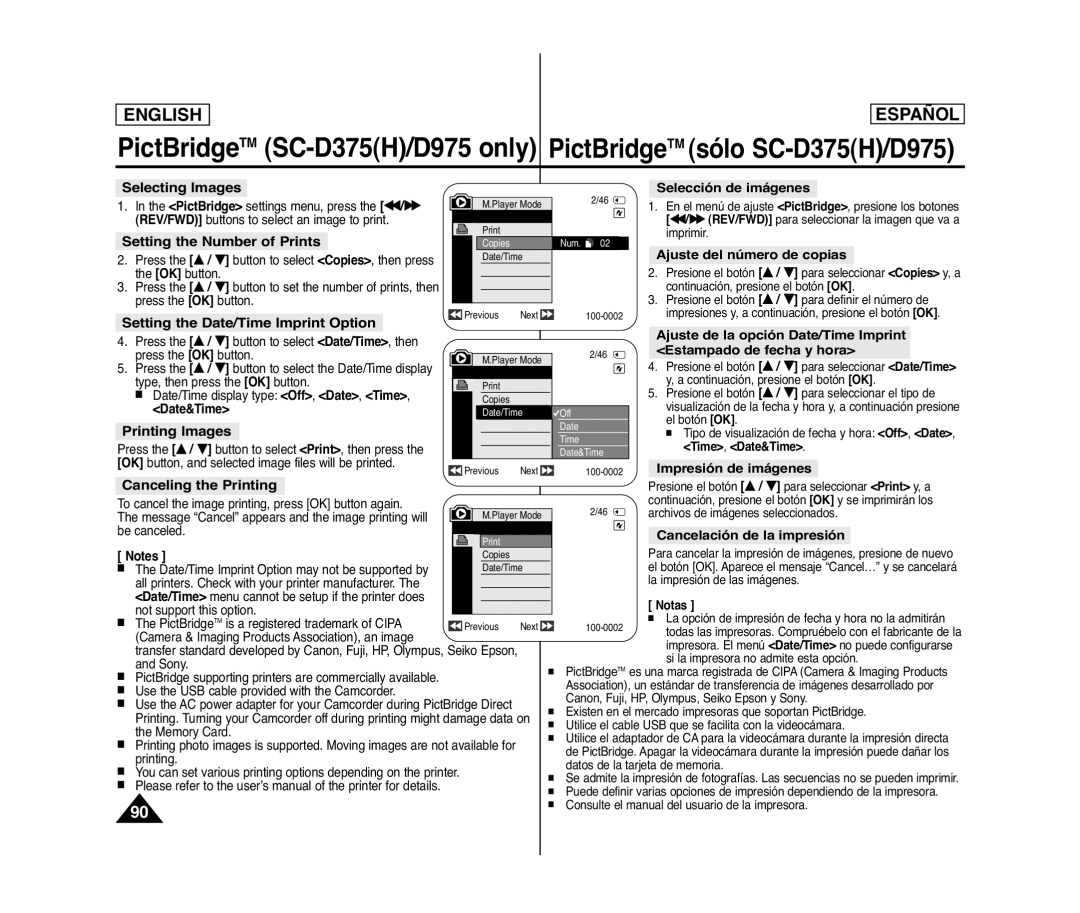
Selecting Images | Selección de imágenes |
1. In the <PictBridge> settings menu, press the [œœ/√√ | M.Player Mode |
| 2/46 | 1. En el menú de ajuste <PictBridge>, presione los botones | |
|
| ||||
(REV/FWD)] buttons to select an image to print. |
|
|
| [œœ/√√ (REV/FWD)] para seleccionar la imagen que va a | |
Setting the Number of Prints |
|
|
| imprimir. | |
Copies |
| Num. | 02 | Ajuste del número de copias | |
2. Press the [… / †] button to select <Copies>, then press | Date/Time |
|
| ||
|
|
|
| 2. Presione el botón [… / †] para seleccionar <Copies> y, a | |
the [OK] button. |
|
|
|
| |
3. Press the [… / †] button to set the number of prints, then |
|
|
|
| continuación, presione el botón [OK]. |
press the [OK] button. |
|
|
|
| 3. Presione el botón [… / †] para definir el número de |
Setting the Date/Time Imprint Option | Previous | Next |
| impresiones y, a continuación, presione el botón [OK]. | |
|
|
|
| Ajuste de la opción Date/Time Imprint | |
4. Press the [… / †] button to select <Date/Time>, then |
|
|
|
| |
|
|
|
| <Estampado de fecha y hora> | |
press the [OK] button. | M.Player Mode |
| 2/46 | ||
| 4. Presione el botón [… / †] para seleccionar <Date/Time> | ||||
5. Press the [… / †] button to select the Date/Time display |
|
| |||
|
|
|
| ||
type, then press the [OK] button. |
|
|
| y, a continuación, presione el botón [OK]. | |
■ Date/Time display type: <Off>, <Date>, <Time>, | Copies |
|
|
| 5. Presione el botón [… / †] para seleccionar el tipo de |
<Date&Time> | Date/Time | Off |
| visualización de la fecha y hora y, a continuación presione | |
Printing Images |
|
| Date |
| el botón [OK]. |
|
|
| ■ Tipo de visualización de fecha y hora: <Off>, <Date>, | ||
|
| Time |
| ||
Press the [… / †] button to select <Print>, then press the |
|
|
| <Time>, <Date&Time>. | |
|
| Date&Time | |||
[OK] button, and selected image files will be printed. | Previous | Next |
| Impresión de imágenes | |
|
| ||||
Canceling the Printing |
|
|
|
|
|
|
|
|
|
| Presione el botón [… / †] para seleccionar <Print> y, a | |||
To cancel the image printing, press [OK] button again. |
|
|
|
|
|
|
| continuación, presione el botón [OK] y se imprimirán los | ||||||
|
|
|
|
|
| 2/46 | archivos de imágenes seleccionados. | |||||||
The message “Cancel” appears and the image printing will |
|
|
| M.Player Mode |
| |||||||||
be canceled. |
|
|
|
|
|
|
|
|
| Cancelación de la impresión |
| |||
|
|
|
|
|
|
|
|
|
|
|
|
| ||
[ Notes ] |
|
|
| Copies |
|
|
|
| Para cancelar la impresión de imágenes, presione de nuevo | |||||
■ | The Date/Time Imprint Option may not be supported by |
|
|
| Date/Time |
|
| el botón [OK]. Aparece el mensaje “Cancel…” y se cancelará | ||||||
| all printers. Check with your printer manufacturer. The |
|
|
|
|
|
|
|
| la impresión de las imágenes. | ||||
| <Date/Time> menu cannot be setup if the printer does |
|
|
|
|
|
|
|
| [ Notas ] | ||||
| not support this option. |
|
|
|
|
|
|
|
| |||||
■ | TM |
|
| Previous | Next |
|
| ■ La opción de impresión de fecha y hora no la admitirán | ||||||
| The PictBridge is a registered trademark of CIPA |
|
|
|
|
| todas las impresoras. Compruébelo con el fabricante de la | |||||||
| (Camera & Imaging Products Association), an image |
|
|
|
|
|
|
|
| |||||
|
|
|
|
|
|
|
|
| impresora. El menú <Date/Time> no puede configurarse | |||||
| transfer standard developed by Canon, Fuji, HP, Olympus, Seiko Epson, |
|
|
|
|
| ||||||||
|
|
|
|
|
| si la impresora no admite esta opción. | ||||||||
| and Sony. |
|
|
|
|
|
|
|
| |||||
■ |
|
|
|
|
| ■ | PictBridgeTM es una marca registrada de CIPA (Camera & Imaging Products | |||||||
PictBridge supporting printers are commercially available. |
|
|
|
|
|
| Association), un estándar de transferencia de imágenes desarrollado por | |||||||
■ | Use the USB cable provided with the Camcorder. |
|
|
|
|
|
| |||||||
|
|
|
|
|
| Canon, Fuji, HP, Olympus, Seiko Epson y Sony. | ||||||||
■ | Use the AC power adapter for your Camcorder during PictBridge Direct |
|
|
| ||||||||||
|
| ■ | Existen en el mercado impresoras que soportan PictBridge. | |||||||||||
| Printing. Turning your Camcorder off during printing might damage data on | |||||||||||||
| ■ | Utilice el cable USB que se facilita con la videocámara. | ||||||||||||
| the Memory Card. |
|
|
|
|
| ||||||||
|
|
|
|
|
| ■ | Utilice el adaptador de CA para la videocámara durante la impresión directa | |||||||
■ | Printing photo images is supported. Moving images are not available for |
|
| |||||||||||
|
|
| de PictBridge. Apagar la videocámara durante la impresión puede dañar los | |||||||||||
| printing. |
|
|
|
|
|
| |||||||
|
|
|
|
|
|
| datos de la tarjeta de memoria. | |||||||
■ | You can set various printing options depending on the printer. |
|
|
|
|
|
| |||||||
|
|
|
|
| ■ | Se admite la impresión de fotografías. Las secuencias no se pueden imprimir. | ||||||||
■ | Please refer to the user’s manual of the printer for details. |
|
|
|
|
| ||||||||
|
|
|
|
| ■ | Puede definir varias opciones de impresión dependiendo de la impresora. | ||||||||
| 90 |
|
|
|
|
|
|
|
| ■ | Consulte el manual del usuario de la impresora. | |||
|
|
|
|
|
|
|
|
|
|
|
|
|
| |