ENGLISH
ESPAÑOL
Advanced Recording | Grabación avanzada |
● CLOCK SET | ● AJUSTE DEL RELOJ |
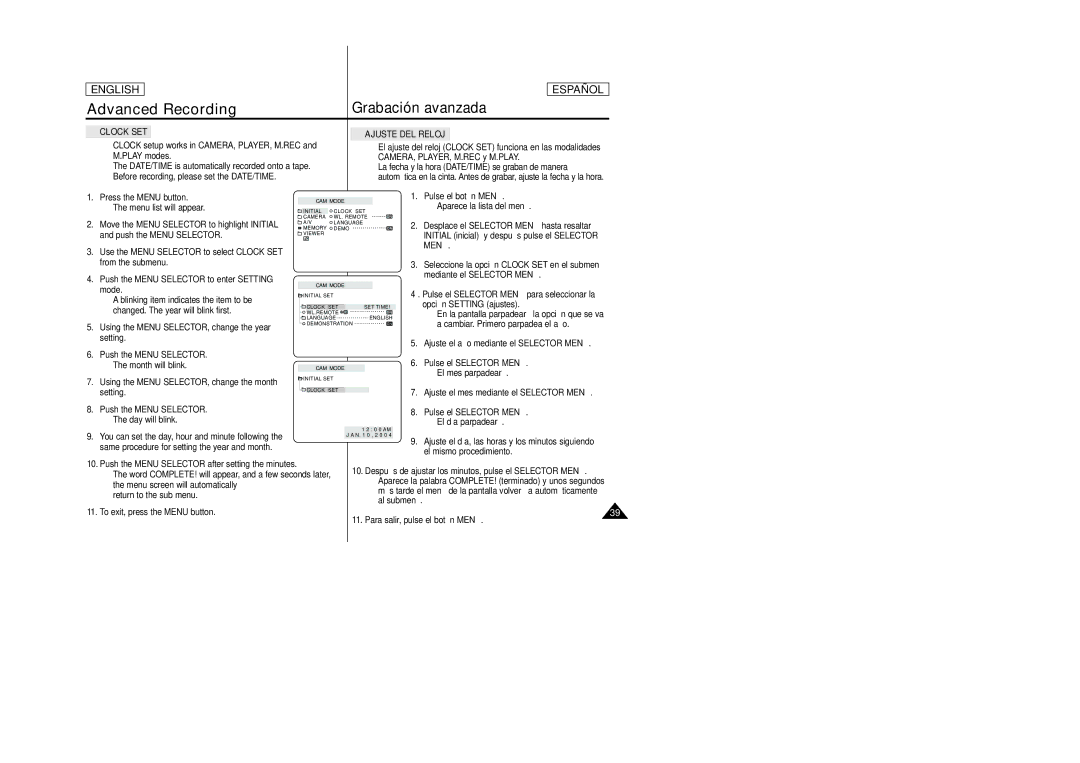
✤CLOCK setup works in CAMERA, PLAYER, M.REC and M.PLAY modes.
✤The DATE/TIME is automatically recorded onto a tape. Before recording, please set the DATE/TIME.
✤El ajuste del reloj (CLOCK SET) funciona en las modalidades CAMERA, PLAYER, M.REC y M.PLAY.
✤La fecha y la hora (DATE/TIME) se graban de manera
automática en la cinta. Antes de grabar, ajuste la fecha y la hora.
1.Press the MENU button.
■The menu list will appear.
2.Move the MENU SELECTOR to highlight INITIAL and push the MENU SELECTOR.
3.Use the MENU SELECTOR to select CLOCK SET from the submenu.
4.Push the MENU SELECTOR to enter SETTING mode.
■A blinking item indicates the item to be changed. The year will blink first.
5.Using the MENU SELECTOR, change the year setting.
6.Push the MENU SELECTOR.
■The month will blink.
7.Using the MENU SELECTOR, change the month setting.
8.Push the MENU SELECTOR.
■The day will blink.
CAM MODE
INITIAL | CLOCK SET |
CAMERA | WL. REMOTE |
A/V | LANGUAGE |
MEMORY | DEMO |
VIEWER |
|
CAM MODE
INITIAL SET |
|
CLOCK SET | SET TIME! |
WL.REMOTE |
|
LANGUAGE | ENGLISH |
DEMONSTRATION |
|
CAM MODE
![]() INITIAL SET
INITIAL SET
![]() CLOCK SET
CLOCK SET
1.Pulse el botón MENÚ.
■ Aparece la lista del menú.
2.Desplace el SELECTOR MENÚ hasta resaltar INITIAL (inicial) y después pulse el SELECTOR MENÚ.
3.Seleccione la opción CLOCK SET en el submenú mediante el SELECTOR MENÚ.
4 . Pulse el SELECTOR MENÚ para seleccionar la opción SETTING (ajustes).
■En la pantalla parpadeará la opción que se va a cambiar. Primero parpadea el año.
5.Ajuste el año mediante el SELECTOR MENÚ.
6.Pulse el SELECTOR MENÚ.
■El mes parpadeará.
7.Ajuste el mes mediante el SELECTOR MENÚ.
8.Pulse el SELECTOR MENÚ.
■El día parpadeará.
9.You can set the day, hour and minute following the same procedure for setting the year and month.
10.Push the MENU SELECTOR after setting the minutes.
■The word COMPLETE! will appear, and a few seconds later, the menu screen will automatically
return to the sub menu.
1 2 : 0 0 AM J A N. 1 0 , 2 0 0 4
9.Ajuste el día, las horas y los minutos siguiendo el mismo procedimiento.
10.Después de ajustar los minutos, pulse el SELECTOR MENÚ.
■Aparece la palabra COMPLETE! (terminado) y unos segundos más tarde el menú de la pantalla volverá a automáticamente al submenú.
11. To exit, press the MENU button.
39
11. Para salir, pulse el botón MENÚ.
