Chapter 2: Setting up and connecting
Connection option D:
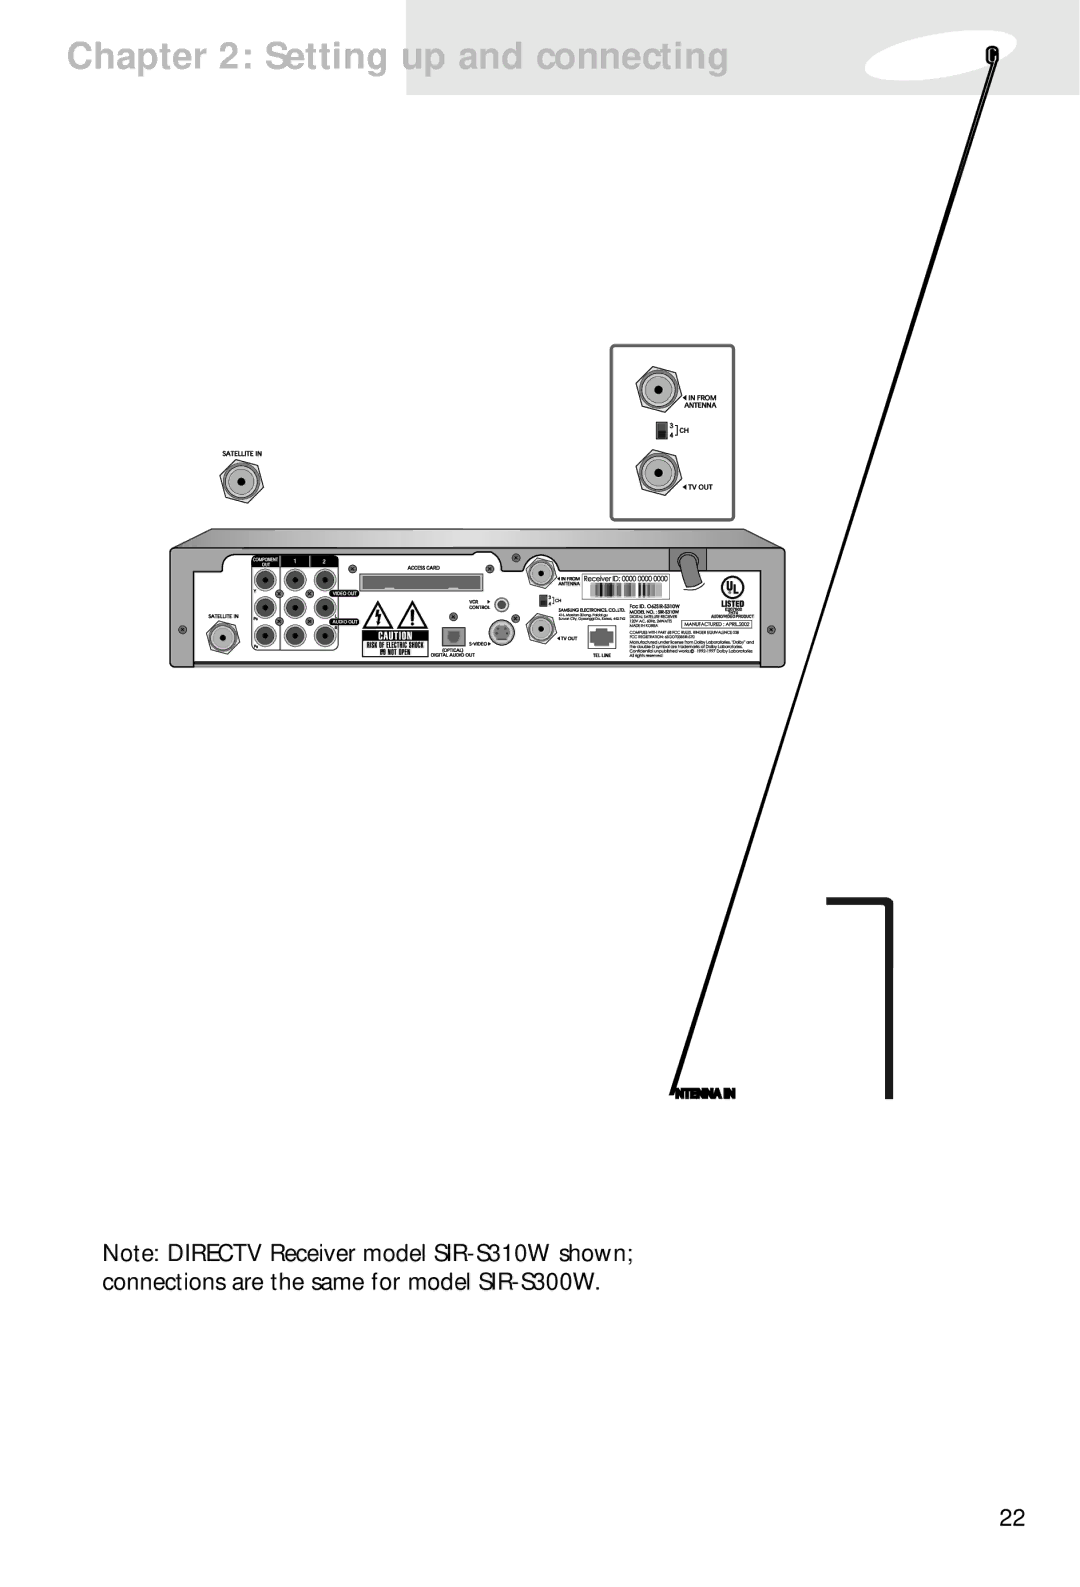
DIRECTV Receiver to TV and VCR with A/V cables
If connection option D best matches your needs, follow these steps:
1Make sure your TV, VCR, and DIRECTV Receiver are turned off and unplugged.
2Connect the
3Connect the coaxial cable running from your cable TV system or
4Connect the supplied phone cord to a telephone wall jack and to the TEL LINE jack on the back of the DIRECTV Receiver.
5Matching like colors, connect the supplied A/V cables to the AUDIO OUT and VIDEO OUT jacks on the back of the DIRECTV Receiver.
6Connect the other ends of these A/V cables to the audio and video input jacks on your VCR. Be sure to connect the A/V jacks on the DIRECTV Receiver to corresponding inputs on your VCR (video out to video in, left audio out to left audio in, right audio out to right audio in).
7Matching like colors, connect another set of A/V cables (not included) to the other set of audio and video output jacks on the back of the DIRECTV Receiver. Connect the other ends of these cables to the audio and video input jacks on your TV. Be sure to connect the outputs on the DIRECTV Receiver to corresponding inputs on your TV.
8(Optional) if your TV and VCR both have
9(Optional, model
10Plug in the power cords for your TV, VCR, and DIRECTV Receiver.
To watch DIRECTV® programming
Set your TV to the appropriate input mode. (This is a setting on your TV usually controlled by a Video, Input, or Mode button. See your TV manual for help.) Also make sure your VCR is turned on.
Next Step
Now turn to page 29 to start using your DIRECTV Receiver.
23