Chapter 3: Setting up and connecting
Using Auto Detection to set the dish type
To function properly, your DIRECTV®
Before you can use Auto Detection to set the
1Press the MENU button on your remote control.
2Highlight the SETUP menu item, then press the OK button.
3Highlight the Installation menu item, then press the OK button.
4Highlight the Set Dish menu item, then press the OK button.
5Highlight the Auto Detection menu item, then press the OK button.
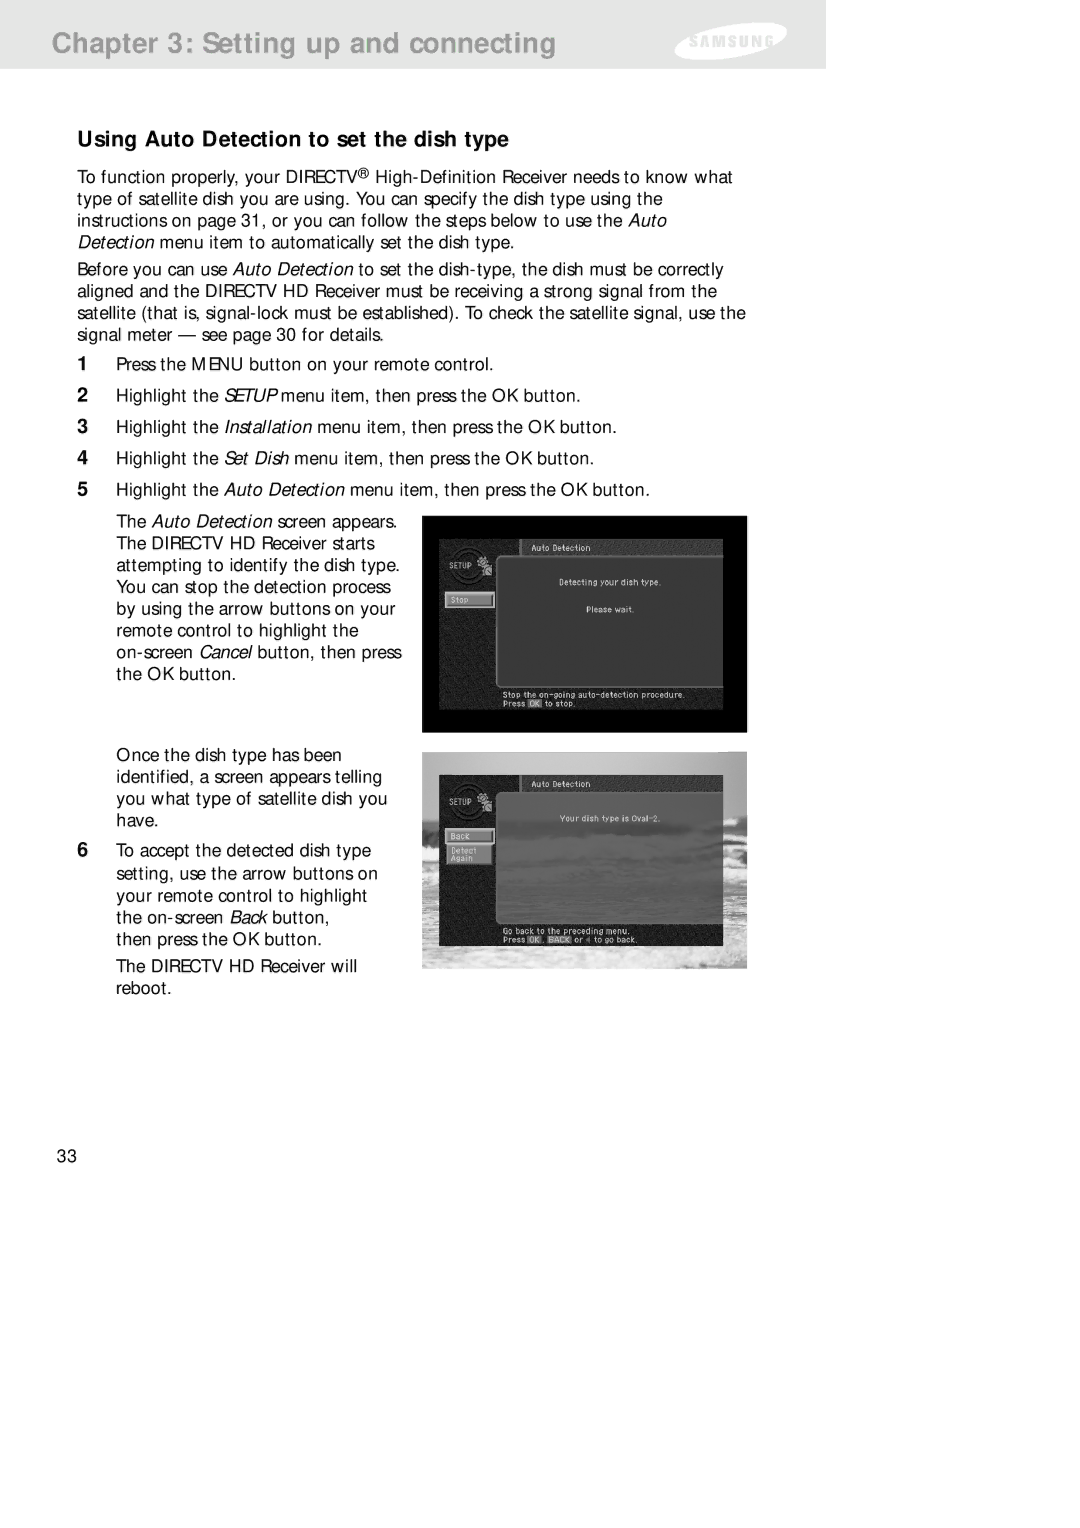
The Auto Detection screen appears. The DIRECTV HD Receiver starts attempting to identify the dish type. You can stop the detection process by using the arrow buttons on your remote control to highlight the
Once the dish type has been identified, a screen appears telling you what type of satellite dish you have.
6To accept the detected dish type setting, use the arrow buttons on your remote control to highlight the
The DIRECTV HD Receiver will reboot.
33