MODELS ICB424 AND ICB424FS INSTALLATION
H I N G E ADJUSTMENT
MODELS
ICB424
IMPORTANT NOTE: Install screws in all the mounting holes in the door frame. The nature of the door panel with a narrow outer rim and no connecting center member requires the support provided by the glass door.
After the door panel installation is complete, apply the cover patches or plugs provided over the holes on the inside surface of the door.
The cover patches or plugs are part of the insulation system on the door of the Wine Storage unit. Be sure to cover all the holes in the door that were used.
OVERLAY SOLID DOOR – MODEL ICB424
IMPORTANT NOTE: The solid door panel for the Model ICB424 must be a minimum of 16 mm thick and cannot exceed 9 kg.
Installation of the solid door panel is the same as the door panel for a glass door model.
A solid panel must not be installed on a glass door unit, as this may cause moisture to form behind the panel.
IMPORTANT NOTE: The Wine Storage unit must be installed and leveled before door hinge adjustments can be made.
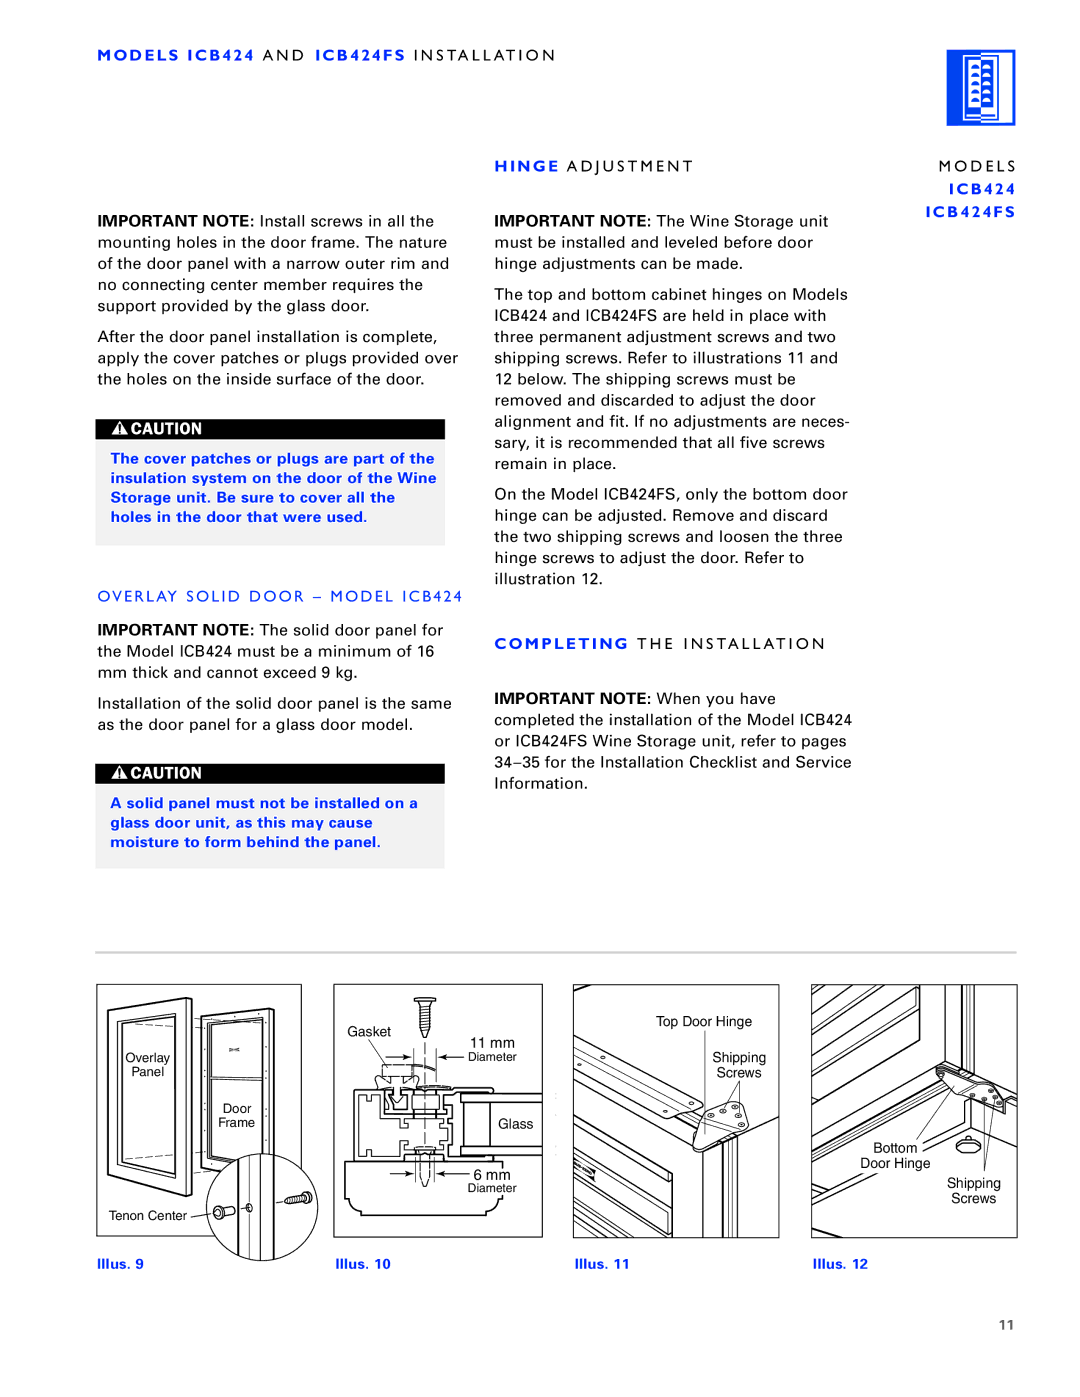
The top and bottom cabinet hinges on Models ICB424 and ICB424FS are held in place with three permanent adjustment screws and two shipping screws. Refer to illustrations 11 and 12 below. The shipping screws must be removed and discarded to adjust the door alignment and fit. If no adjustments are neces- sary, it is recommended that all five screws remain in place.
On the Model ICB424FS, only the bottom door hinge can be adjusted. Remove and discard the two shipping screws and loosen the three hinge screws to adjust the door. Refer to illustration 12.
COMPLETING THE INSTALLATION
IMPORTANT NOTE: When you have completed the installation of the Model ICB424 or ICB424FS Wine Storage unit, refer to pages
ICB424FS
Overlay |
Panel |
Door |
Frame |
Tenon Center |
Gasket |
11 mm |
Diameter |
Glass |
6 mm |
Diameter |
Top Door Hinge
Shipping
Screws
Bottom
Door Hinge
Shipping
Screws
Illus. 9
Illus. 10 | Illus. 11 | Illus. 12 |
11