MODELS ICB427 AND ICB427R INSTALLATION
MODELS
ICB427
STAINLESS STEEL DOOR PANEL | OVERLAY GLASS DOOR PANEL |
ICB427R
PANEL
DESIGN
Additional panel design information can be found in the
Before installing the stainless steel door panel, check the panel carefully. Options are available for kickplate/grille height, overall height, door swing and door lock.
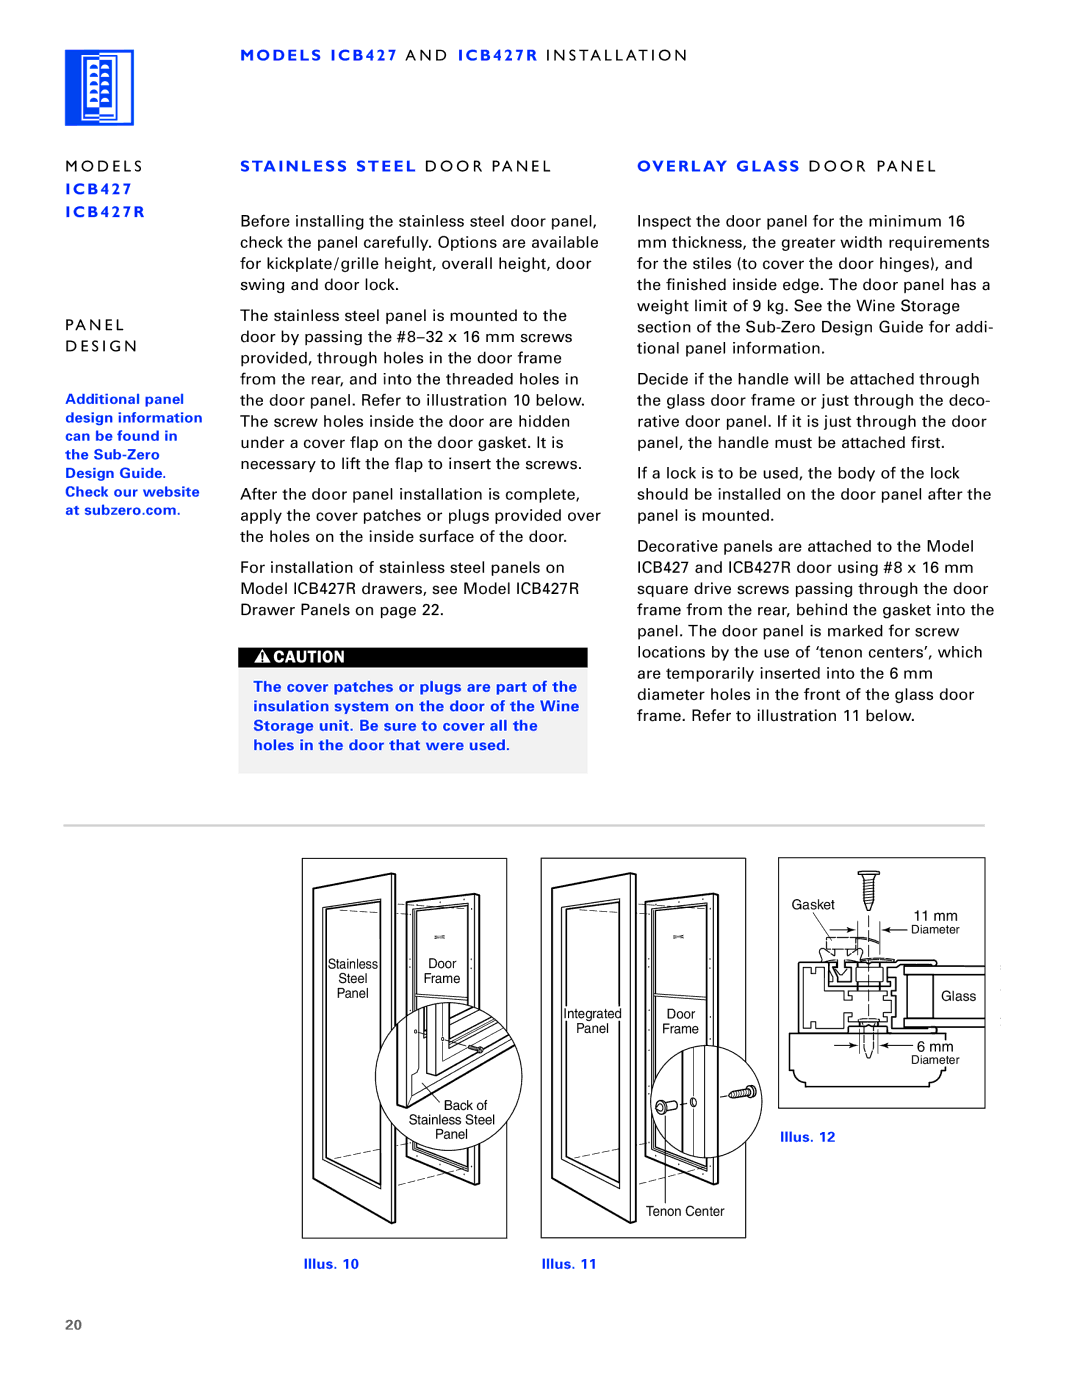
The stainless steel panel is mounted to the door by passing the
After the door panel installation is complete, apply the cover patches or plugs provided over the holes on the inside surface of the door.
For installation of stainless steel panels on Model ICB427R drawers, see Model ICB427R Drawer Panels on page 22.
The cover patches or plugs are part of the insulation system on the door of the Wine Storage unit. Be sure to cover all the holes in the door that were used.
Inspect the door panel for the minimum 16
mmthickness, the greater width requirements for the stiles (to cover the door hinges), and the finished inside edge. The door panel has a weight limit of 9 kg. See the Wine Storage section of the
Decide if the handle will be attached through the glass door frame or just through the deco- rative door panel. If it is just through the door panel, the handle must be attached first.
If a lock is to be used, the body of the lock should be installed on the door panel after the panel is mounted.
Decorative panels are attached to the Model ICB427 and ICB427R door using #8 x 16 mm square drive screws passing through the door frame from the rear, behind the gasket into the panel. The door panel is marked for screw locations by the use of ‘tenon centers’, which are temporarily inserted into the 6 mm diameter holes in the front of the glass door frame. Refer to illustration 11 below.
Stainless | Door |
Steel | Frame |
Panel |
|
| Back of |
| Stainless Steel |
| Panel |
Illus. 10
Integrated | Door |
Panel | Frame |
| Tenon Center |
Illus. 11
Gasket |
11 mm |
Diameter |
Glass |
6 mm |
Diameter |
Illus. 12
20
