![]()
![]()
![]() X6QT8/X6QTE+ User's Manual
X6QT8/X6QTE+ User's Manual
2-3 Installing DIMMs
CAUTION Exercise extreme care when installing or removing
!DIMM modules to prevent any possible damage. Also note that
the memory is interleaved to improve performance.
DIMM Installation (See Figure 2-2)
1.Insert the desired number of DIMMs into the memory slots, starting with the fi rst DIMM of the fi rst bank. Each UXMB chip is independent from each other, so memory modules can be installed on the fi rst bank of a UXMB Controller. For best memory performance, 8 memory modules minimal are required
| DIMM Memory |
| |||
| Bank 1 | Bank 2 | |||
UXMB1 | A1 | B1 | A2 |
| B2 |
UXMB2 | A3 | B3 | A4 |
| B4 |
UXMB3 | A5 | B5 | A6 |
| B6 |
UXMB4 | A7 | B7 | A8 |
| B8 |
2.To optimize memory performance, install DIMM modules in the following slots fi rst: DIMMs A1& B1, DIMMs A3 & B3, DIMMs A5 & B5, DIMMs A7 & B7.
3.Insert each DIMM module vertically into its slot. Pay attention to the notch along the bottom of the module to prevent inserting the DIMM module incorrectly.
4.Gently press down on the DIMM module until it snaps into place in the slot. Repeat for all modules.
Memory Support
The X6QT8/X6QTE+ supports up to 64 GB of Reg. ECC DDR2 533/400 (PC3200) memory. (Note: Due to OS limitations, some operating systems may not support more than 4GB of memory.)
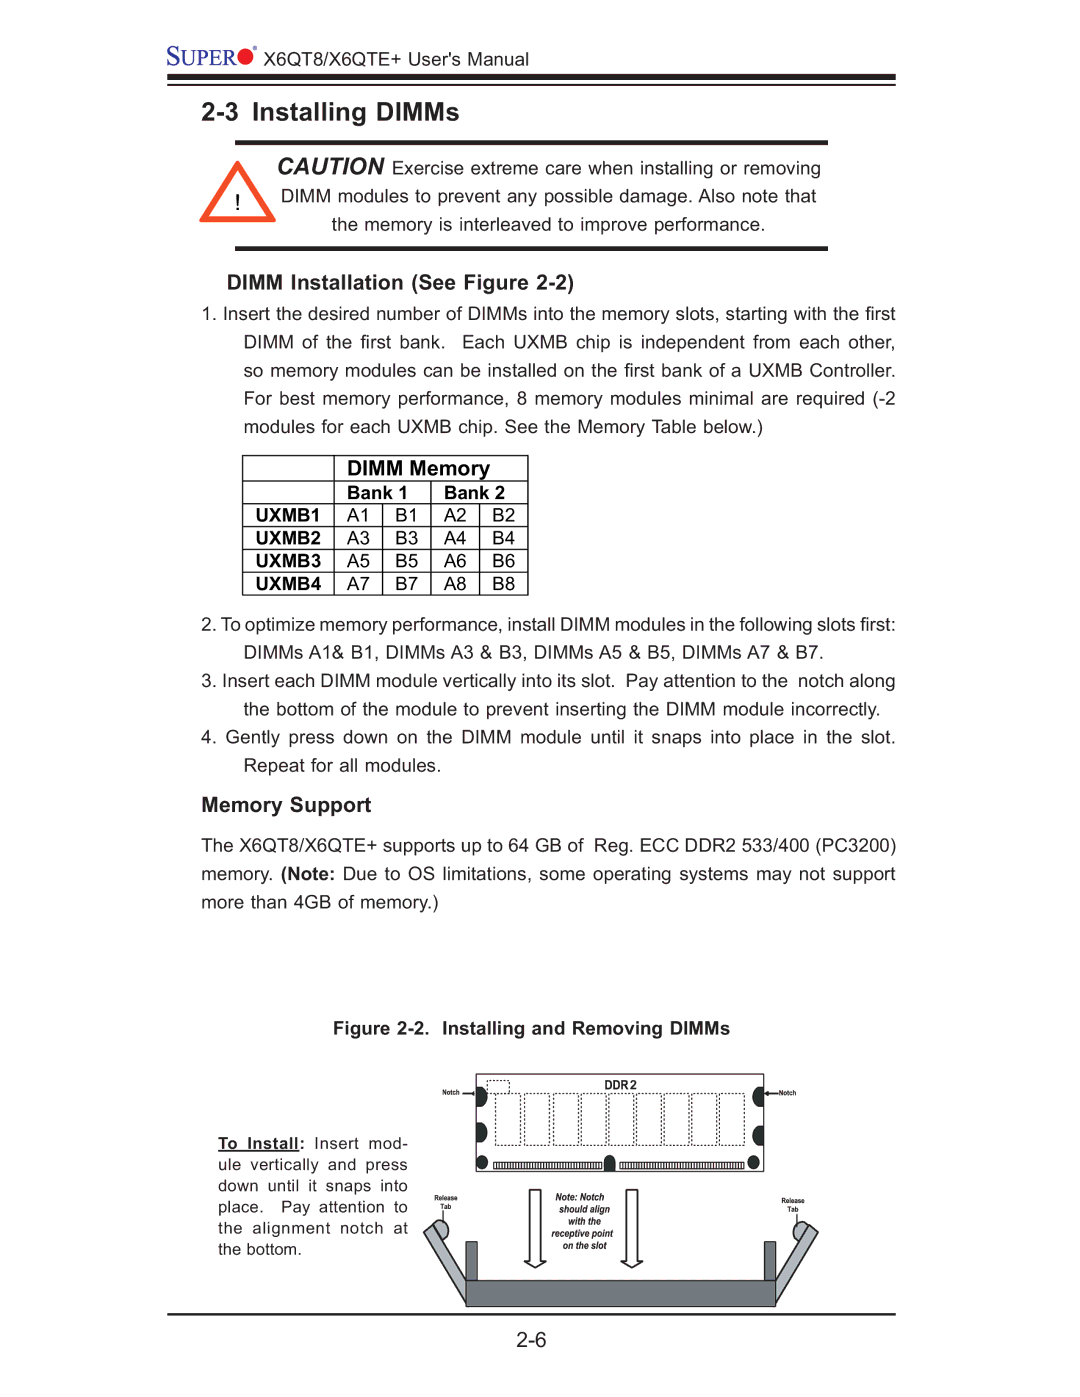
Figure 2-2. Installing and Removing DIMMs
To Install: Insert mod- ule vertically and press down until it snaps into place. Pay attention to the alignment notch at the bottom.
2 |