![]()
![]()
![]() X6QT8/X6QTE+ User's Manual
X6QT8/X6QTE+ User's Manual
2-2 Processor and Heatsink Installation
When handling the processor package, avoid placing direct pressure on the label area of the fan. Also, do not place the motherboard on a
!conductive surface which can damage the BIOS battery and prevent system bootup.
IMPORTANT: Always connect the power cord last and always remove it before add- ing, removing or changing any hardware components. Make sure that you install the processor into the CPU socket before you install the CPU heat sink.
*Note: For proper system cooling, please use the heatsink provided by
Supermicro.
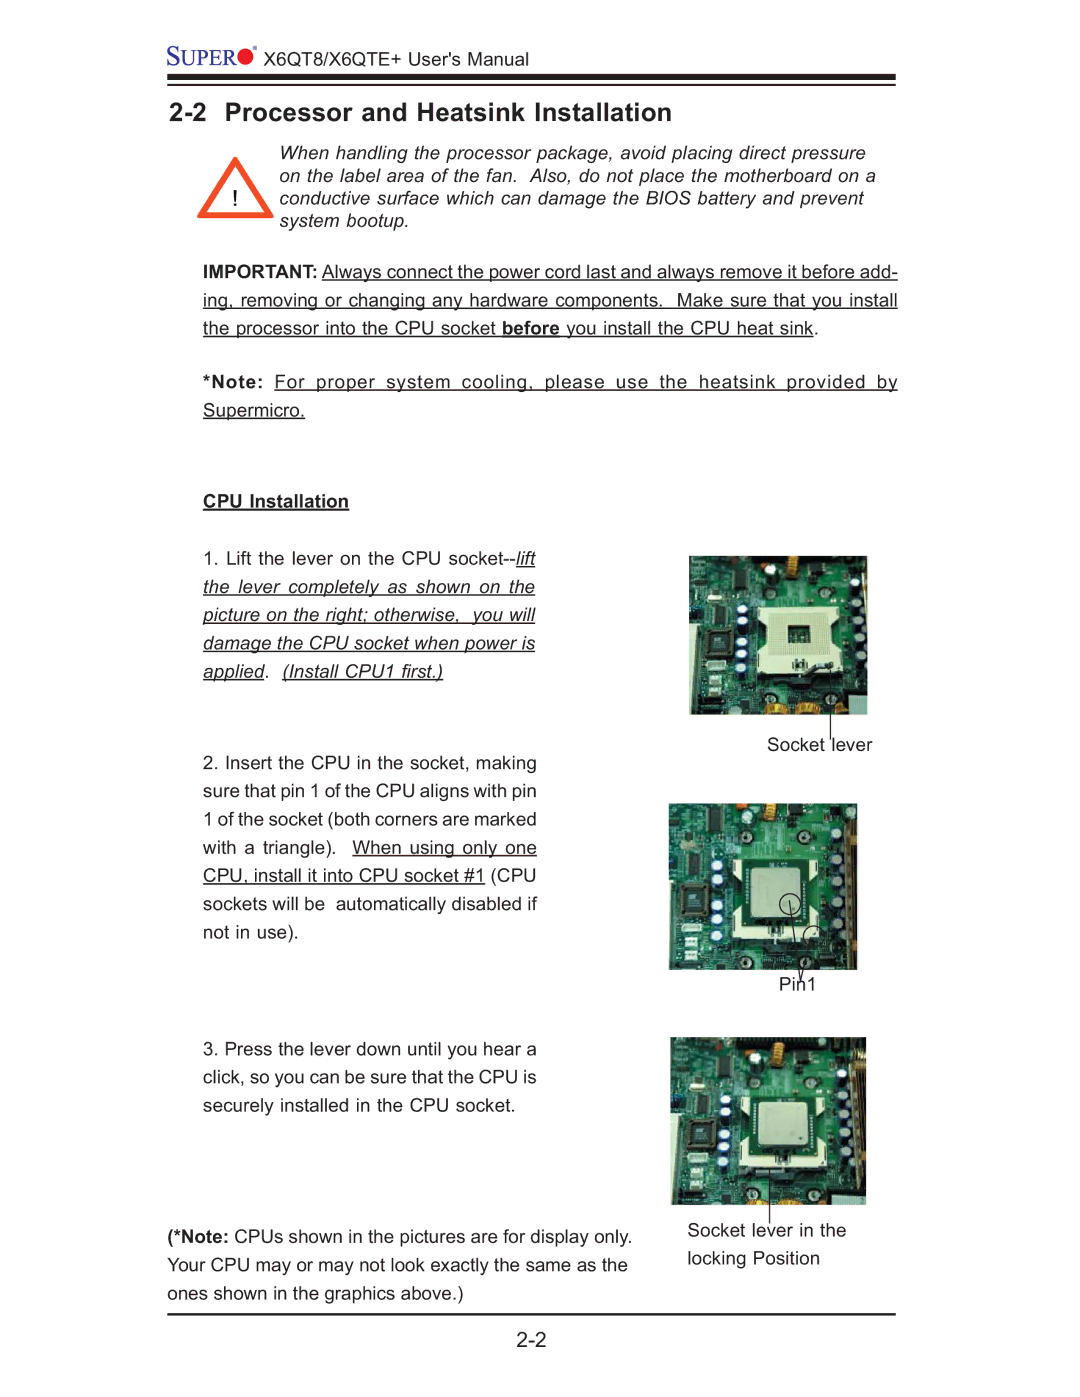
CPU Installation
1.Lift the lever on the CPU
Socket lever
2.Insert the CPU in the socket, making sure that pin 1 of the CPU aligns with pin 1 of the socket (both corners are marked with a triangle). When using only one CPU, install it into CPU socket #1 (CPU sockets will be automatically disabled if not in use).
Pin1
3.Press the lever down until you hear a click, so you can be sure that the CPU is securely installed in the CPU socket.
(*Note: CPUs shown in the pictures are for display only. | Socket lever in the | |
locking Position | ||
Your CPU may or may not look exactly the same as the | ||
| ||
ones shown in the graphics above.) |
| |
|
|