Windows 98/Me/2000
To scan directly into an application using the Button Manager on Windows 98, Windows Me and Windows 2000. Set the Event Manager properties to send only to Button Manager as shown below.
1 Click the “Start” button, select “Control Panel” from “Settings”, and open “Scanners and Cameras” in start menu.
In Windows Me, it occasionally happens that the “Scanners and Cameras” icon does not appear immediately after installation of the MFP driver is completed. If the icon does not appear, click “View all Control Panel options” in the Control Panel and display the “Scanner and Cameras” icon.
2
3
4
Select
In Windows Me, right click
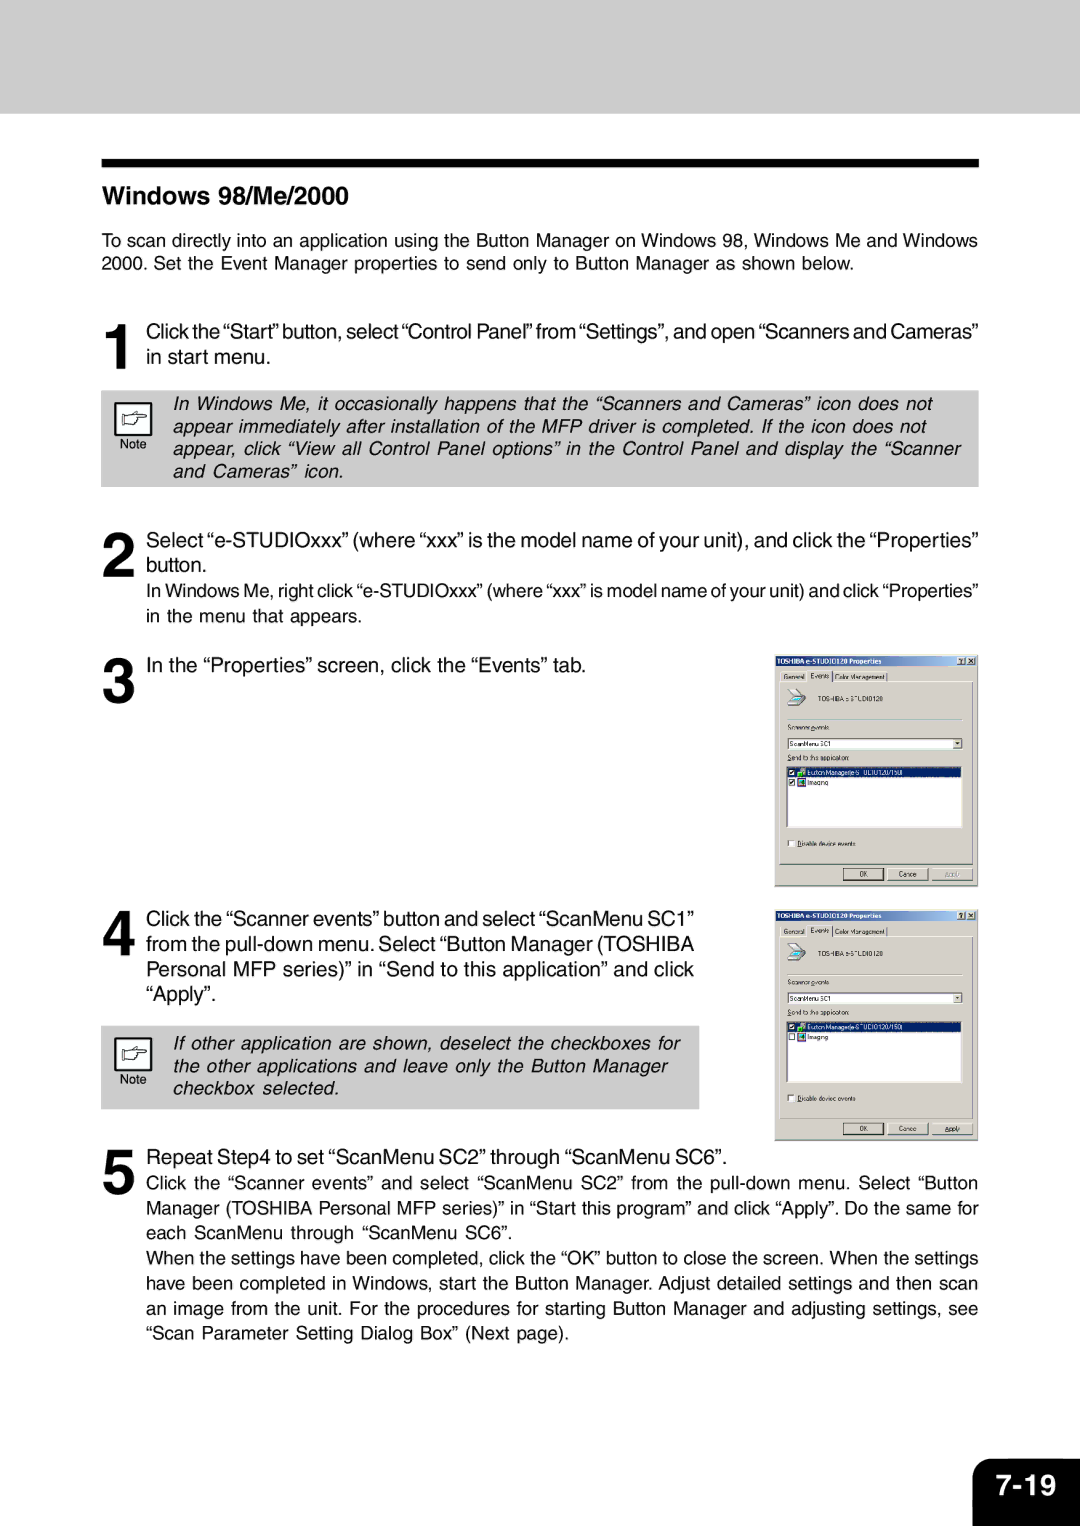
In the “Properties” screen, click the “Events” tab.
Click the “Scanner events” button and select “ScanMenu SC1” from the
If other application are shown, deselect the checkboxes for the other applications and leave only the Button Manager checkbox selected.
5 Repeat Step4 to set “ScanMenu SC2” through “ScanMenu SC6”.
Click the “Scanner events” and select “ScanMenu SC2” from the
When the settings have been completed, click the “OK” button to close the screen. When the settings have been completed in Windows, start the Button Manager. Adjust detailed settings and then scan an image from the unit. For the procedures for starting Button Manager and adjusting settings, see “Scan Parameter Setting Dialog Box” (Next page).