Scan Parameter Setting Dialog Box
After you have completed the Button Manager settings in Windows, configure the scan settings in Button Manager. To configure the scan settings in Button Manager, right click the ( ![]() ) icon in the Taskbar and select “Setting” from the menu that appears.
) icon in the Taskbar and select “Setting” from the menu that appears.
For details on configuring the scan settings in Button Manager, see the online manual or the help file.
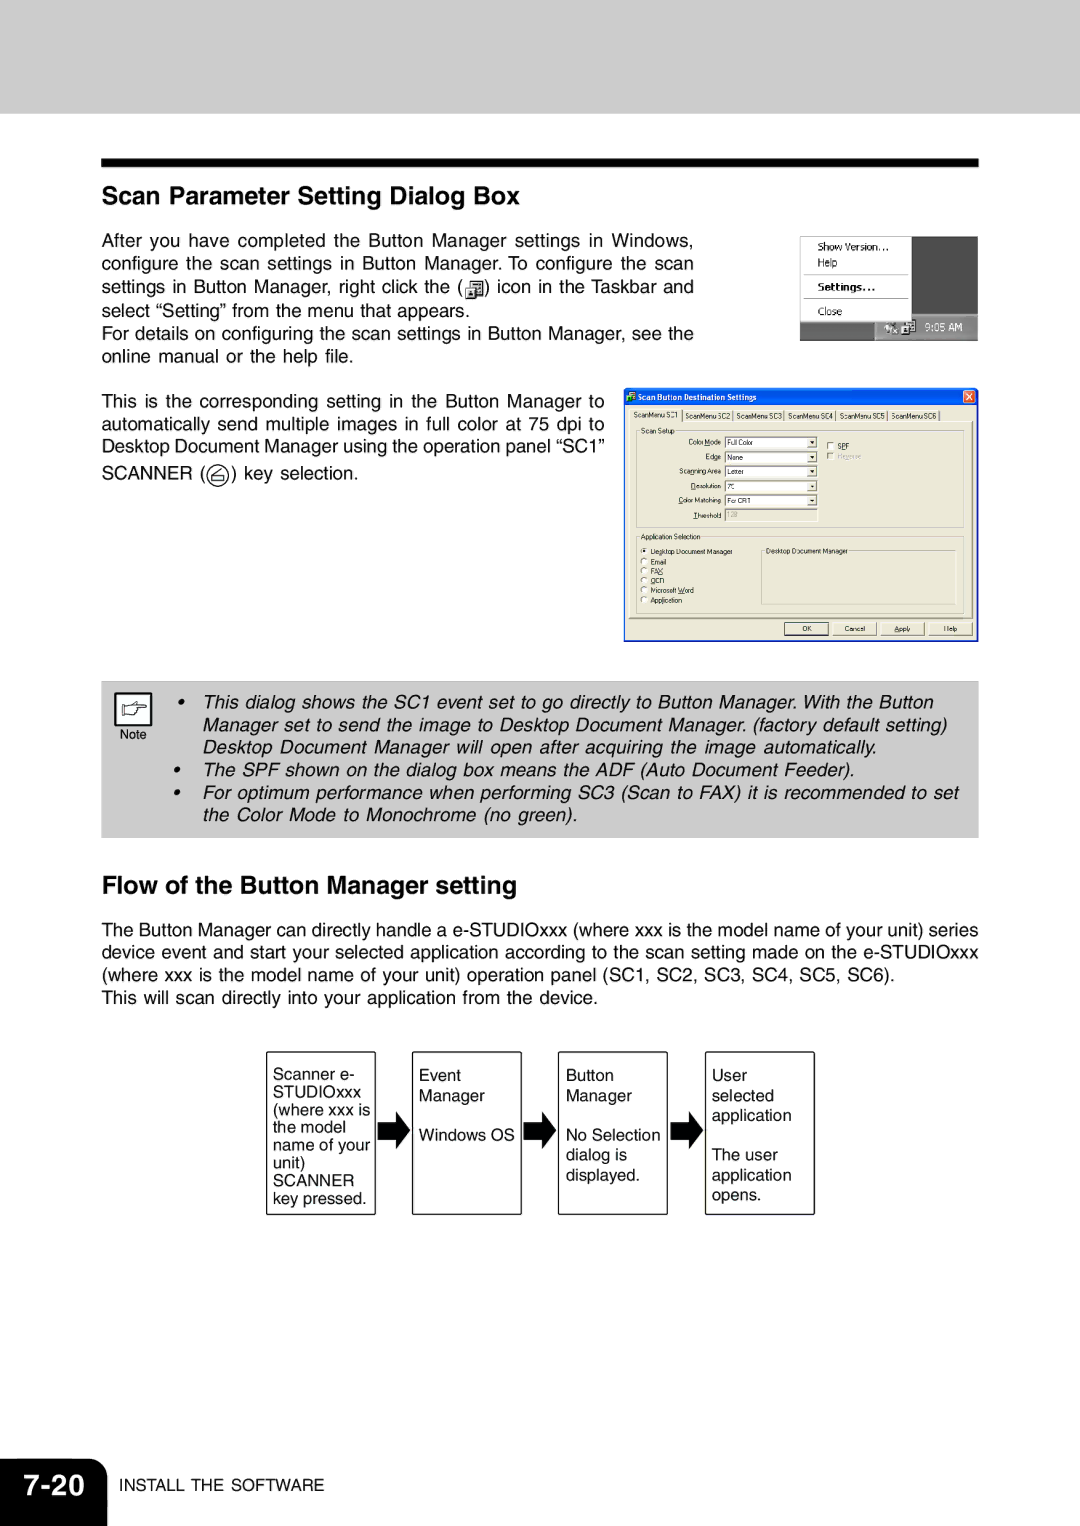
This is the corresponding setting in the Button Manager to automatically send multiple images in full color at 75 dpi to Desktop Document Manager using the operation panel “SC1” SCANNER (![]() ) key selection.
) key selection.
• This dialog shows the SC1 event set to go directly to Button Manager. With the Button Manager set to send the image to Desktop Document Manager. (factory default setting) Desktop Document Manager will open after acquiring the image automatically.
•The SPF shown on the dialog box means the ADF (Auto Document Feeder).
•For optimum performance when performing SC3 (Scan to FAX) it is recommended to set the Color Mode to Monochrome (no green).
Flow of the Button Manager setting
The Button Manager can directly handle a
This will scan directly into your application from the device.
Scanner e- |
| Event |
| Button |
| User |
STUDIOxxx |
| Manager |
| Manager |
| selected |
(where xxx is |
|
|
|
|
| application |
the model |
|
|
|
|
| |
| Windows OS |
| No Selection |
|
| |
name of your |
|
|
|
| ||
|
|
| dialog is |
| The user | |
unit) |
|
|
|
| ||
|
|
| displayed. |
| application | |
SCANNER |
|
|
|
| ||
|
|
|
|
| opens. | |
key pressed. |
|
|
|
|
|