2. PRINTER SETUP
ENGLISH VERSION
2.4 Loading the Ribbon
2.4Loading the Ribbon (Cont.)
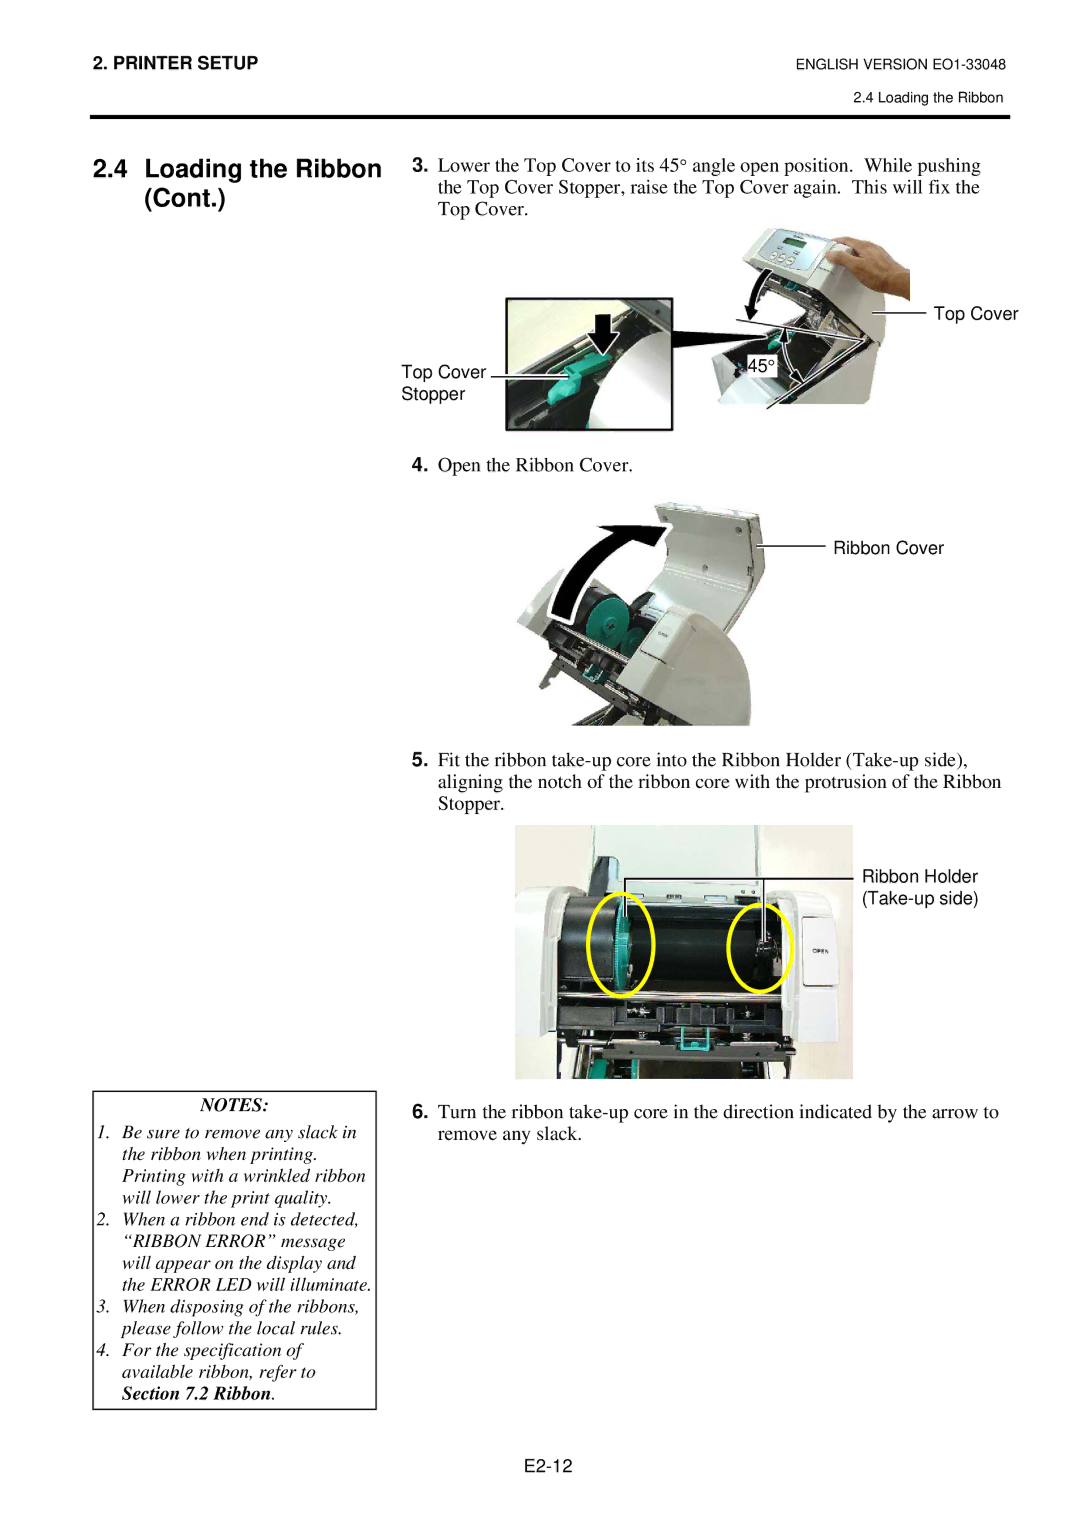
3.Lower the Top Cover to its 45° angle open position. While pushing the Top Cover Stopper, raise the Top Cover again. This will fix the Top Cover.
Top Cover
Top Cover |
|
| 45° |
|
| ||
Stopper |
| ||
4.Open the Ribbon Cover.
Ribbon Cover
NOTES:
1.Be sure to remove any slack in the ribbon when printing. Printing with a wrinkled ribbon will lower the print quality.
2.When a ribbon end is detected, “RIBBON ERROR” message will appear on the display and the ERROR LED will illuminate.
3.When disposing of the ribbons, please follow the local rules.
4.For the specification of available ribbon, refer to Section 7.2 Ribbon.
5.Fit the ribbon
Ribbon Holder
6.Turn the ribbon