2. PRINTER SETUP
ENGLISH VERSION
2.8 Installing the Printer Drivers
2.8.5 Adding/Deleting a LAN Port
To use the LAN interface, first, you have to make the following settings in “<7> IP ADDRESS” in the system mode of the printer. (Refer to Section 2.7.3)
•Set the printer IP address (“PRINTER IP ADRES”), the gateway IP address (“GATEWAY IP ADRES”), and subnet mask (“SUBNET MASK”).
•Set the port number (“SOCKET PORT”).
Among these settings, the printer IP address and the port number are also required for adding a LAN port.
(1)Adding a LAN Port Windows 95/98/ME
(1)
(2)Select the “Details” tab, and click on the [Add Port…] button. The “Add Port” dialog box is displayed.
(3)Select “Other”.
Select “Seagull Scientific TCP/IP Port” from the list, then click on the [OK] button.
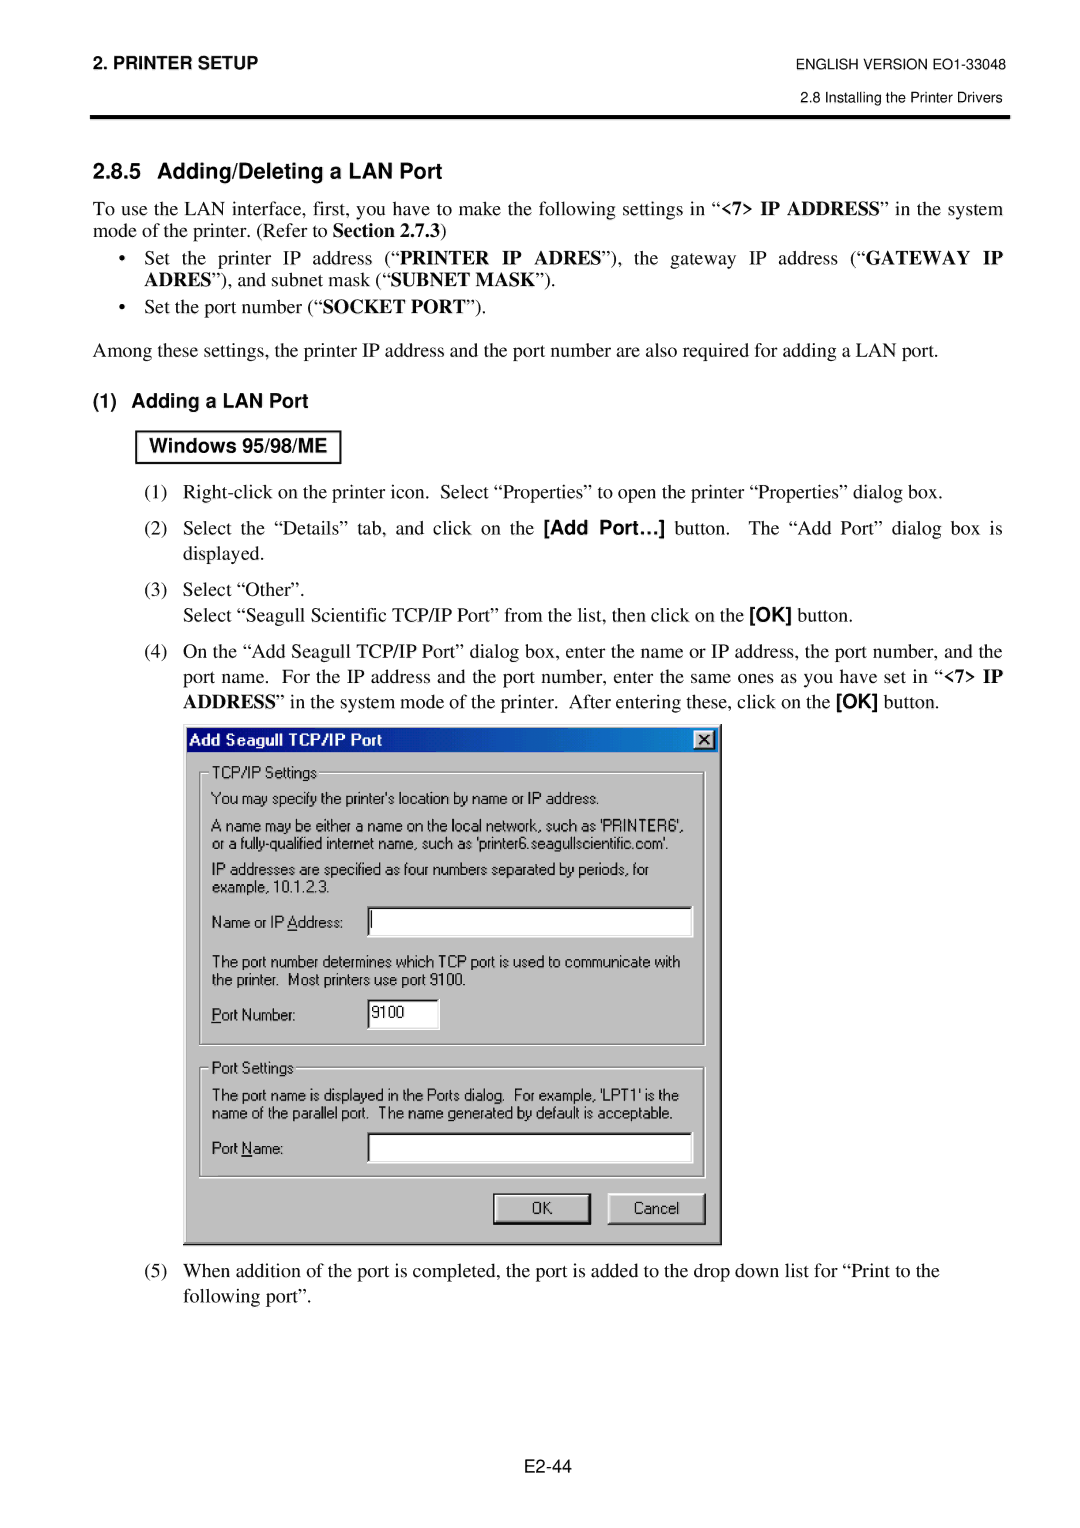
(4)On the “Add Seagull TCP/IP Port” dialog box, enter the name or IP address, the port number, and the port name. For the IP address and the port number, enter the same ones as you have set in “<7> IP ADDRESS” in the system mode of the printer. After entering these, click on the [OK] button.
(5)When addition of the port is completed, the port is added to the drop down list for “Print to the following port”.