2.PRINTER SETUP
ENGLISH VERSION
2.11 Threshold Setting
2.11Threshold Setting (Cont.)
The Parameter Fine Adjustment Mode contains sub menus for adjusting a print start position, cut/strip position, print tone, etc., and setting a threshold. For details, refer to Section 2.10 Print Position and Print Tone Fine Adjustment.
Each time the [PAUSE] key is pressed, the sub menus are displayed sequentially.
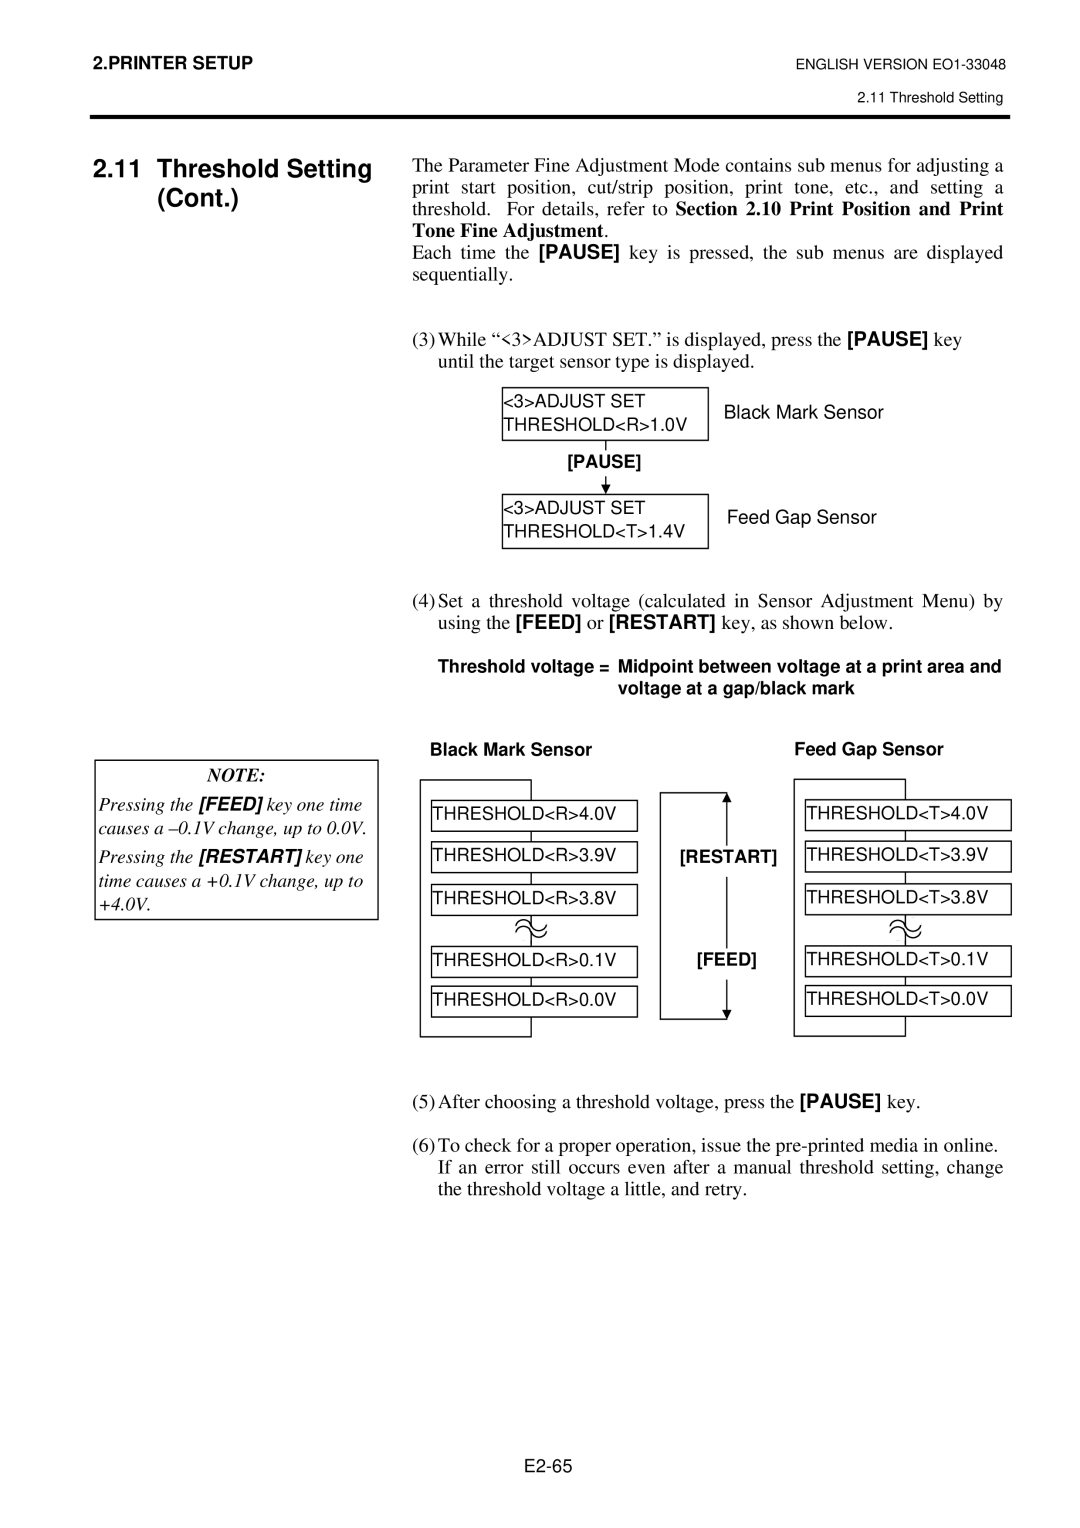
(3)While “<3>ADJUST SET.” is displayed, press the [PAUSE] key until the target sensor type is displayed.
<3>ADJUST SET THRESHOLD<R>1.0V
[PAUSE]
<3>ADJUST SET THRESHOLD<T>1.4V
Black Mark Sensor
Feed Gap Sensor
NOTE:
Pressing the [FEED] key one time causes a
Pressing the [RESTART] key one time causes a +0.1V change, up to +4.0V.
(4)Set a threshold voltage (calculated in Sensor Adjustment Menu) by using the [FEED] or [RESTART] key, as shown below.
Threshold voltage = Midpoint between voltage at a print area and voltage at a gap/black mark
Black Mark Sensor |
| Feed Gap Sensor |
THRESHOLD<R>4.0V |
| THRESHOLD<T>4.0V |
THRESHOLD<R>3.9V | [RESTART] | THRESHOLD<T>3.9V |
THRESHOLD<R>3.8V |
| THRESHOLD<T>3.8V |
THRESHOLD<R>0.1V | [FEED] | THRESHOLD<T>0.1V |
THRESHOLD<R>0.0V |
| THRESHOLD<T>0.0V |
(5)After choosing a threshold voltage, press the [PAUSE] key.
(6)To check for a proper operation, issue the