2.PRINTER SETUP
ENGLISH VERSION
2.11 Threshold Setting
2.11Threshold Setting (Cont.)
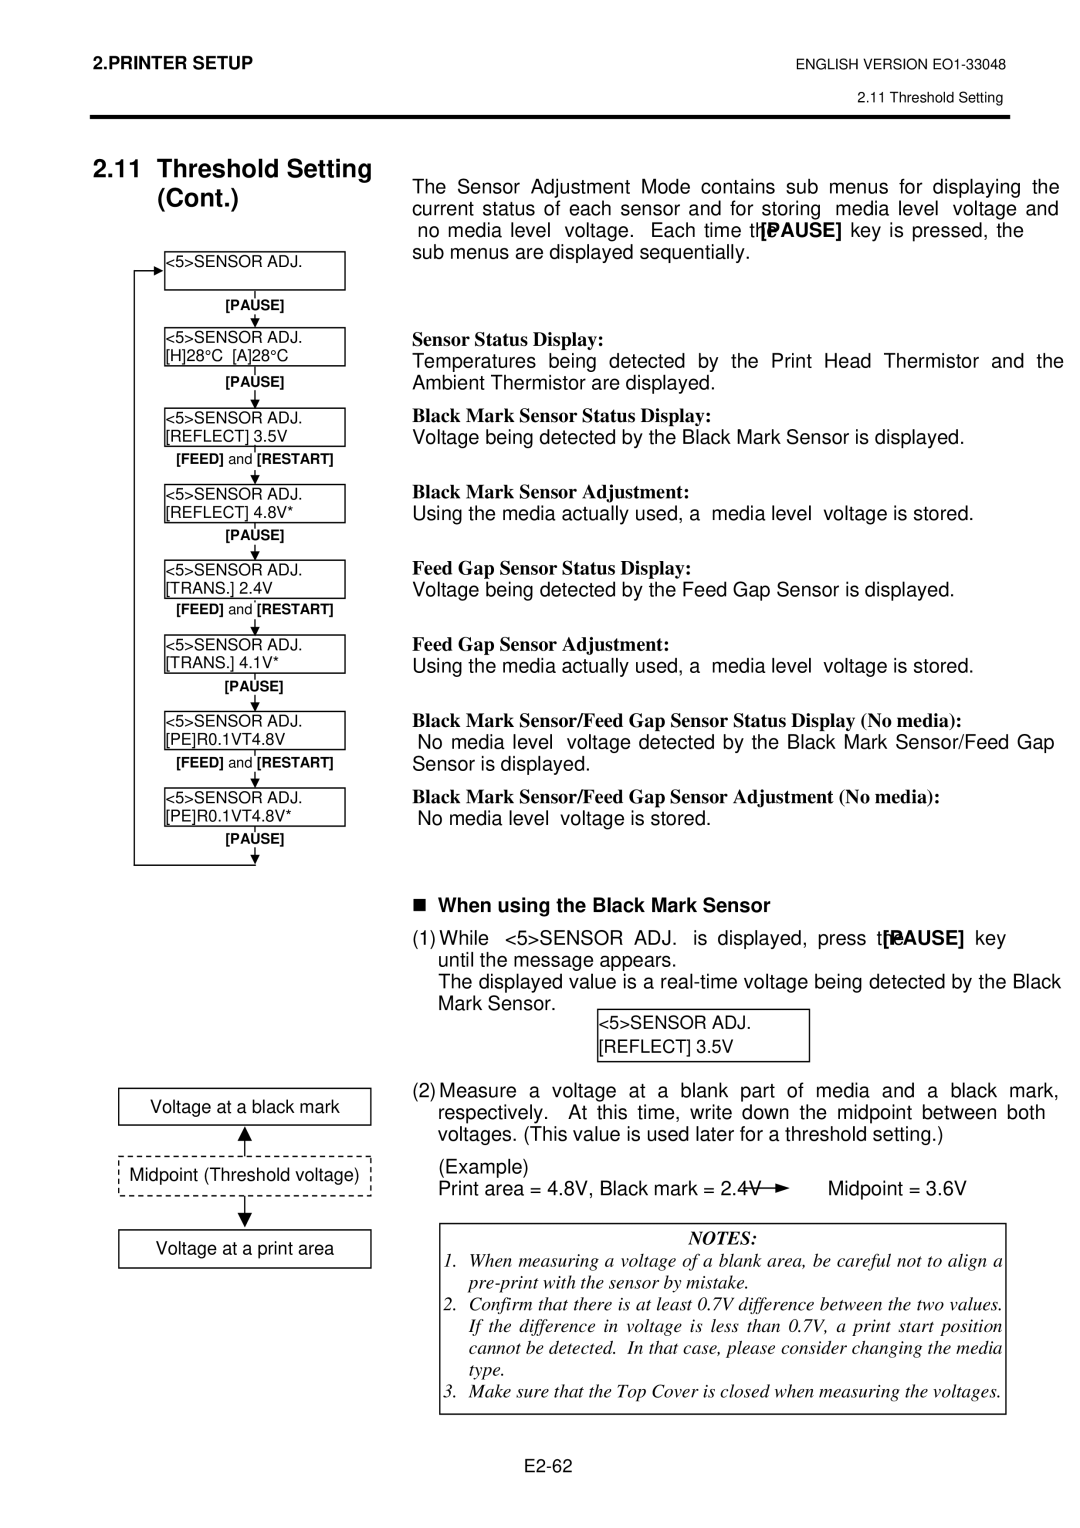
<5>SENSOR ADJ.
[PAUSE]
<5>SENSOR ADJ. [H]28°C [A]28°C
[PAUSE]
<5>SENSOR ADJ. [REFLECT] 3.5V
[FEED] and [RESTART]
The Sensor Adjustment Mode contains sub menus for displaying the current status of each sensor and for storing “media level” voltage and “no media level” voltage. Each time the [PAUSE] key is pressed, the sub menus are displayed sequentially.
Sensor Status Display:
Temperatures being detected by the Print Head Thermistor and the Ambient Thermistor are displayed.
Black Mark Sensor Status Display:
Voltage being detected by the Black Mark Sensor is displayed.
<5>SENSOR ADJ. [REFLECT] 4.8V*
[PAUSE]
<5>SENSOR ADJ. [TRANS.] 2.4V
[FEED] and [RESTART]
<5>SENSOR ADJ. [TRANS.] 4.1V*
[PAUSE]
Black Mark Sensor Adjustment:
Using the media actually used, a “media level” voltage is stored.
Feed Gap Sensor Status Display:
Voltage being detected by the Feed Gap Sensor is displayed.
Feed Gap Sensor Adjustment:
Using the media actually used, a “media level” voltage is stored.
<5>SENSOR ADJ. [PE]R0.1VT4.8V
[FEED] and [RESTART]
<5>SENSOR ADJ. [PE]R0.1VT4.8V*
[PAUSE]
Voltage at a black mark
Midpoint (Threshold voltage)
Voltage at a print area
Black Mark Sensor/Feed Gap Sensor Status Display (No media):
“No media level” voltage detected by the Black Mark Sensor/Feed Gap Sensor is displayed.
Black Mark Sensor/Feed Gap Sensor Adjustment (No media):
“No media level” voltage is stored.
When using the Black Mark Sensor
(1)While “<5>SENSOR ADJ.” is displayed, press the [PAUSE] key until the message appears.
The displayed value is a
<5>SENSOR ADJ. [REFLECT] 3.5V
(2)Measure a voltage at a blank part of media and a black mark, respectively. At this time, write down the midpoint between both voltages. (This value is used later for a threshold setting.)
(Example) |
|
Print area = 4.8V, Black mark = 2.4V | Midpoint = 3.6V |
NOTES:
1.When measuring a voltage of a blank area, be careful not to align a
2.Confirm that there is at least 0.7V difference between the two values. If the difference in voltage is less than 0.7V, a print start position cannot be detected. In that case, please consider changing the media type.
3.Make sure that the Top Cover is closed when measuring the voltages.