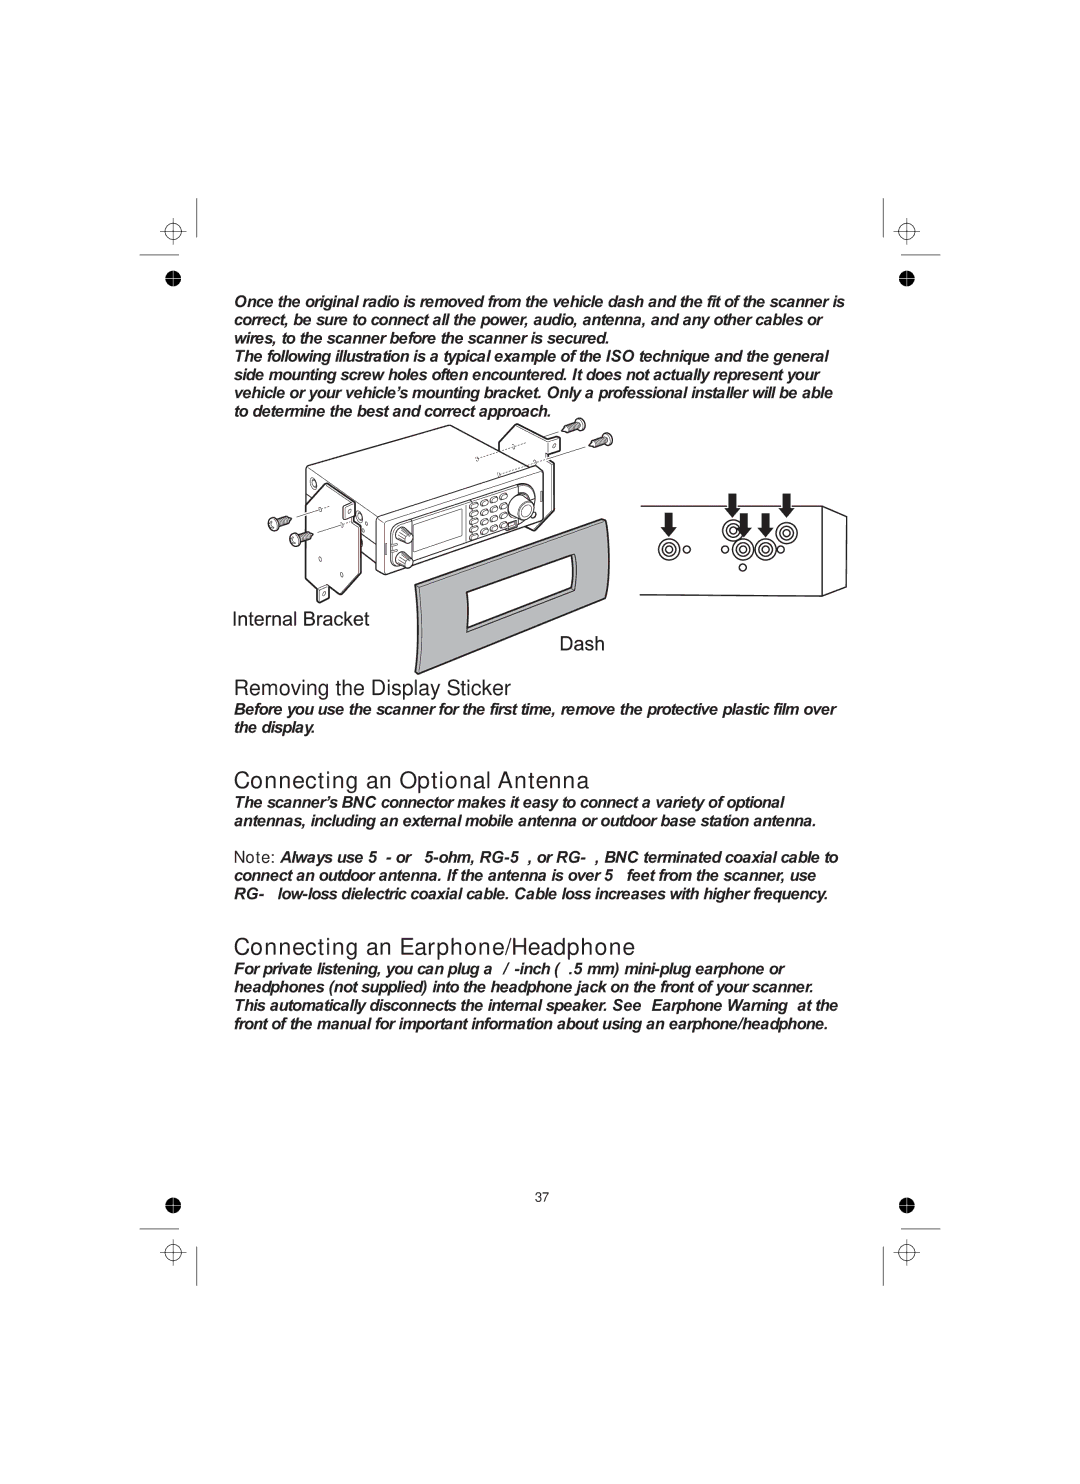
Once the original radio is removed from the vehicle dash and the fit of the scanner is correct, be sure to connect all the power, audio, antenna, and any other cables or wires, to the scanner before the scanner is secured.
The following illustration is a typical example of the ISO technique and the general side mounting screw holes often encountered. It does not actually represent your vehicle or your vehicle’s mounting bracket. Only a professional installer will be able to determine the best and correct approach.
Removing the Display Sticker
Before you use the scanner for the first time, remove the protective plastic film over the display.
Connecting an Optional Antenna
The scanner’s BNC connector makes it easy to connect a variety of optional antennas, including an external mobile antenna or outdoor base station antenna.
Note: Always use 50- or
Connecting an Earphone/Headphone
For private listening, you can plug a
37