SCANNING FROM THE TWAIN INTERFACE 87
SCANNING FROM THE ADVANCED TWAIN INTERFACE
Here are the basic steps for scanning with the Advanced TWAIN Interface. The next section will walk you through all of the image adjustment options that are available in the Advance TWAIN Interface.
1. Start your TWAIN application and open the TWAIN interface.
If the Basic Interface opens, click the Advanced Interface button.
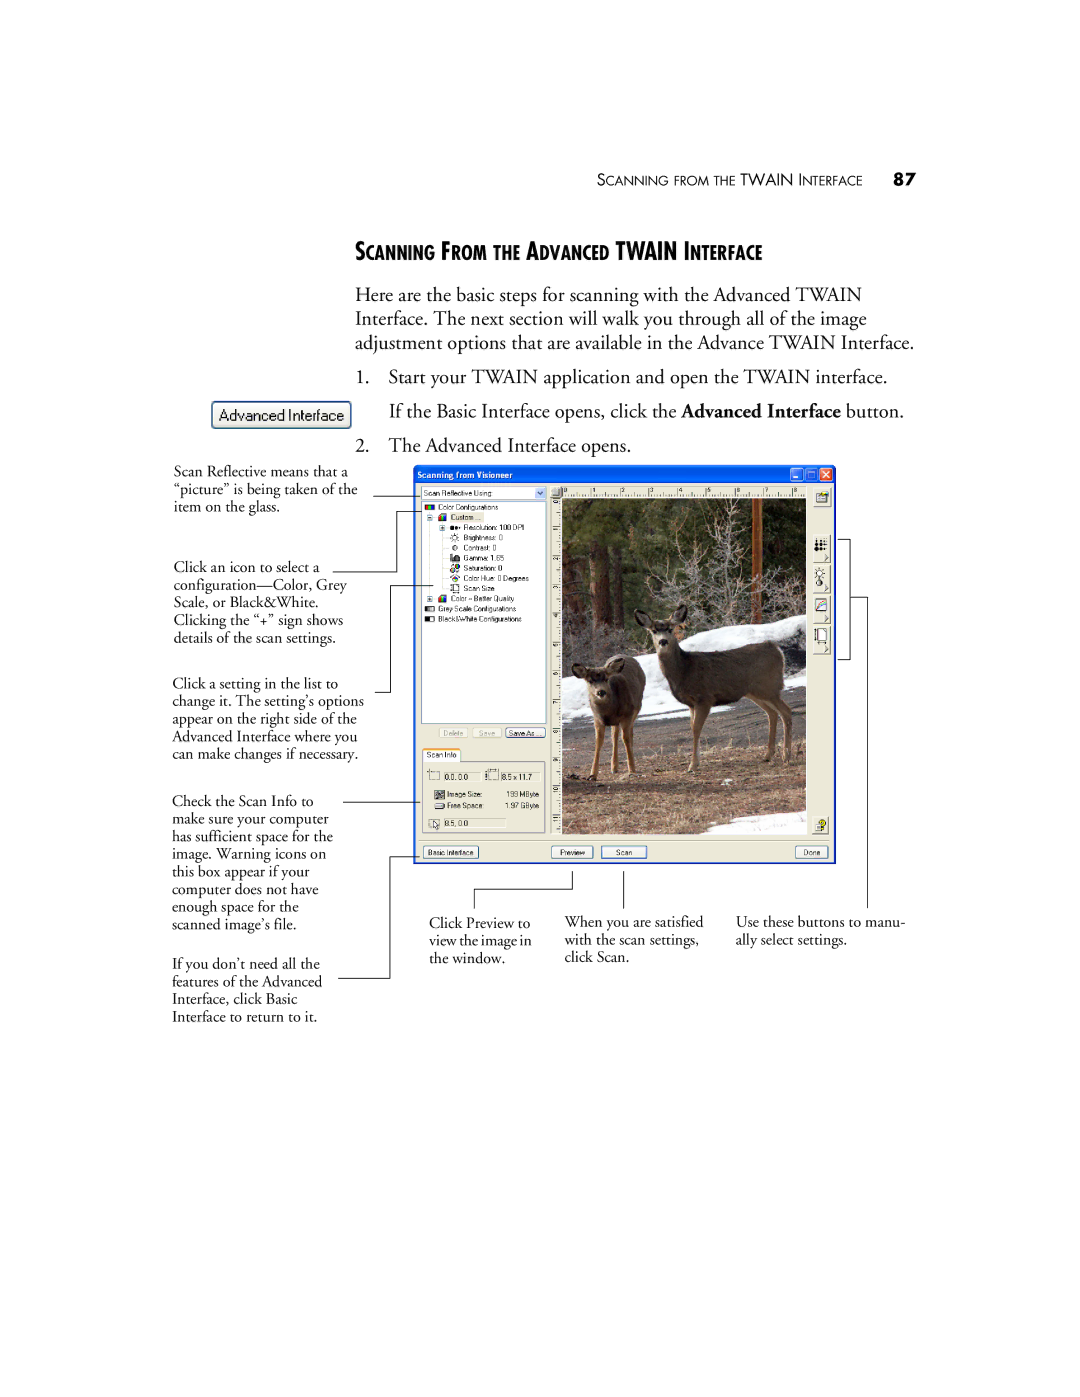
2. The Advanced Interface opens.
Scan Reflective means that a “picture” is being taken of the item on the glass.
Click an icon to select a
Click a setting in the list to change it. The setting’s options appear on the right side of the Advanced Interface where you can make changes if necessary.
Check the Scan Info to make sure your computer has sufficient space for the image. Warning icons on this box appear if your computer does not have enough space for the scanned image’s file.
If you don’t need all the features of the Advanced Interface, click Basic Interface to return to it.
Click Preview to view the image in the window.
When you are satisfied with the scan settings, click Scan.
Use these buttons to manu- ally select settings.
