16 |
| Installing the Light Fixture | |||
|
| ||||
|
|
| (If Included) | ||
|
|
|
|
| |
Tools Needed: |
|
|
|
| |
|
| WARNING |
| ||
Phillips Head |
|
|
| ||
TO AVOID ELECTRICAL SHOCK | |||||
Screwdriver | |||||
DISCONNECT POWER TO THE | |||||
| |||||
Flat Tip | RECEPTACLE AT THE FUSE/BREAKER | ||||
Screwdriver | BOX, BEFORE PROCEEDING WITH THE | ||||
Step Ladder | INSTALLATION OF THE LIGHT FIXTURE. | ||||
|
|
|
| ||
IMPORTANT! THIS LIGHT FIXTURE HAS A GROUNDING TYPE PLUG WITH A THIRD (GROUNDING) PIN. THIS PLUG WILL ONLY FIT INTO A
![]() WARNING
WARNING
TO AVOID ELECTRICAL SHOCK/FIRE, DO
NOT MOUNT THE LIGHT FIXTURE TO A
RECEPTACLE WITH A METAL FACE
PLATE.
IMPORTANT! GARAGE DOOR MUST
CLEAR LIGHT FIXTURE WHEN THE DOOR IS
IN THE OPEN POSITION.
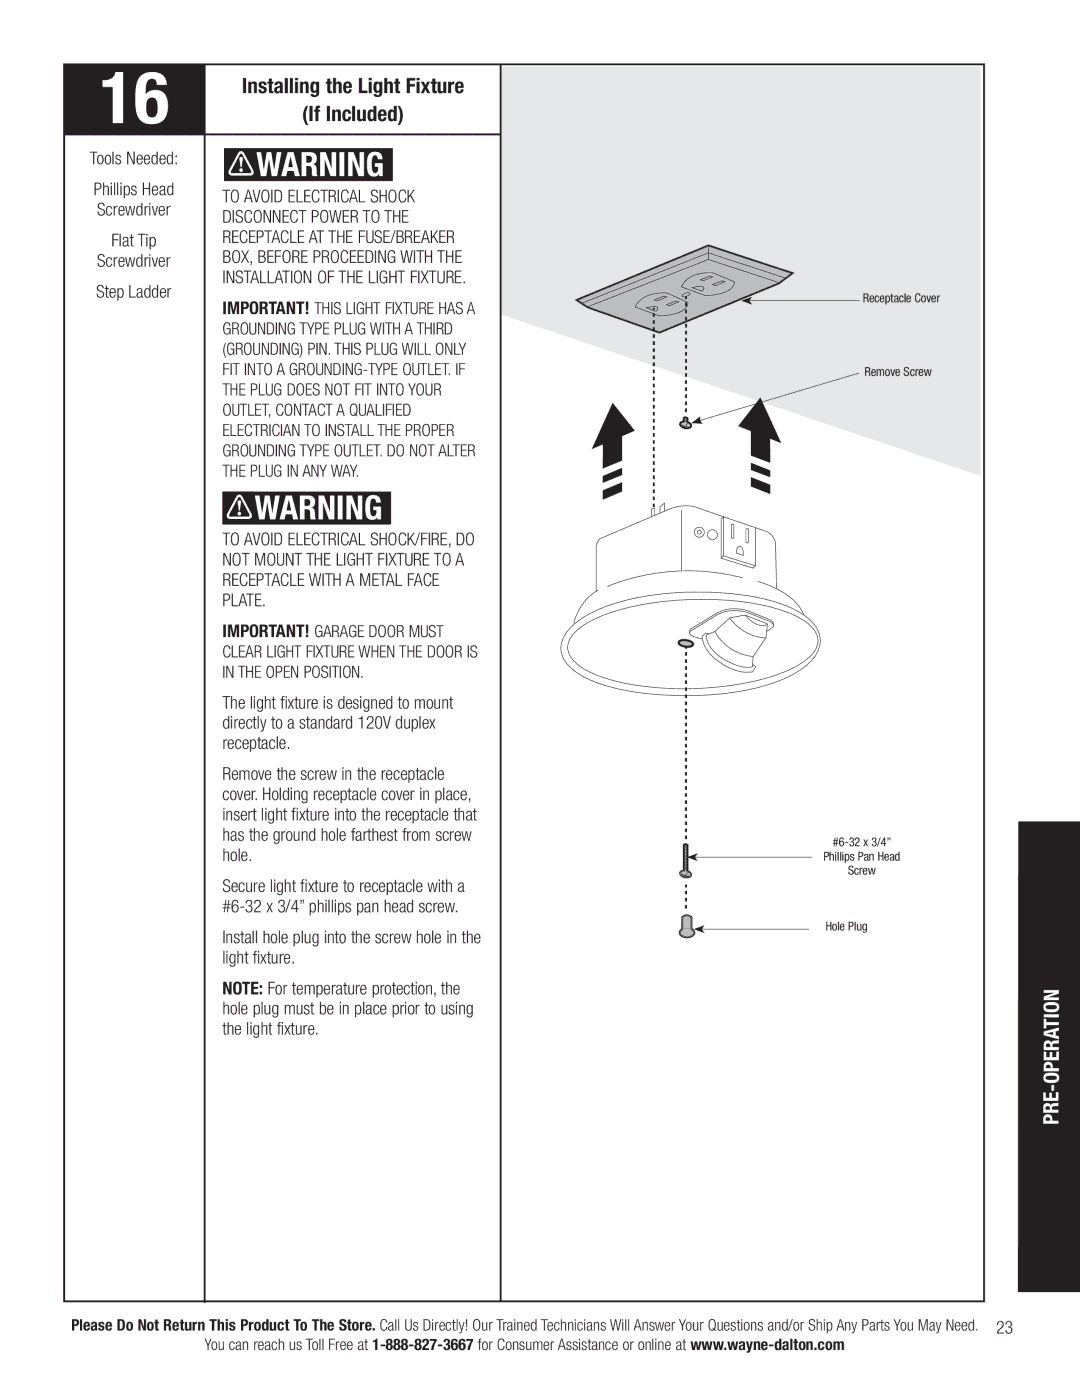
The light fixture is designed to mount directly to a standard 120V duplex receptacle.
Remove the screw in the receptacle cover. Holding receptacle cover in place, insert light fixture into the receptacle that has the ground hole farthest from screw hole.
Secure light fixture to receptacle with a
Install hole plug into the screw hole in the light fixture.
NOTE: For temperature protection, the hole plug must be in place prior to using the light fixture.
Receptacle Cover
Remove Screw
Phillips Pan Head
Screw
Hole Plug
PRE-OPERATION
Please Do Not Return This Product To The Store. Call Us Directly! Our Trained Technicians Will Answer Your Questions and/or Ship Any Parts You May Need. 23 You can reach us Toll Free at