4. SETTING UP
4-1. Setting up your balance
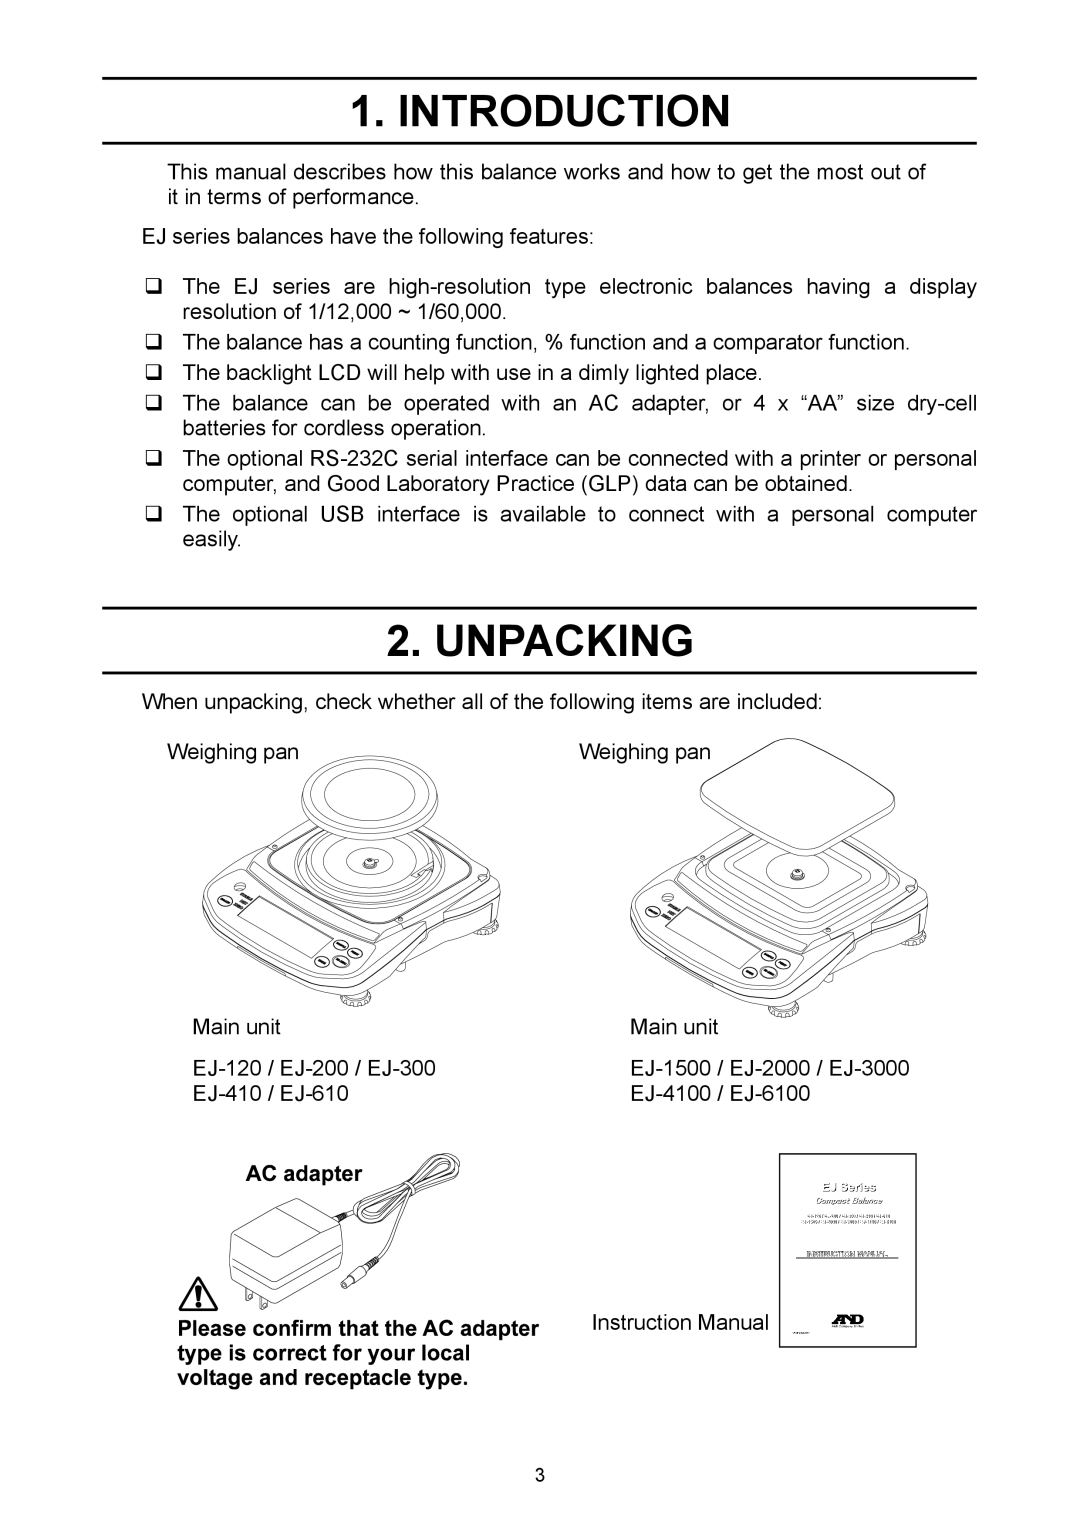
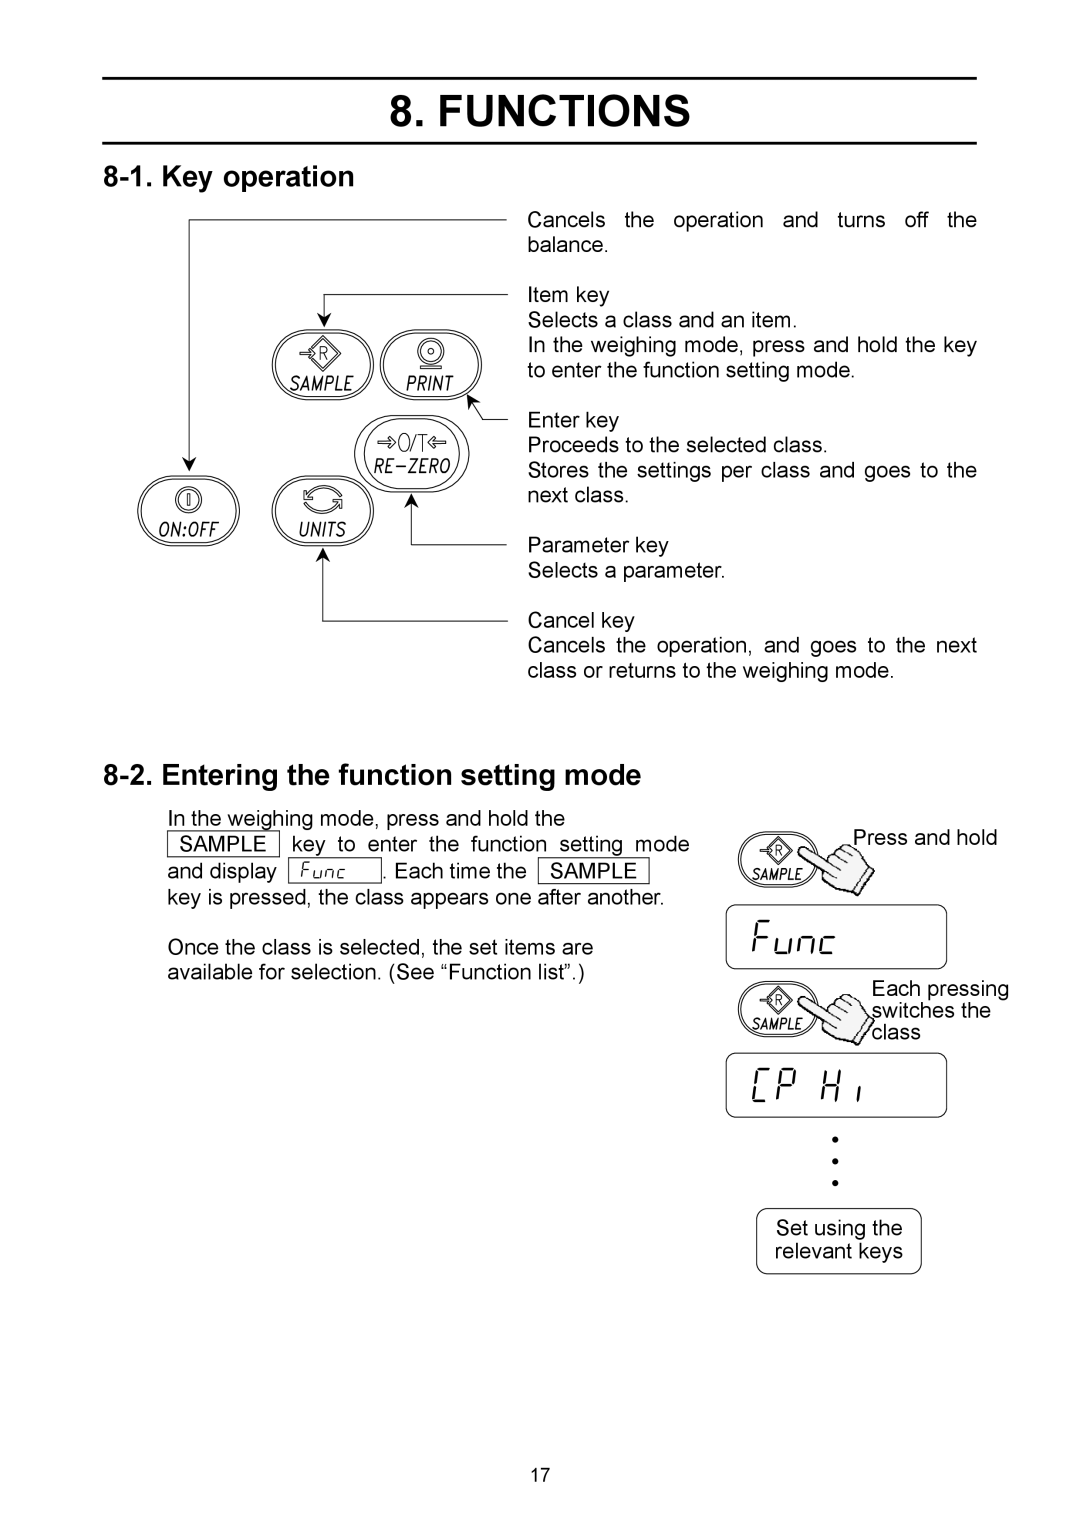
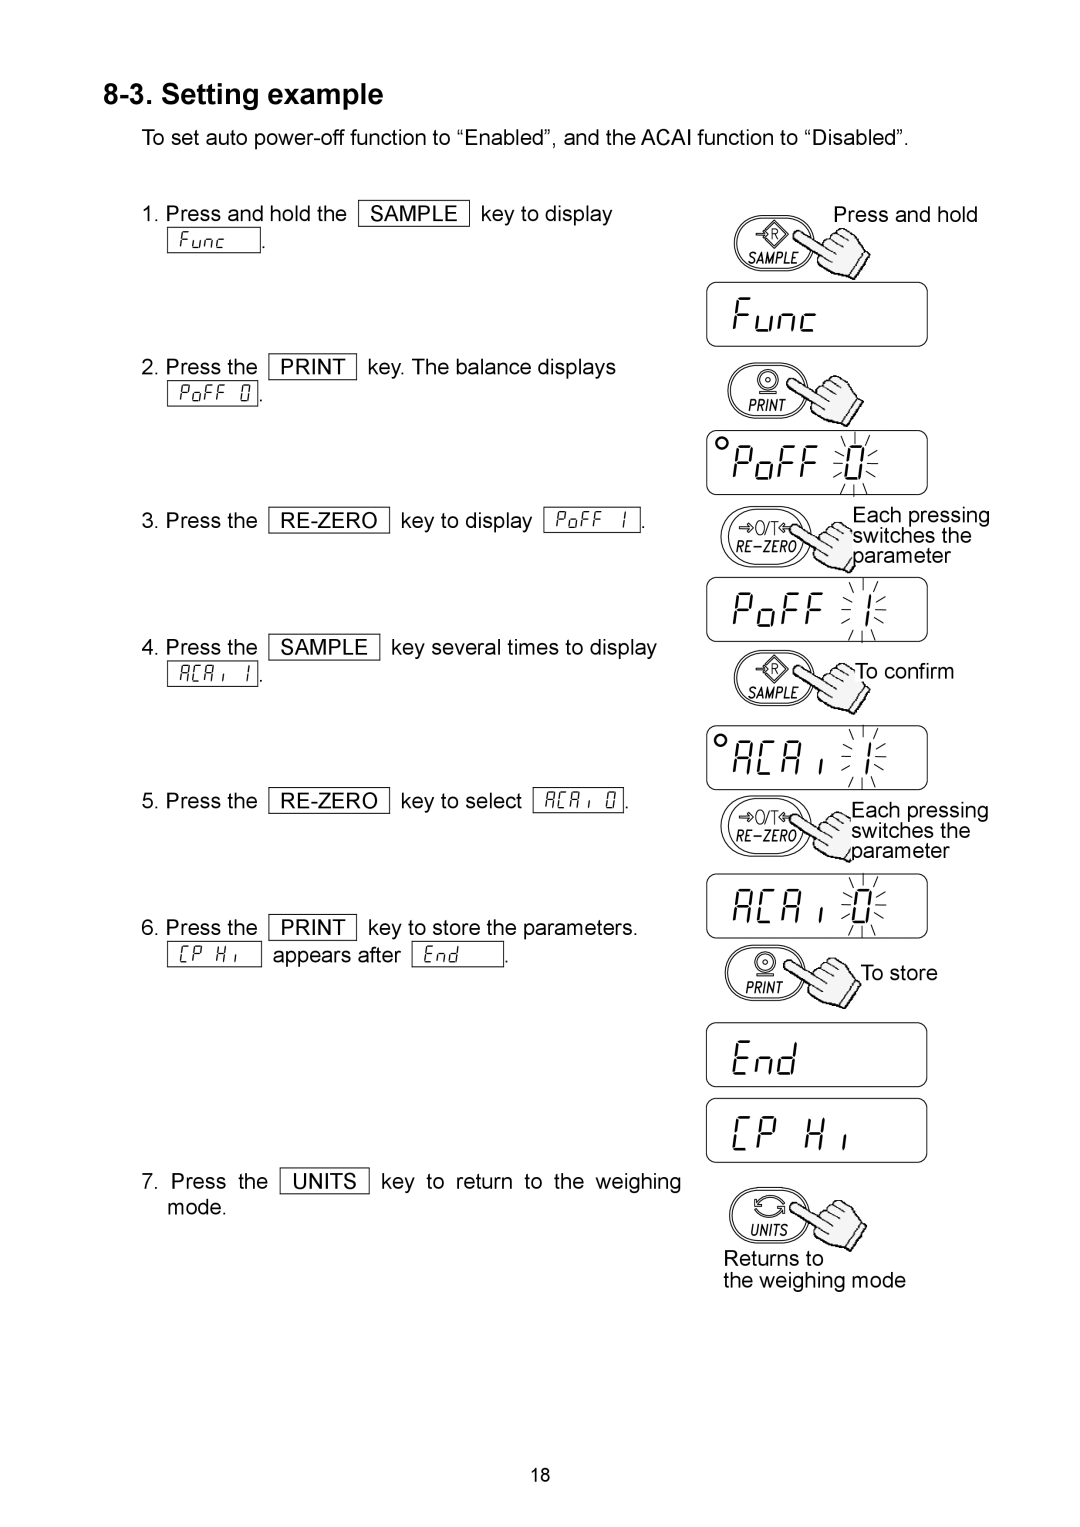
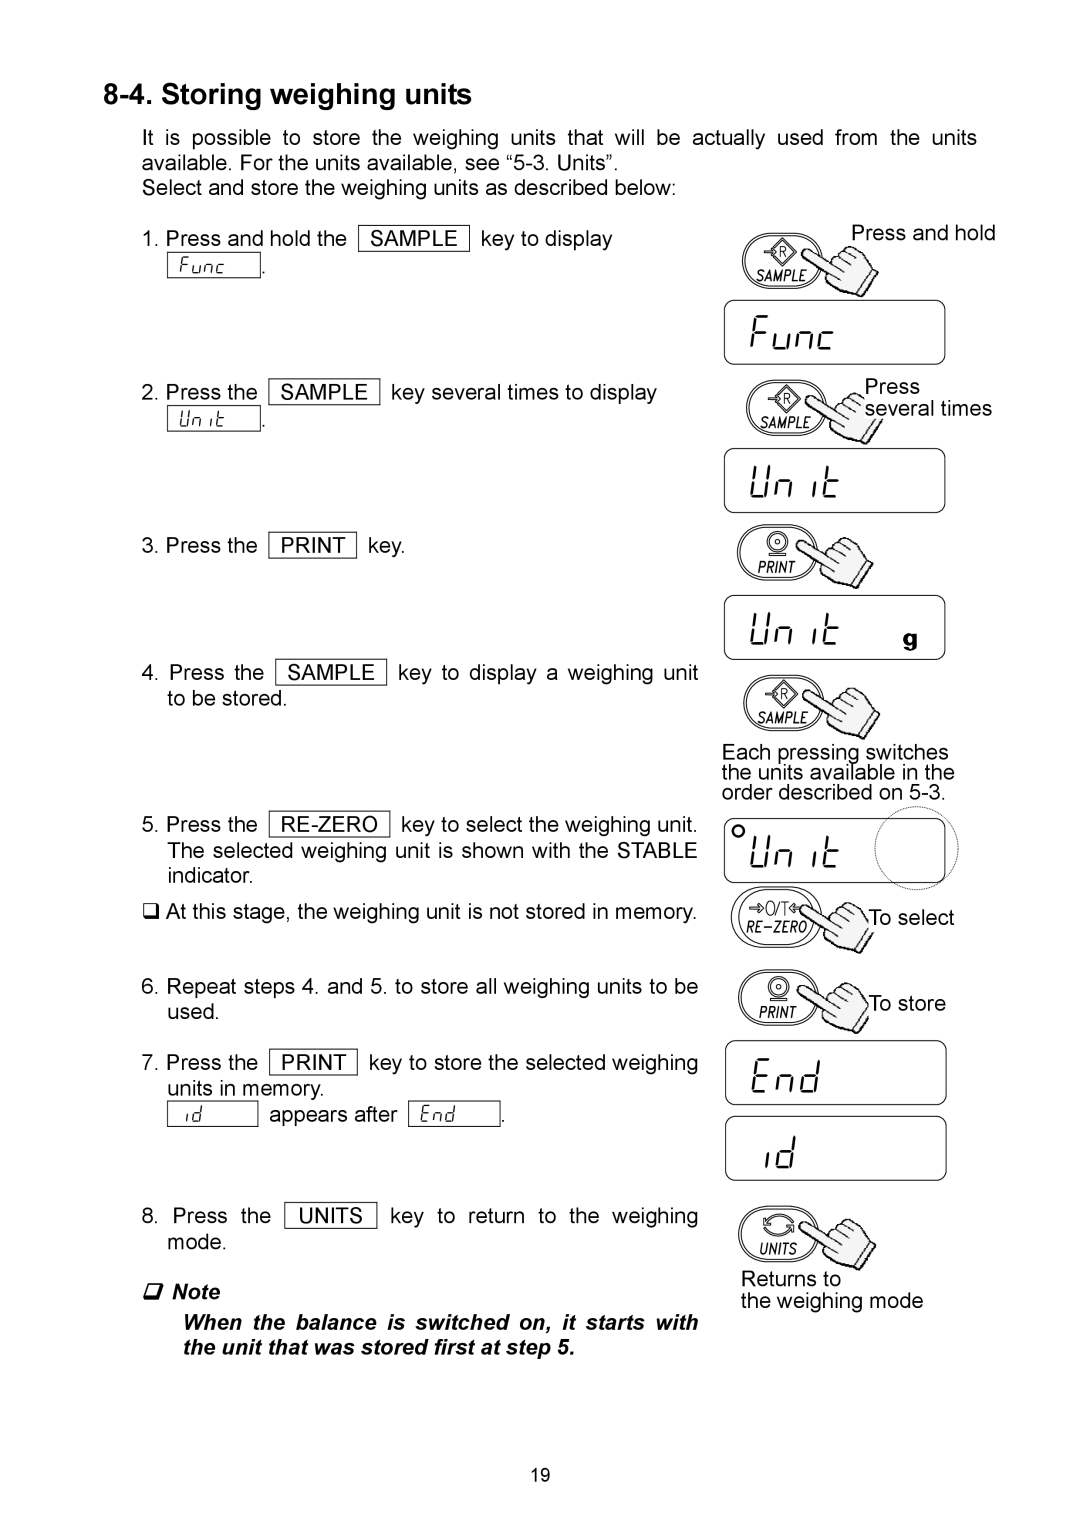
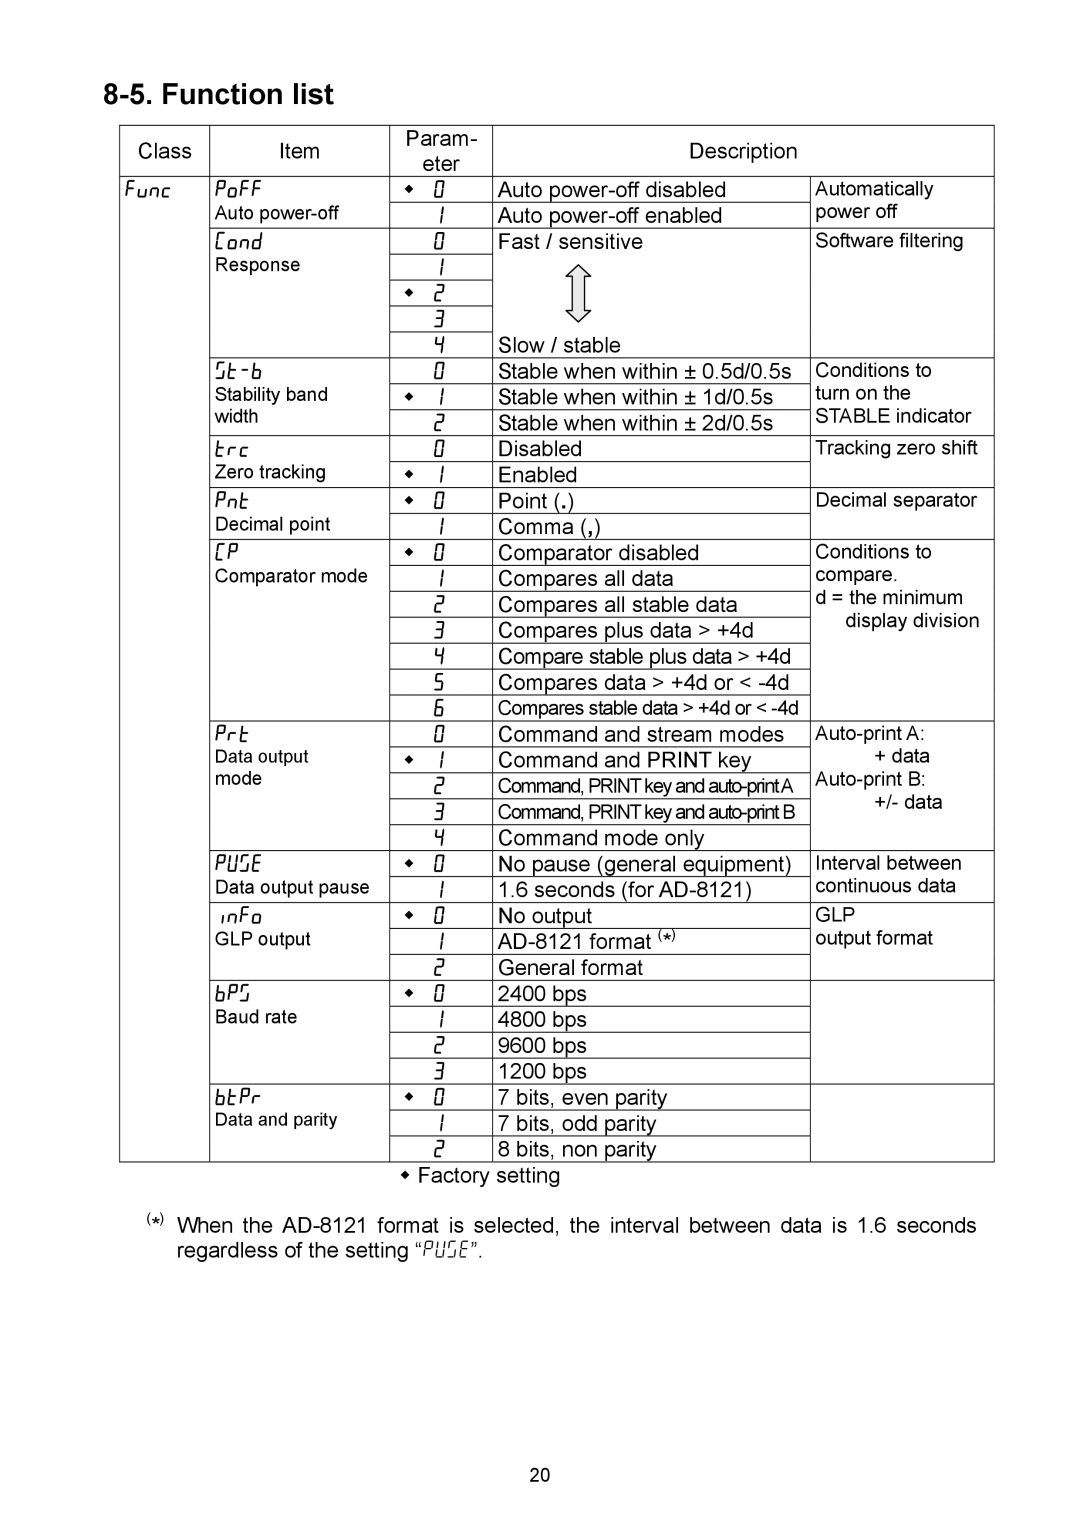
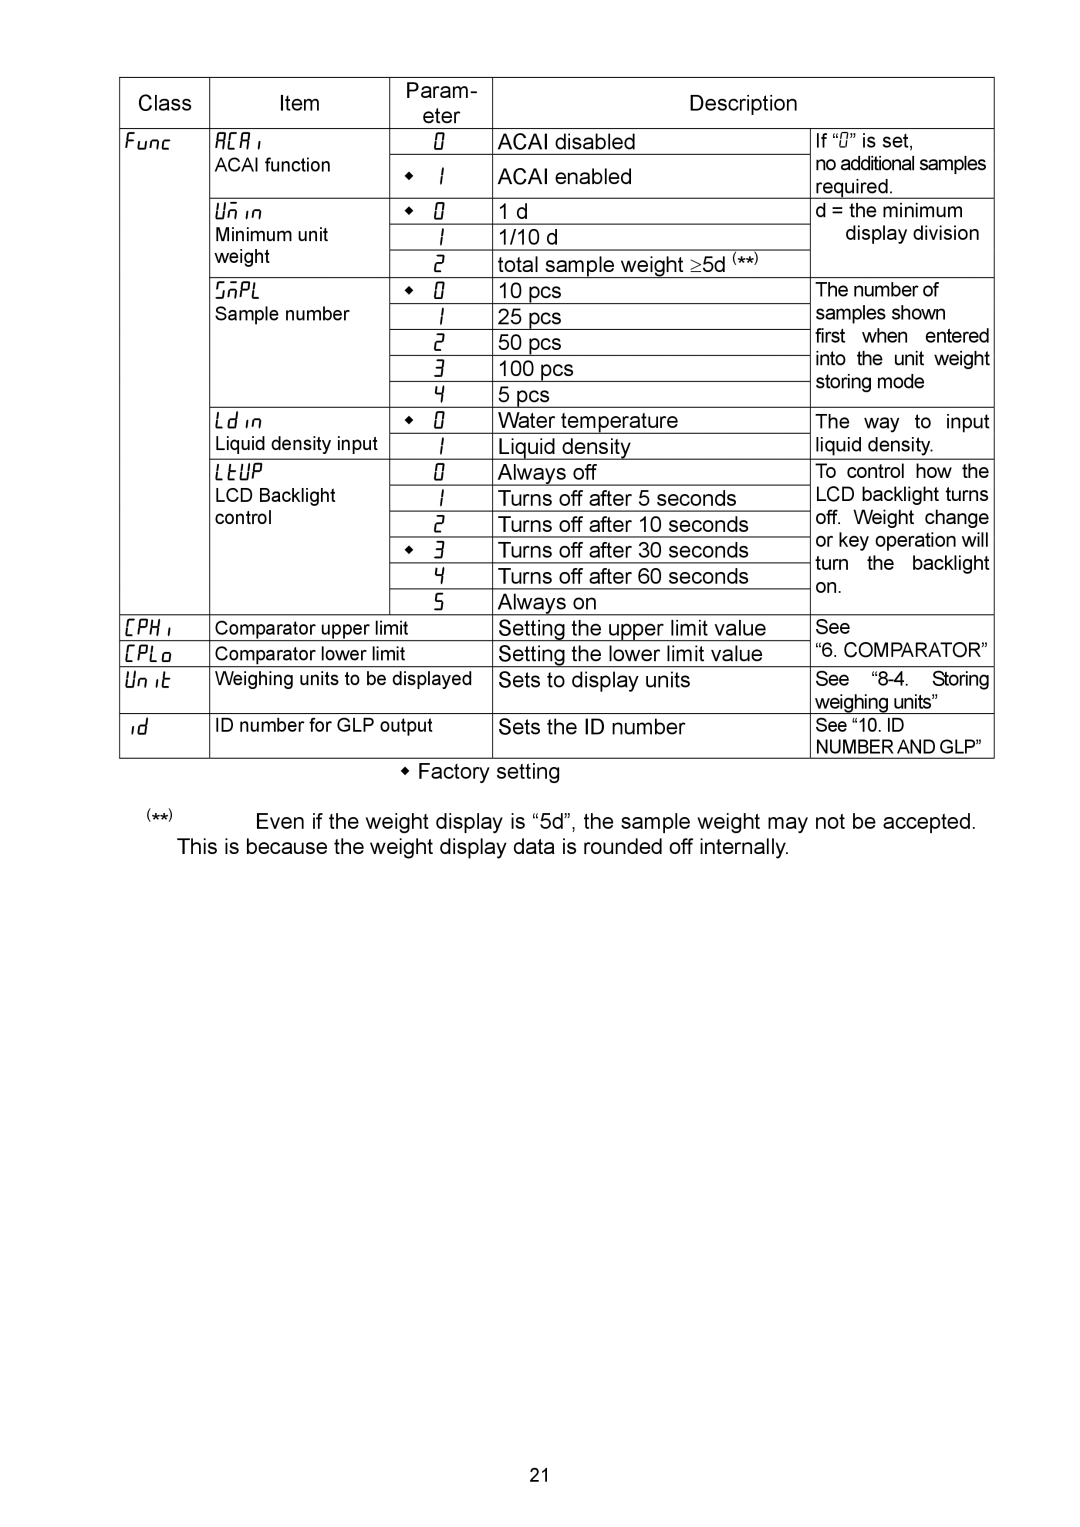
1.Place the weighing pan on the main unit as shown in “2. UNPACKING”.
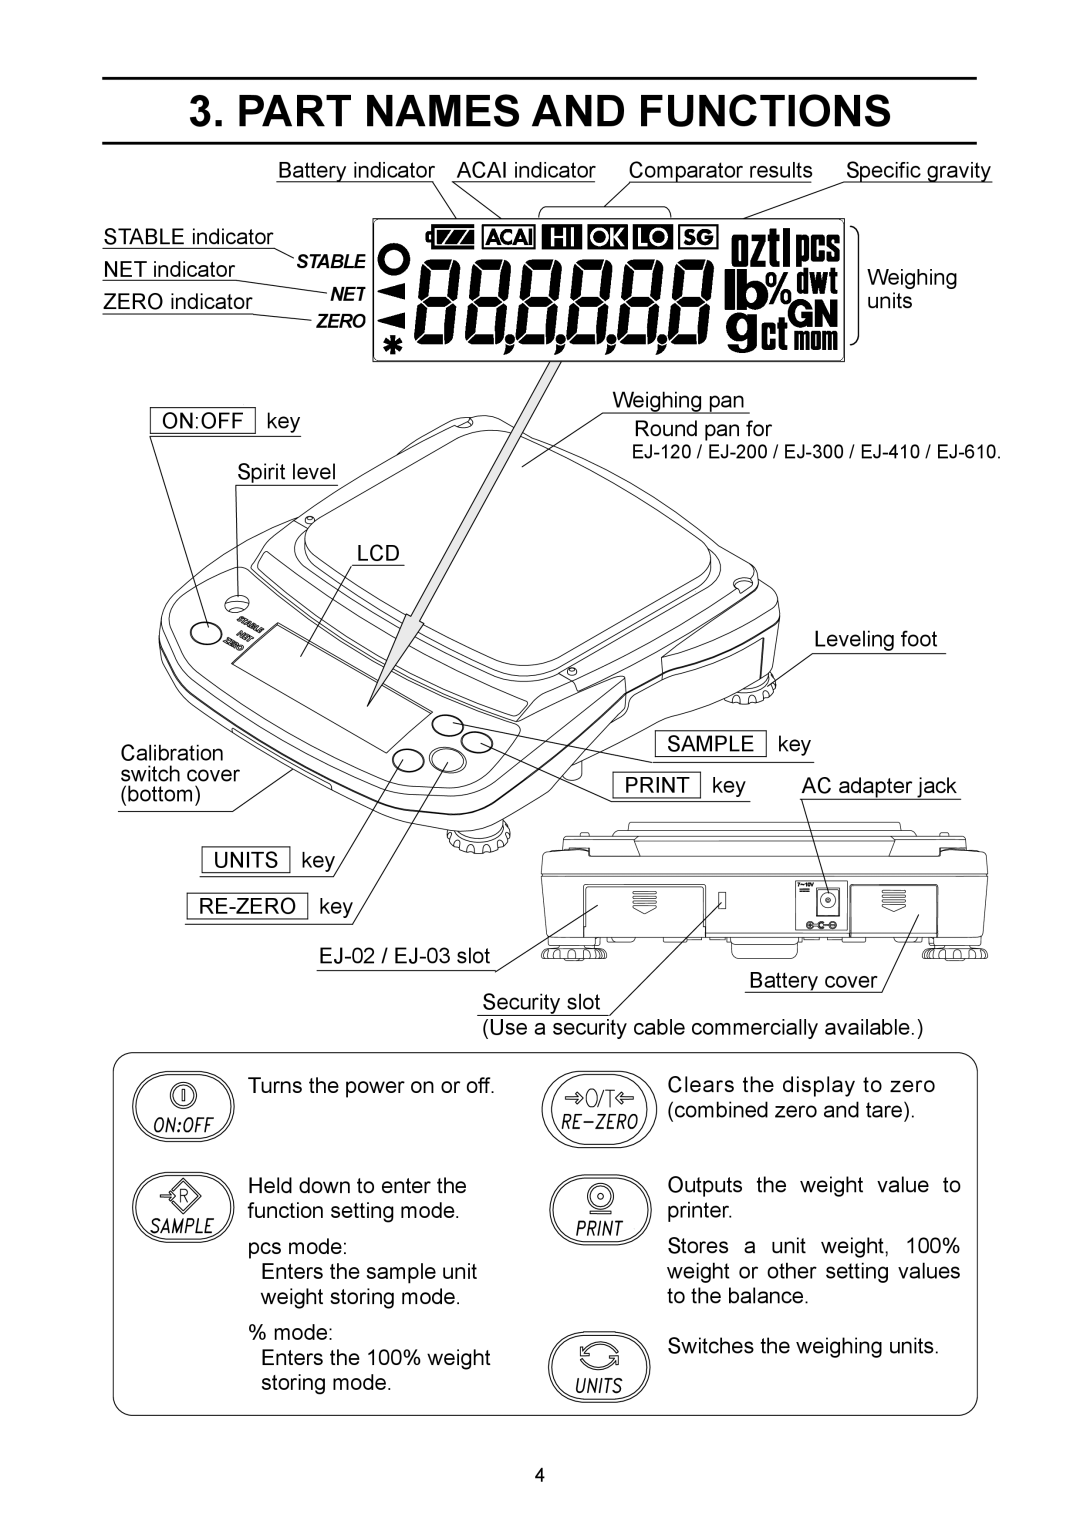
2.Adjust the level of the balance using the leveling feet. Use the spirit level to confirm. The bubble should be in the center of the circle.
3.Calibrate your balance before use. (See “7. CALIBRATION”)
Balance location
To measure correctly, to keep the balance in good condition, and to prevent hazards, observe the following:
Do not install the balance in locations that are subject to excessive dust, breezes, vibration, large temperature fluctuations, condensation, or that may have magnetic fields.
Do not install the balance on a surface that is soft or that may cause the balance level to shift.
Do not install the balance in direct sunshine.
Do not install the balance near heaters or air conditioners.
Do not use an unstable AC power source.
Do not install the balance in a place where combustible or corrosive gases may exist.
Allow the balance to reach equilibrium with the ambient temperature before use.
Switch the power ON at least half an hour before use so that the balance can warm up.
When the balance is installed for the first time, or the balance has been moved, carry out calibration as described in “7. CALIBRATION”
4-2. Power source
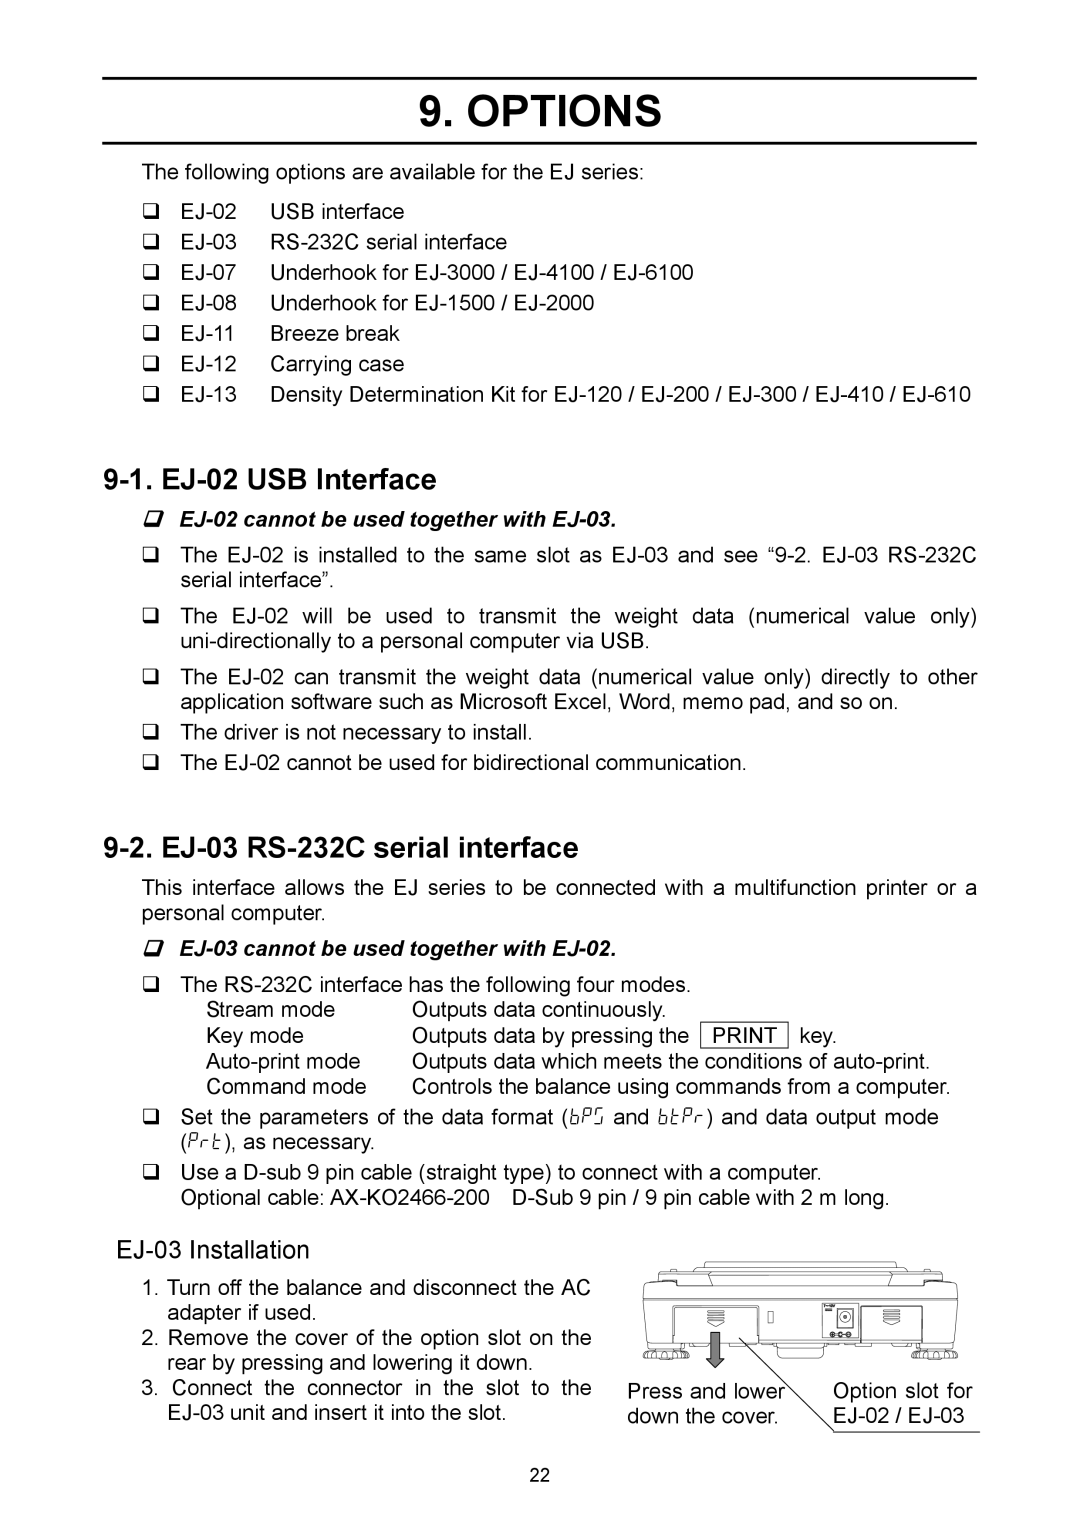
For the power source, the AC adapter or 4 x “AA” size
When using the AC adapter | AC adapter jack |
Use a stable power source. To use the AC adapter, |
|
insert the AC adapter plug into the AC adapter jack |
|
on the rear side of the EJ. |
|
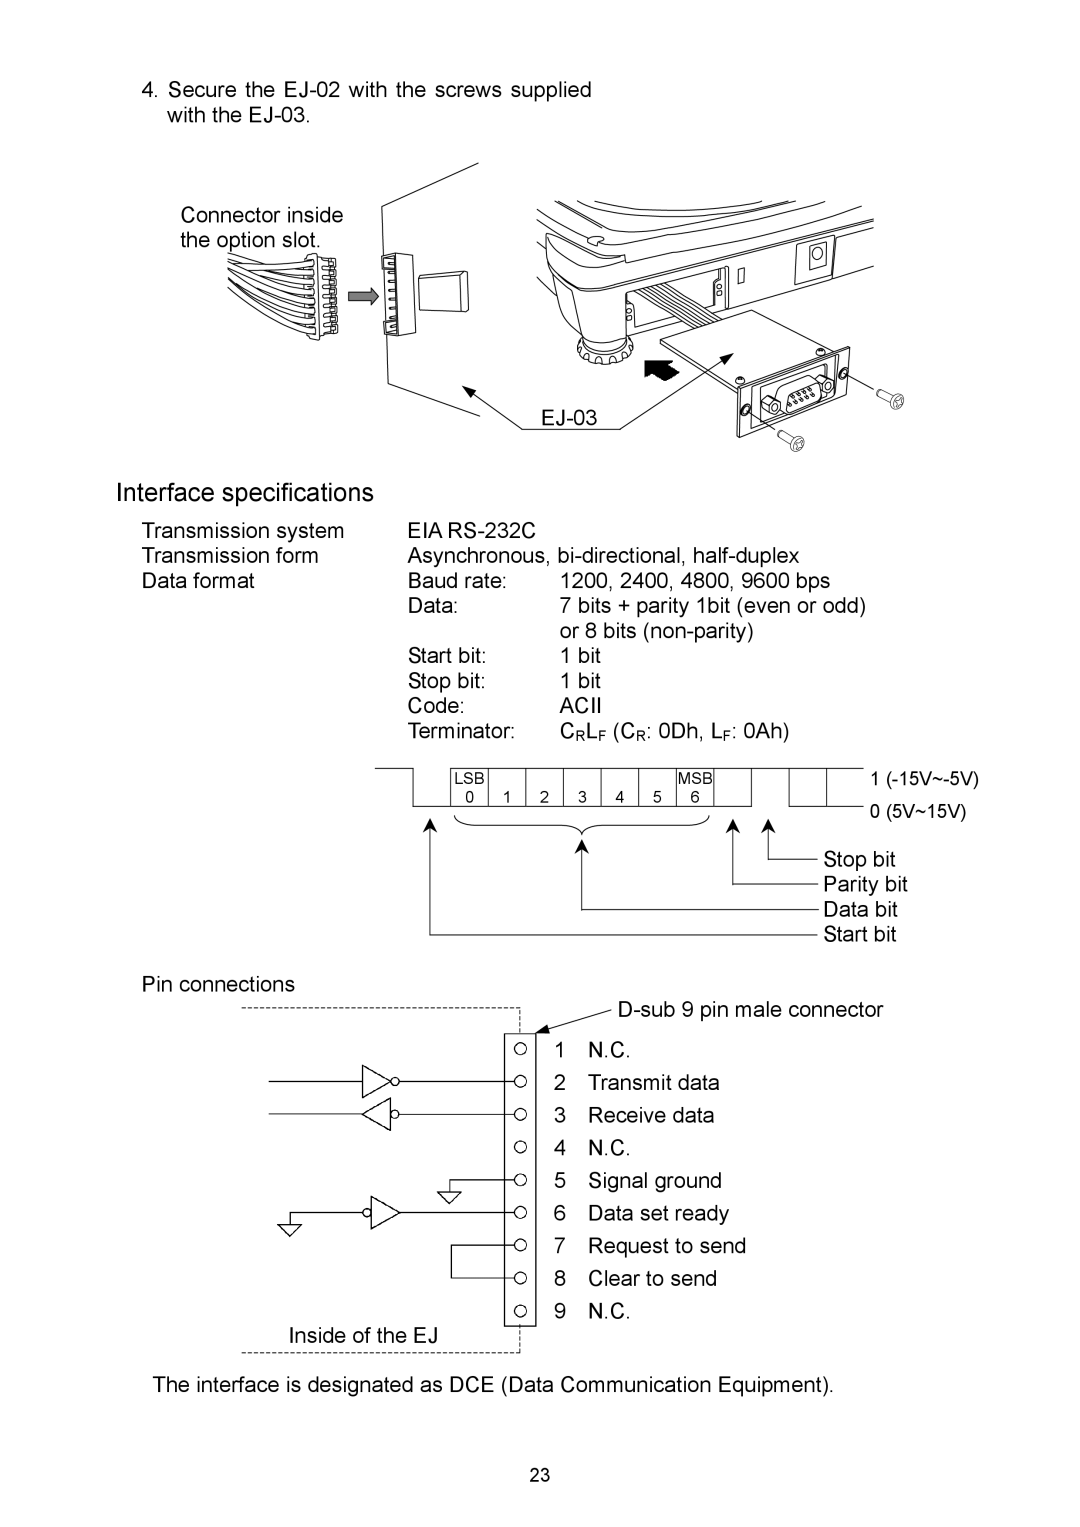
When using the dry-cell batteries
Prepare 4 x AA size (LR6 / R6P) dry cell batteries. The batteries are not included in the product,
![]() CAUTION
CAUTION
Take great care of the polarity of batteries. The polarity marks are shown in the battery box.
Replace used batteries with four new ones when “lb0” is displayed.
Do not mix used and new batteries. Do not mix the battery type. It may cause damage to the batteries and the balance.
The battery life depends on the ambient temperature, how to use and so on.
5
