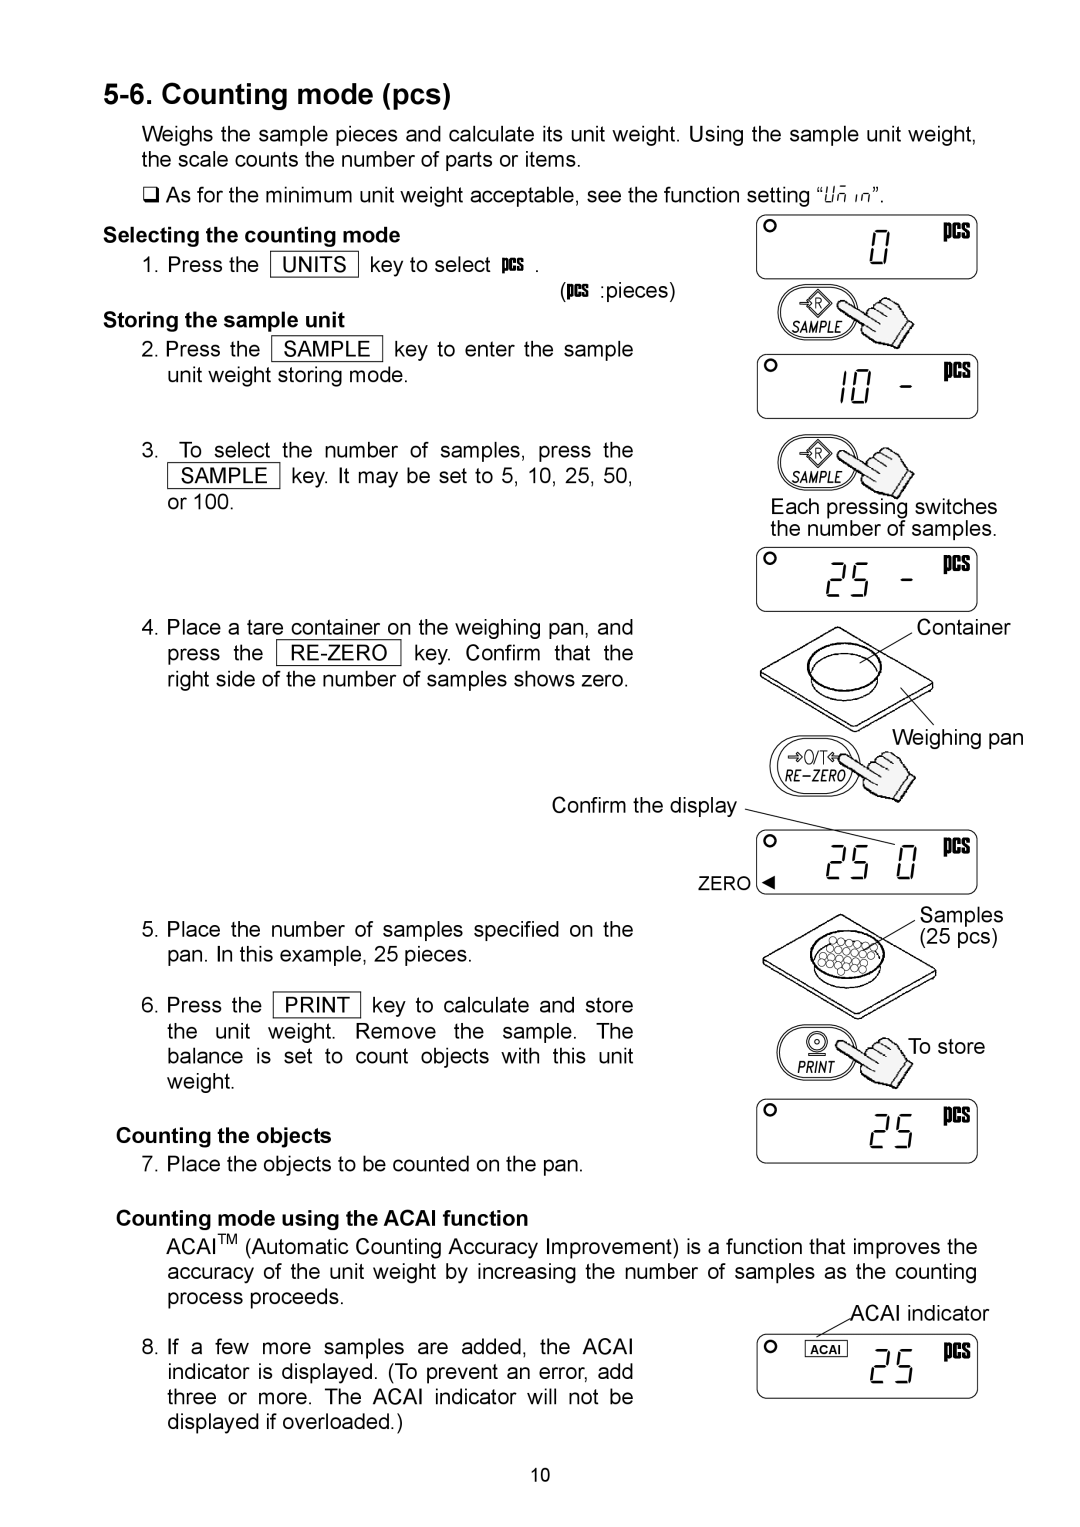
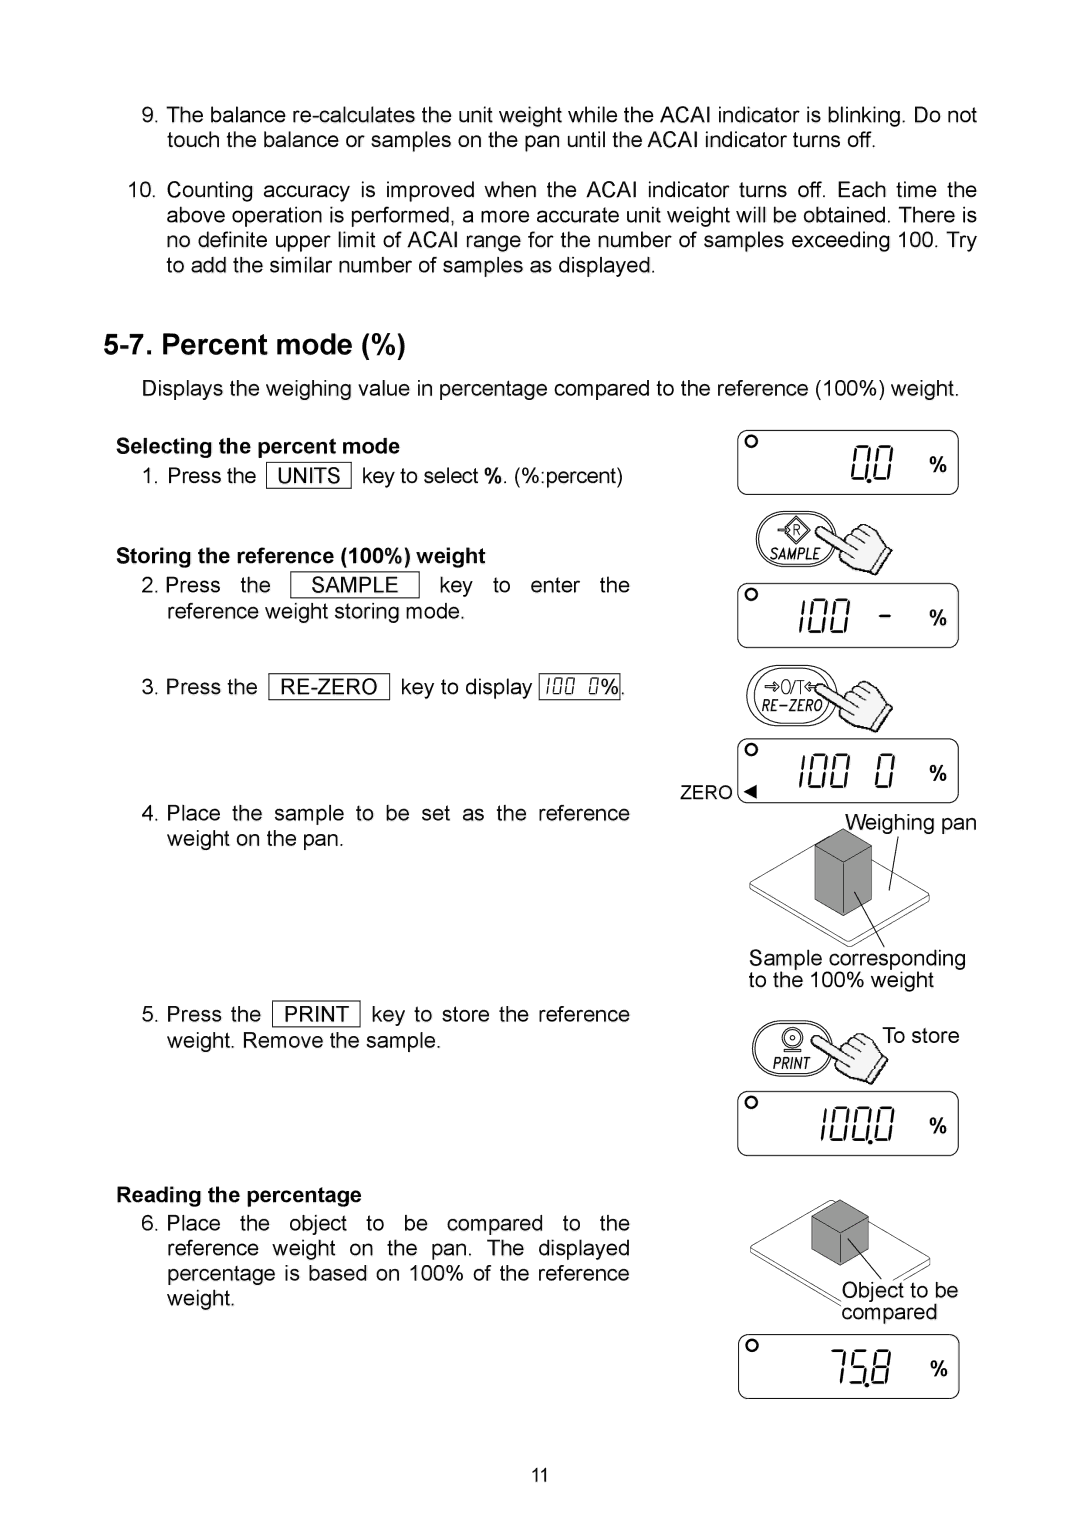
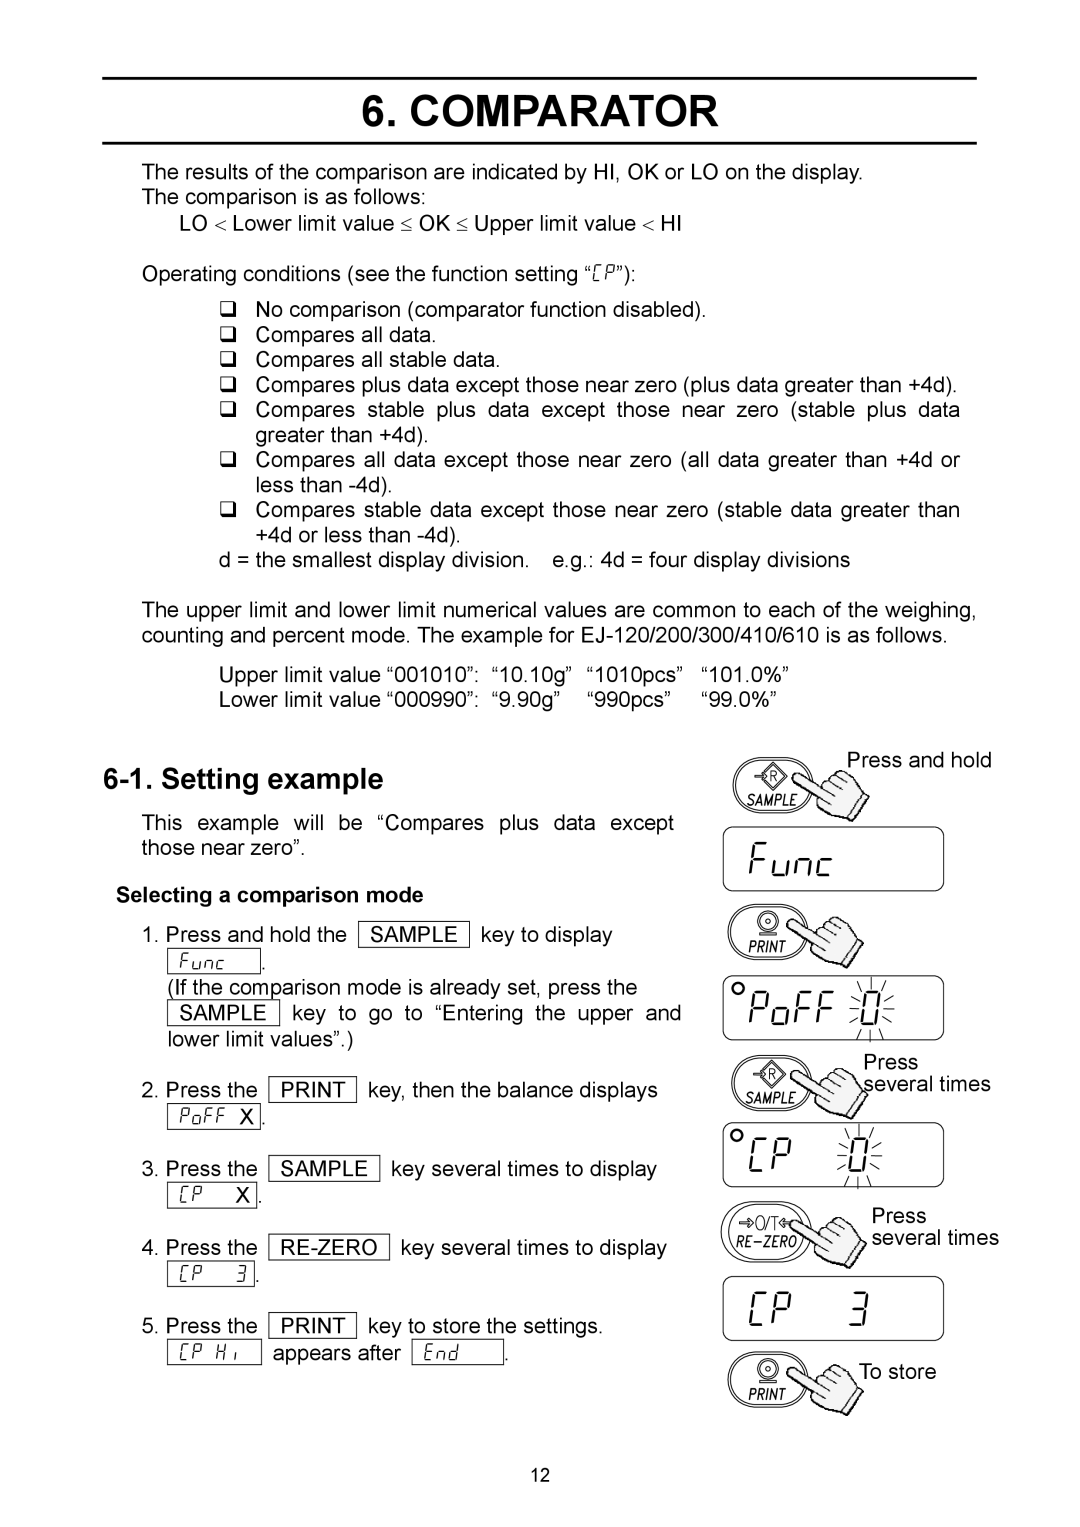
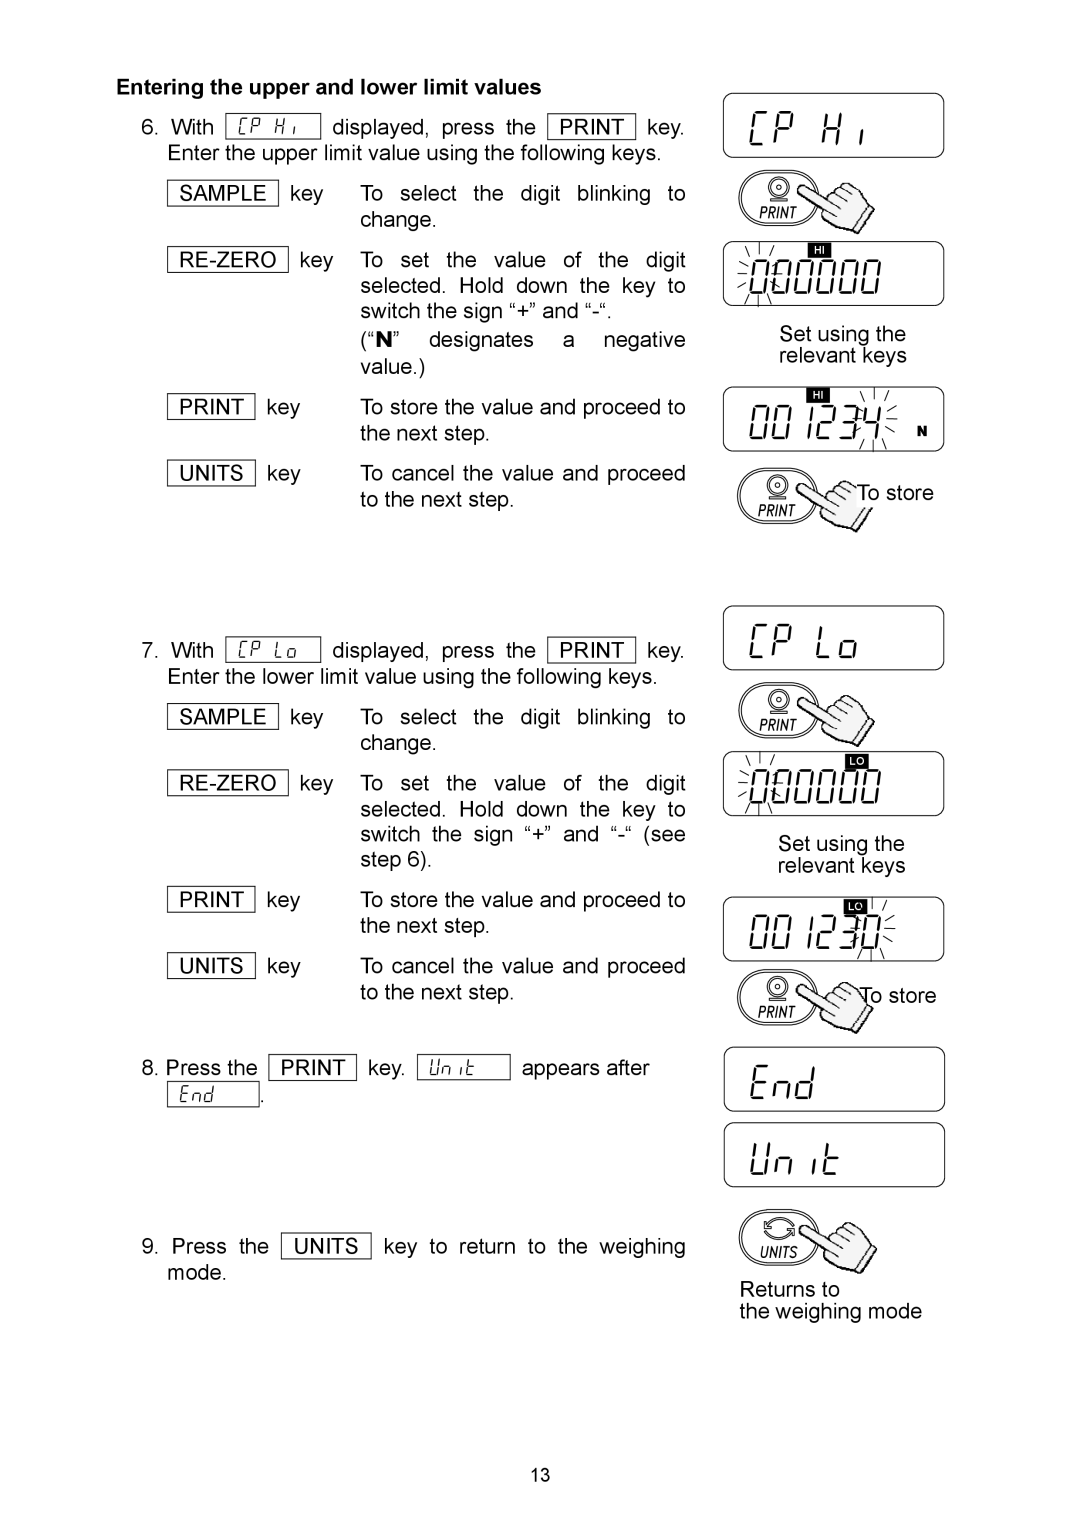
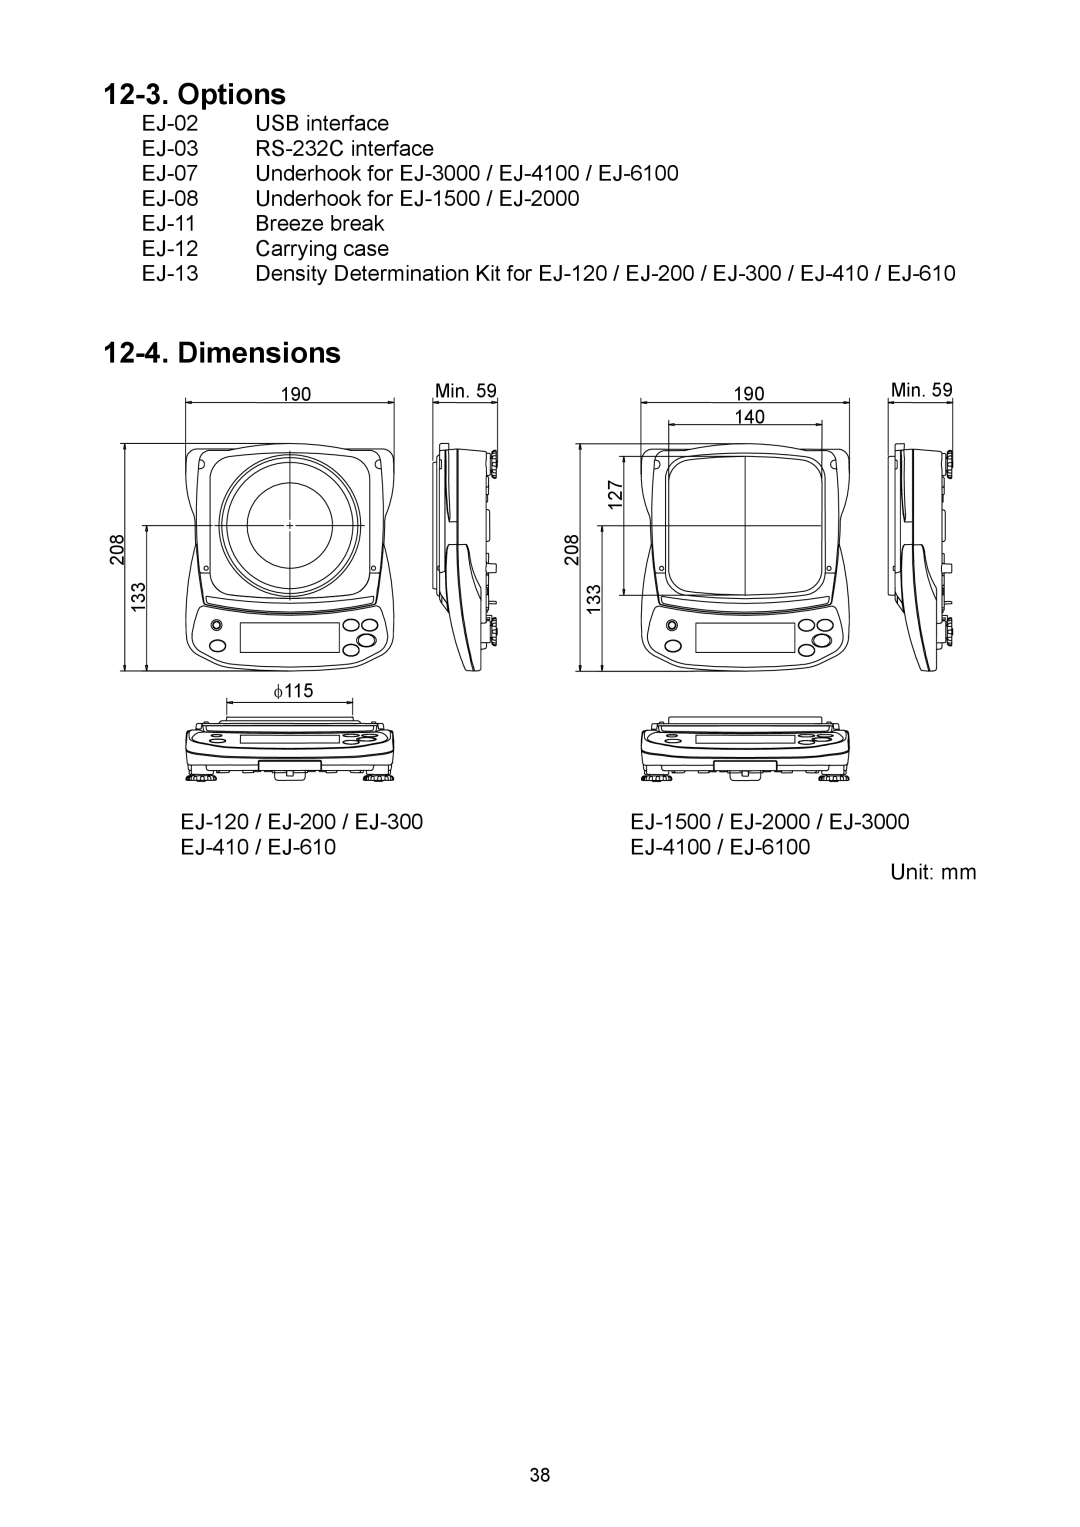
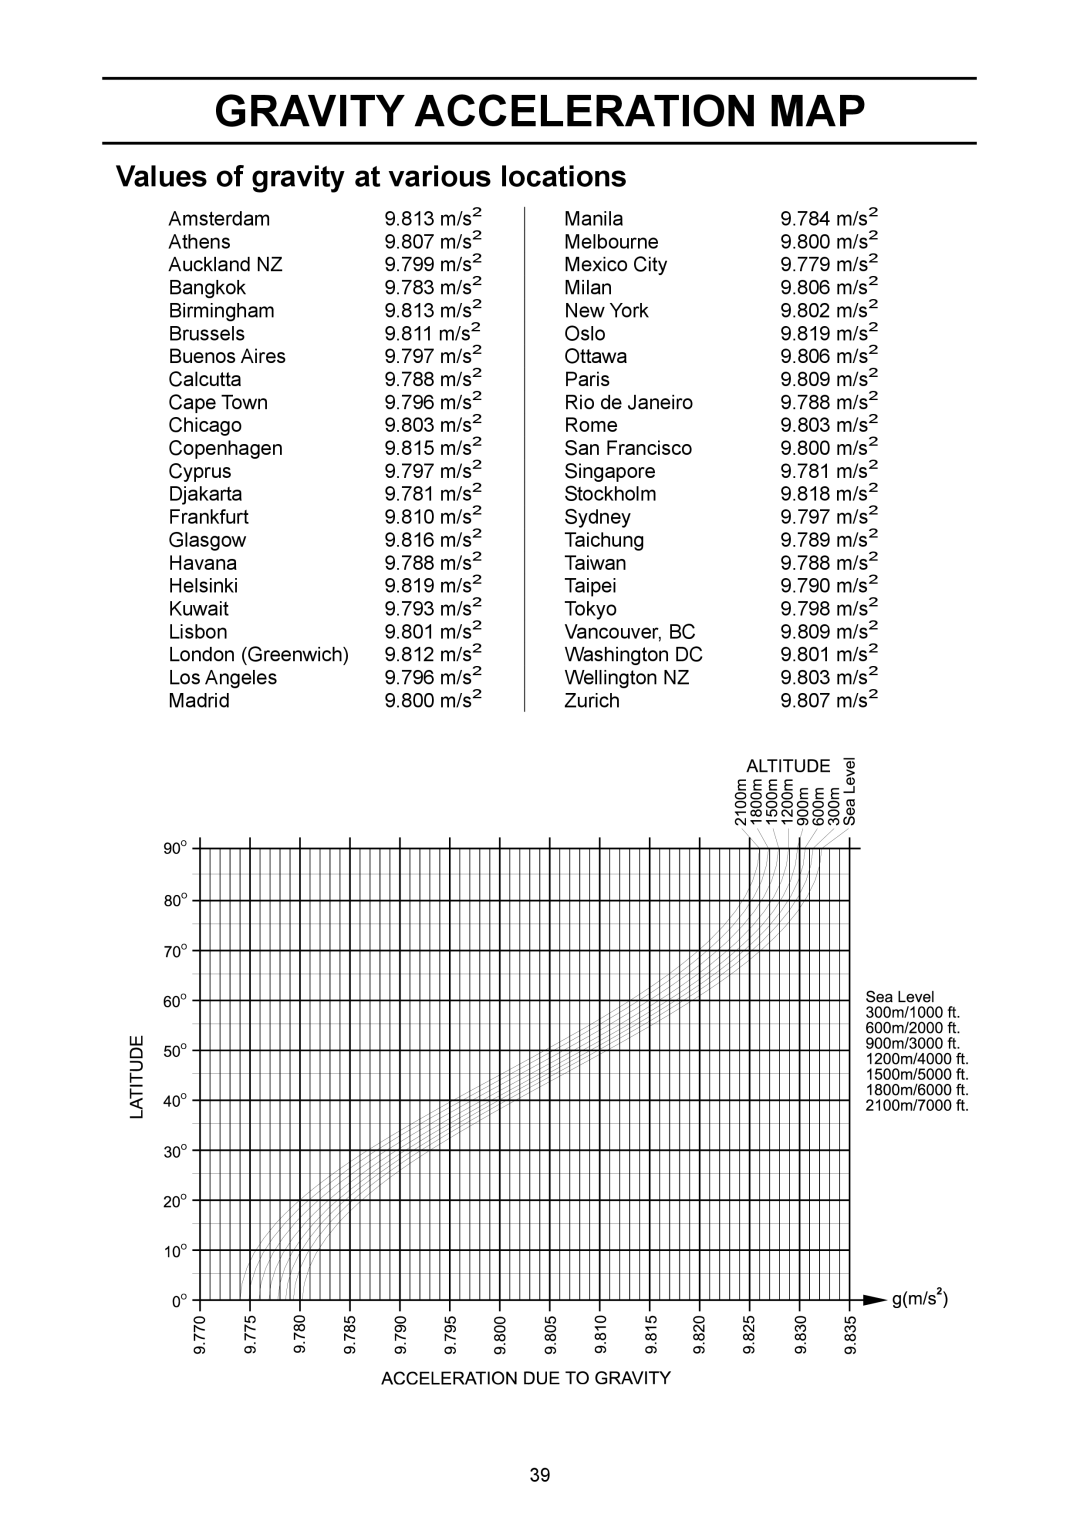
A&D EJ-3000 Options, EJ-02 USB Interface, EJ-03 RS-232C serial interface, EJ-03 Installation

Page 24

9. OPTIONS

The following options are available for the EJ series:

‰EJ-02 USB interface

‰EJ-03 RS-232C serial interface

‰EJ-07 Underhook for EJ-3000 / EJ-4100 / EJ-6100

‰EJ-08 Underhook for EJ-1500 / EJ-2000

‰EJ-11 Breeze break

‰EJ-12 Carrying case

‰EJ-13 Density Determination Kit for EJ-120 / EJ-200 / EJ-300 / EJ-410 / EJ-610

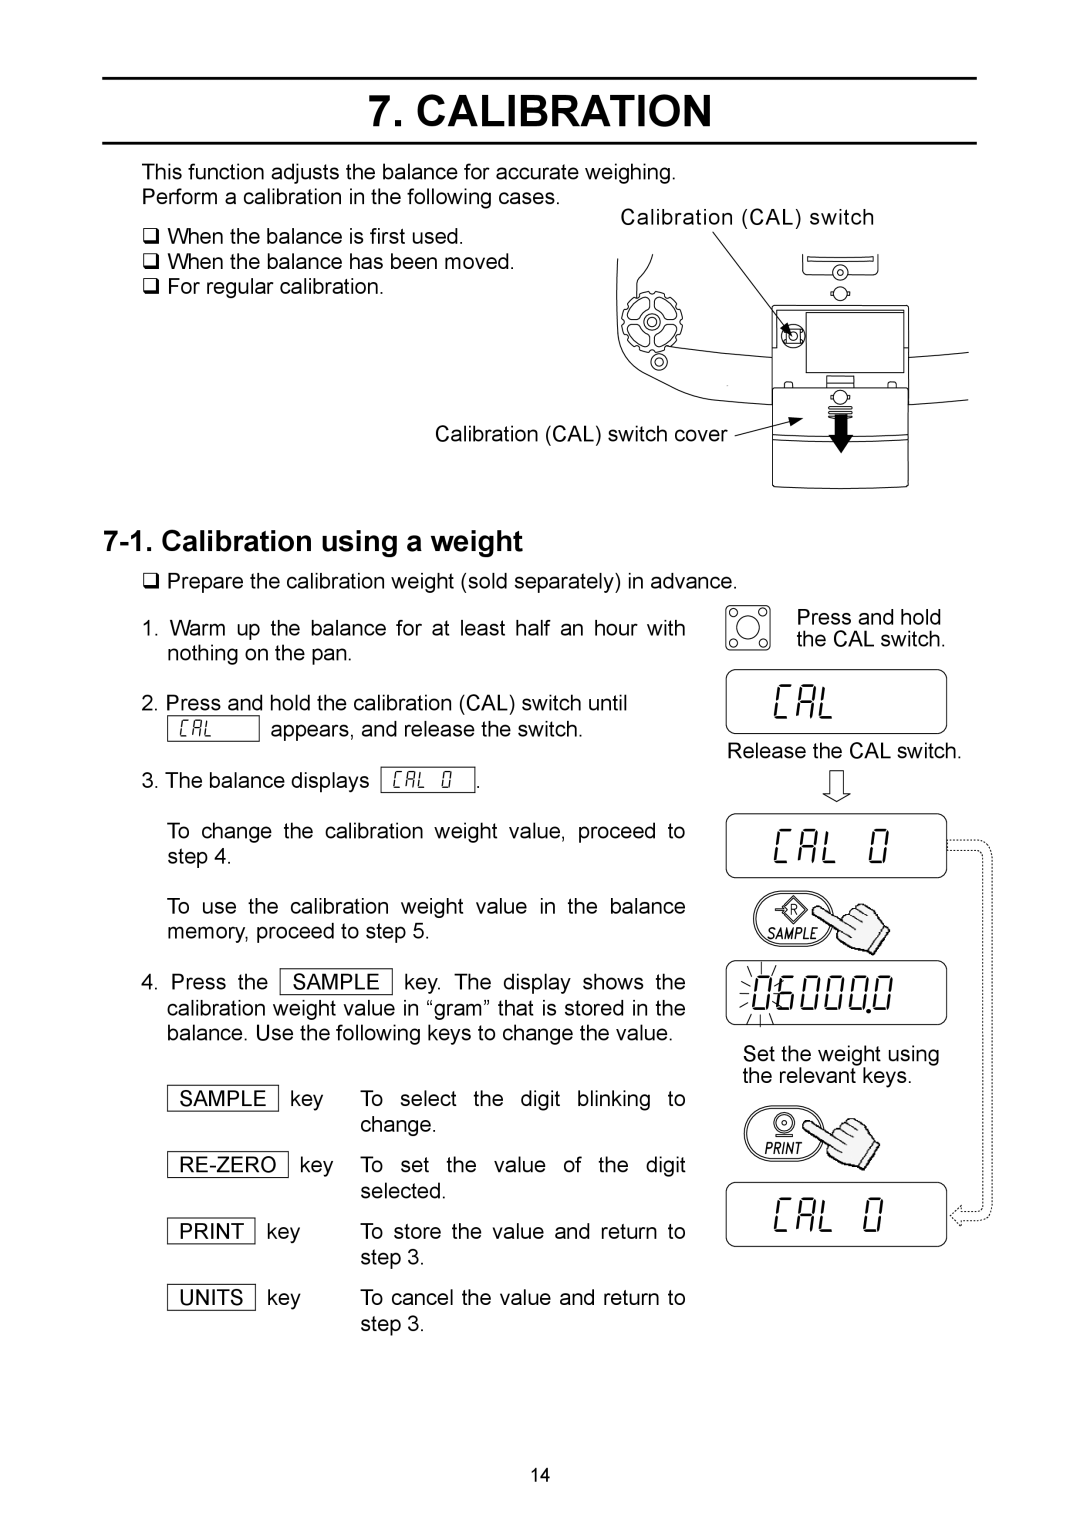
9-1. EJ-02 USB Interface

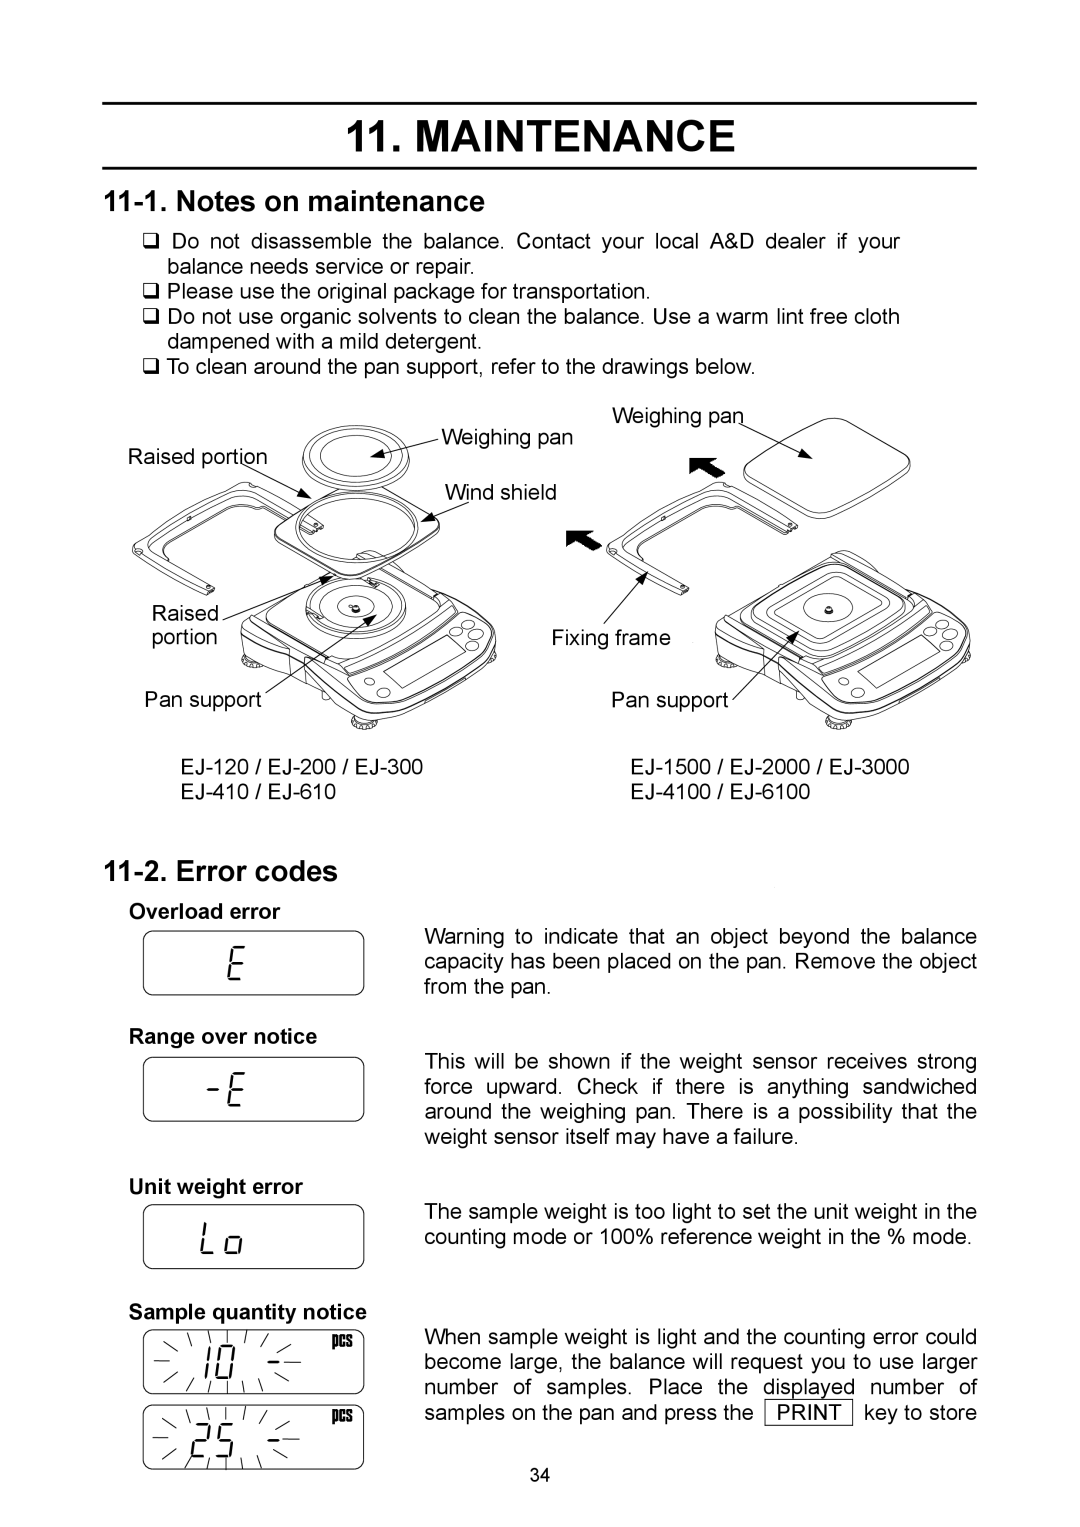
‰EJ-02 cannot be used together with EJ-03.

‰The EJ-02 is installed to the same slot as EJ-03 and see “9-2. EJ-03 RS-232C serial interface”.

‰The EJ-02 will be used to transmit the weight data (numerical value only) uni-directionally to a personal computer via USB.

‰The EJ-02 can transmit the weight data (numerical value only) directly to other application software such as Microsoft Excel, Word, memo pad, and so on.

‰The driver is not necessary to install.

‰The EJ-02 cannot be used for bidirectional communication.

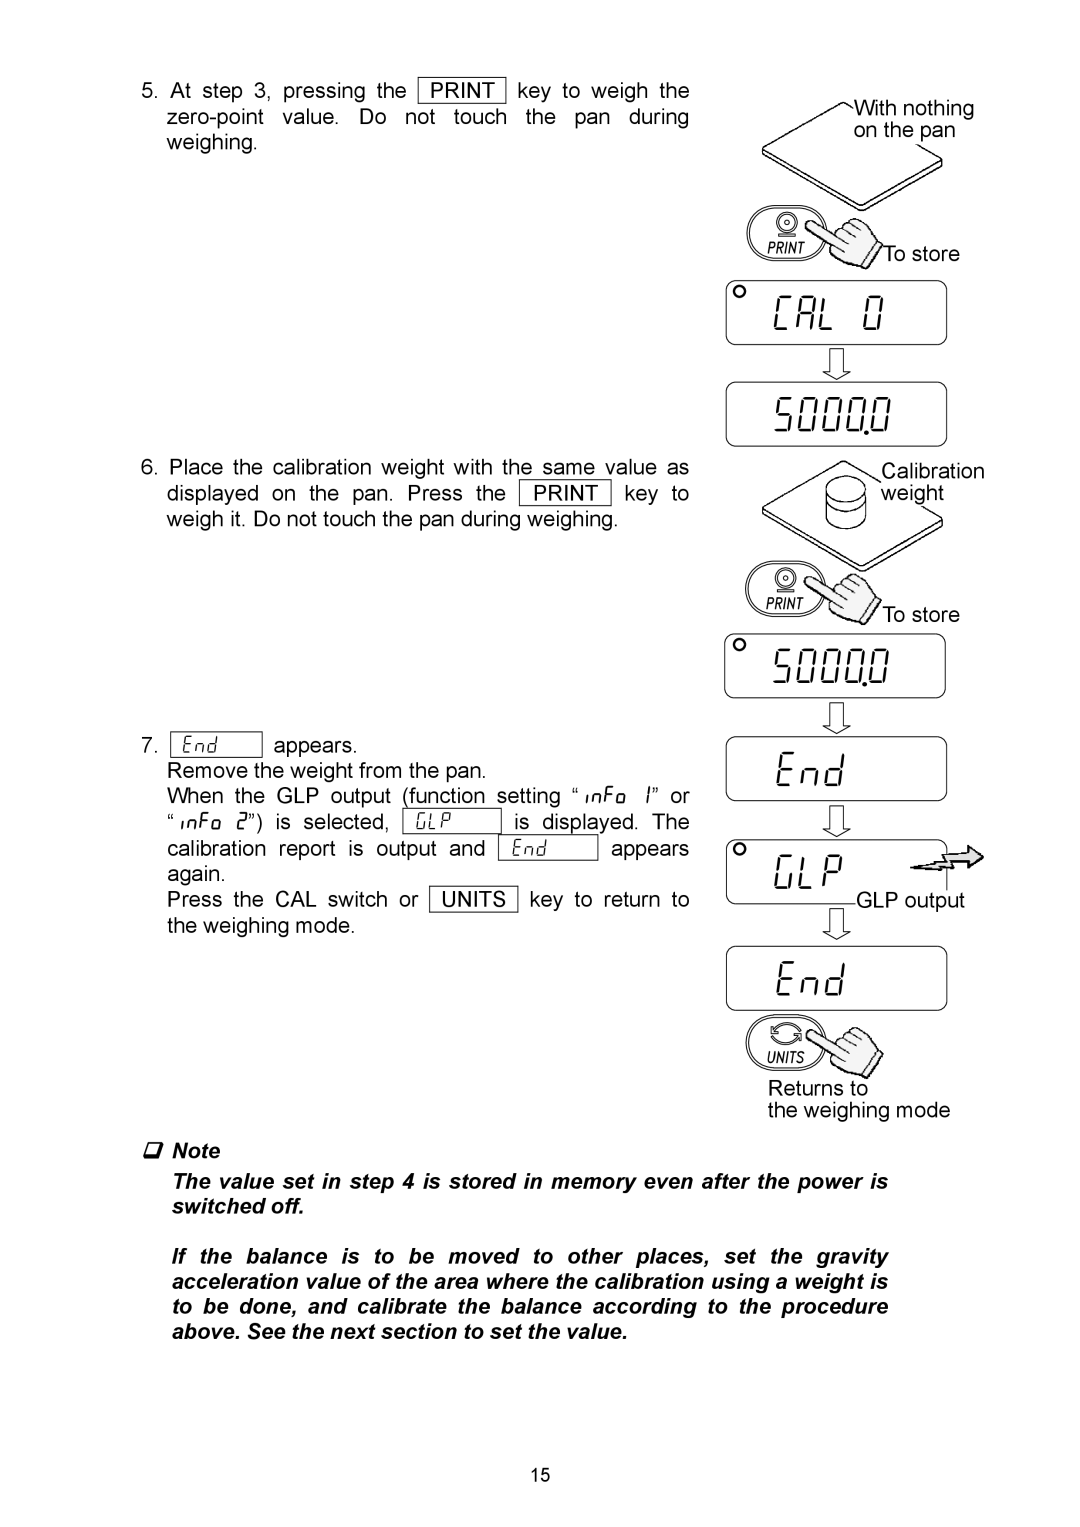
9-2. EJ-03 RS-232C serial interface

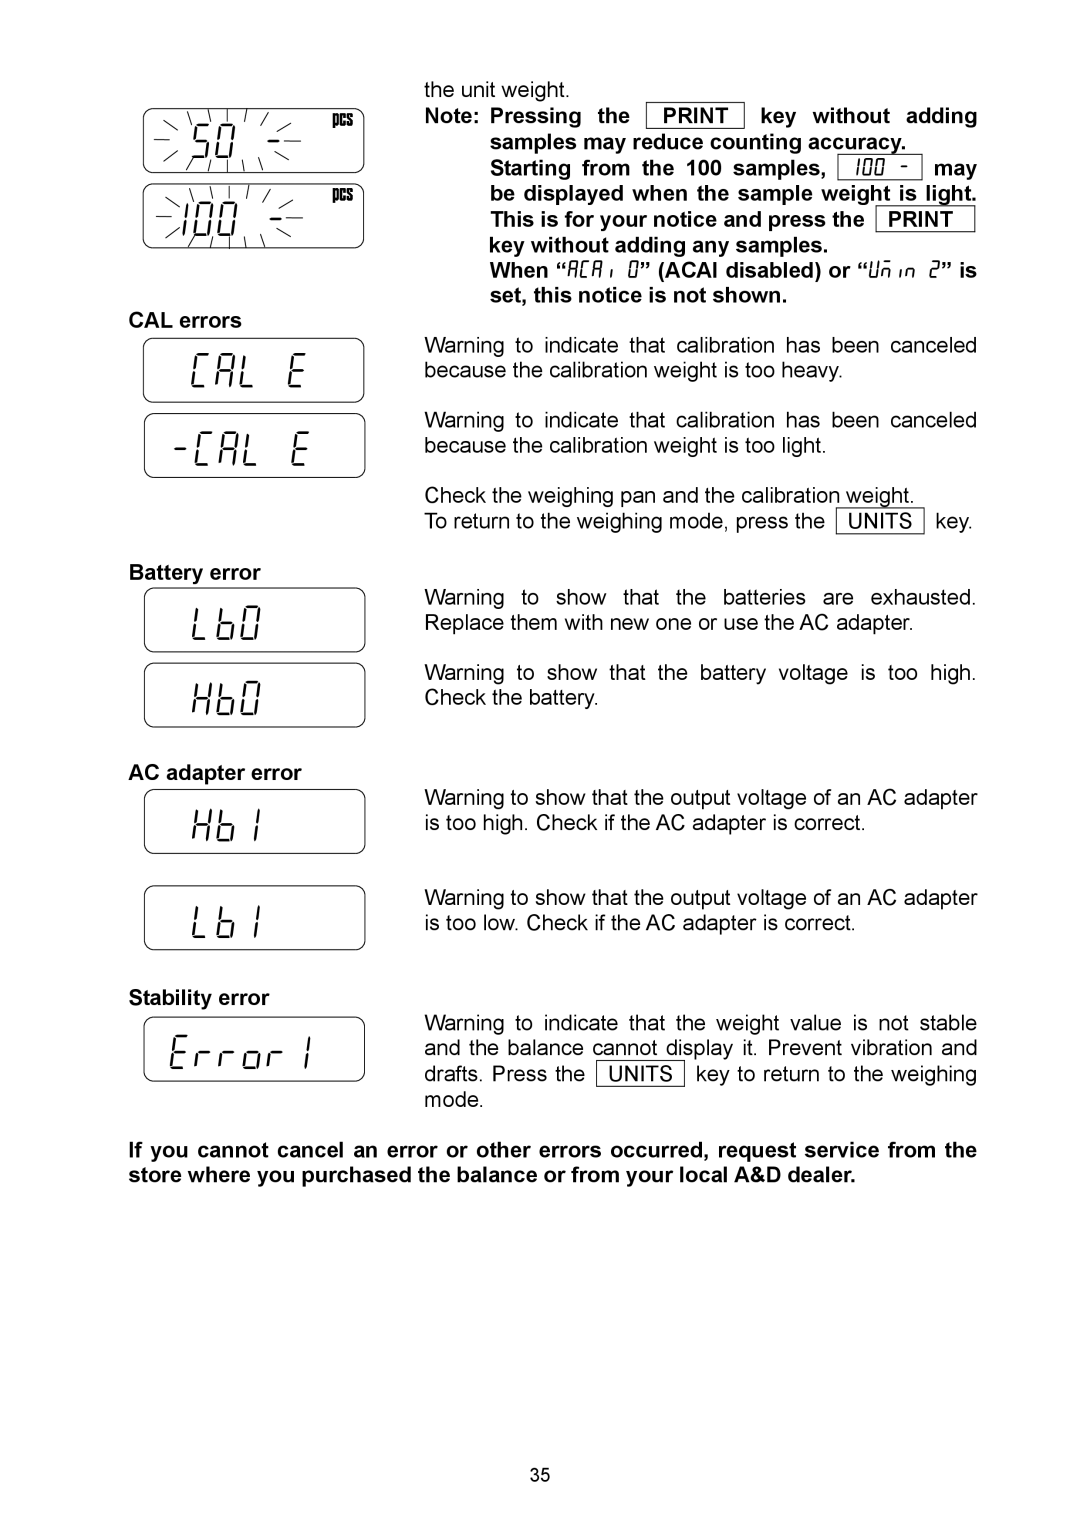
This interface allows the EJ series to be connected with a multifunction printer or a personal computer.

‰EJ-03 cannot be used together with EJ-02.

‰The RS-232C interface has the following four modes.

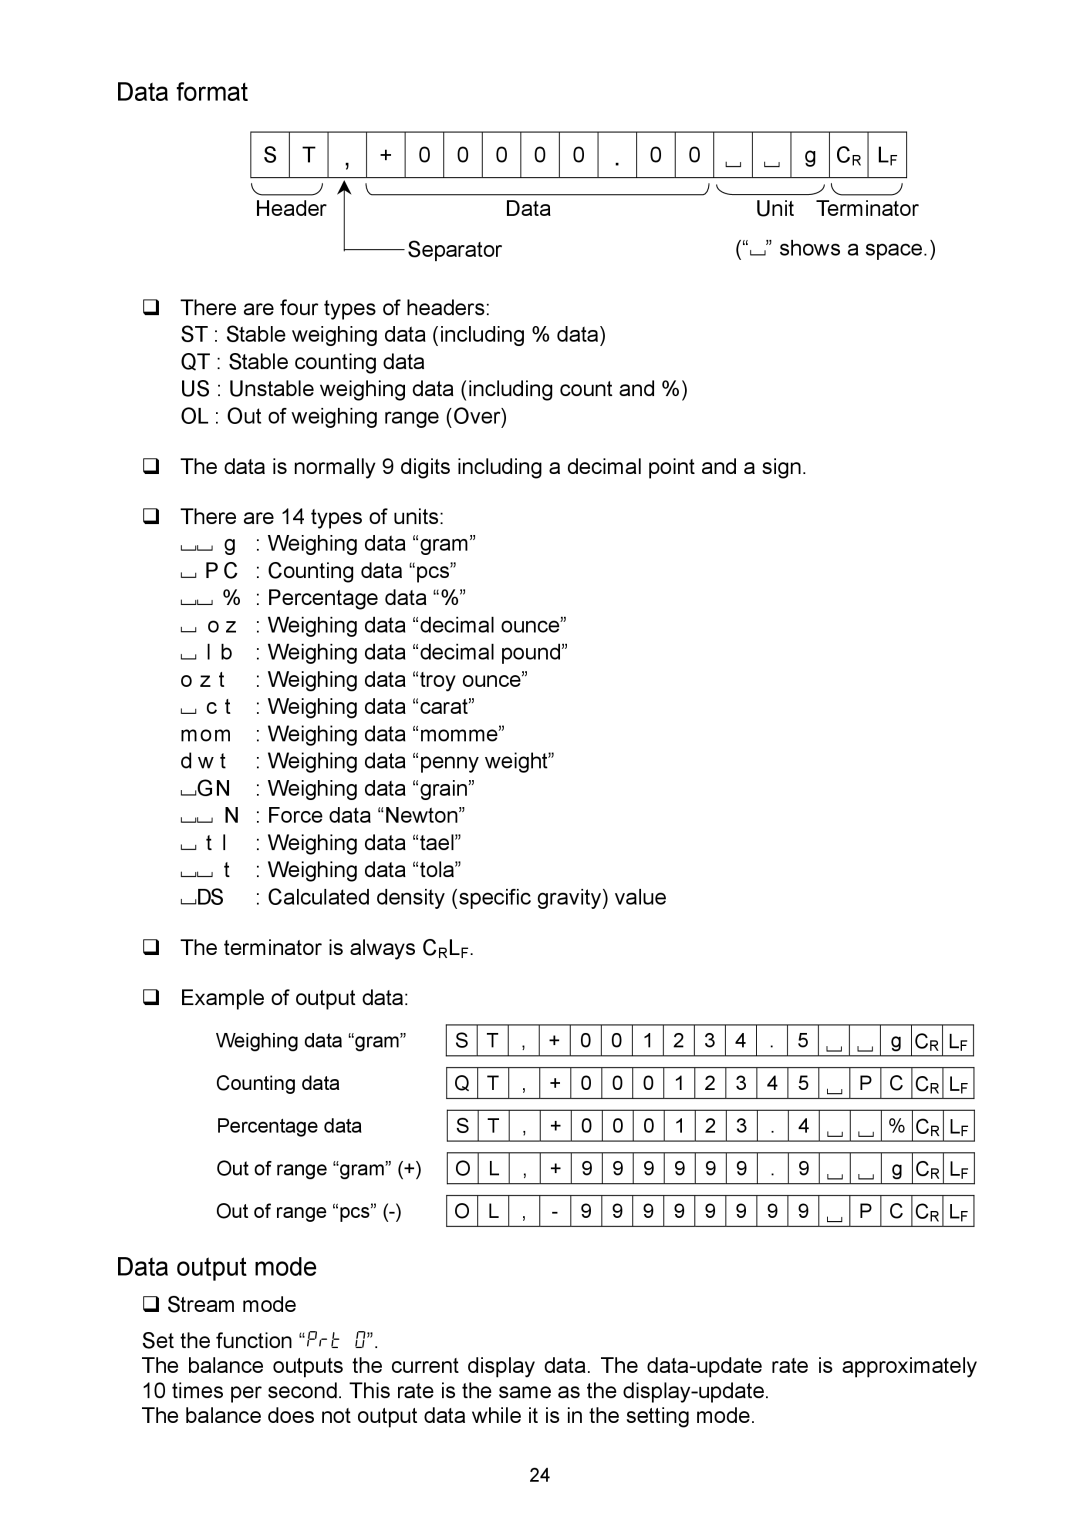
Stream mode

Outputs data continuously.

Key mode

Outputs data by pressing the

PRINT

key.

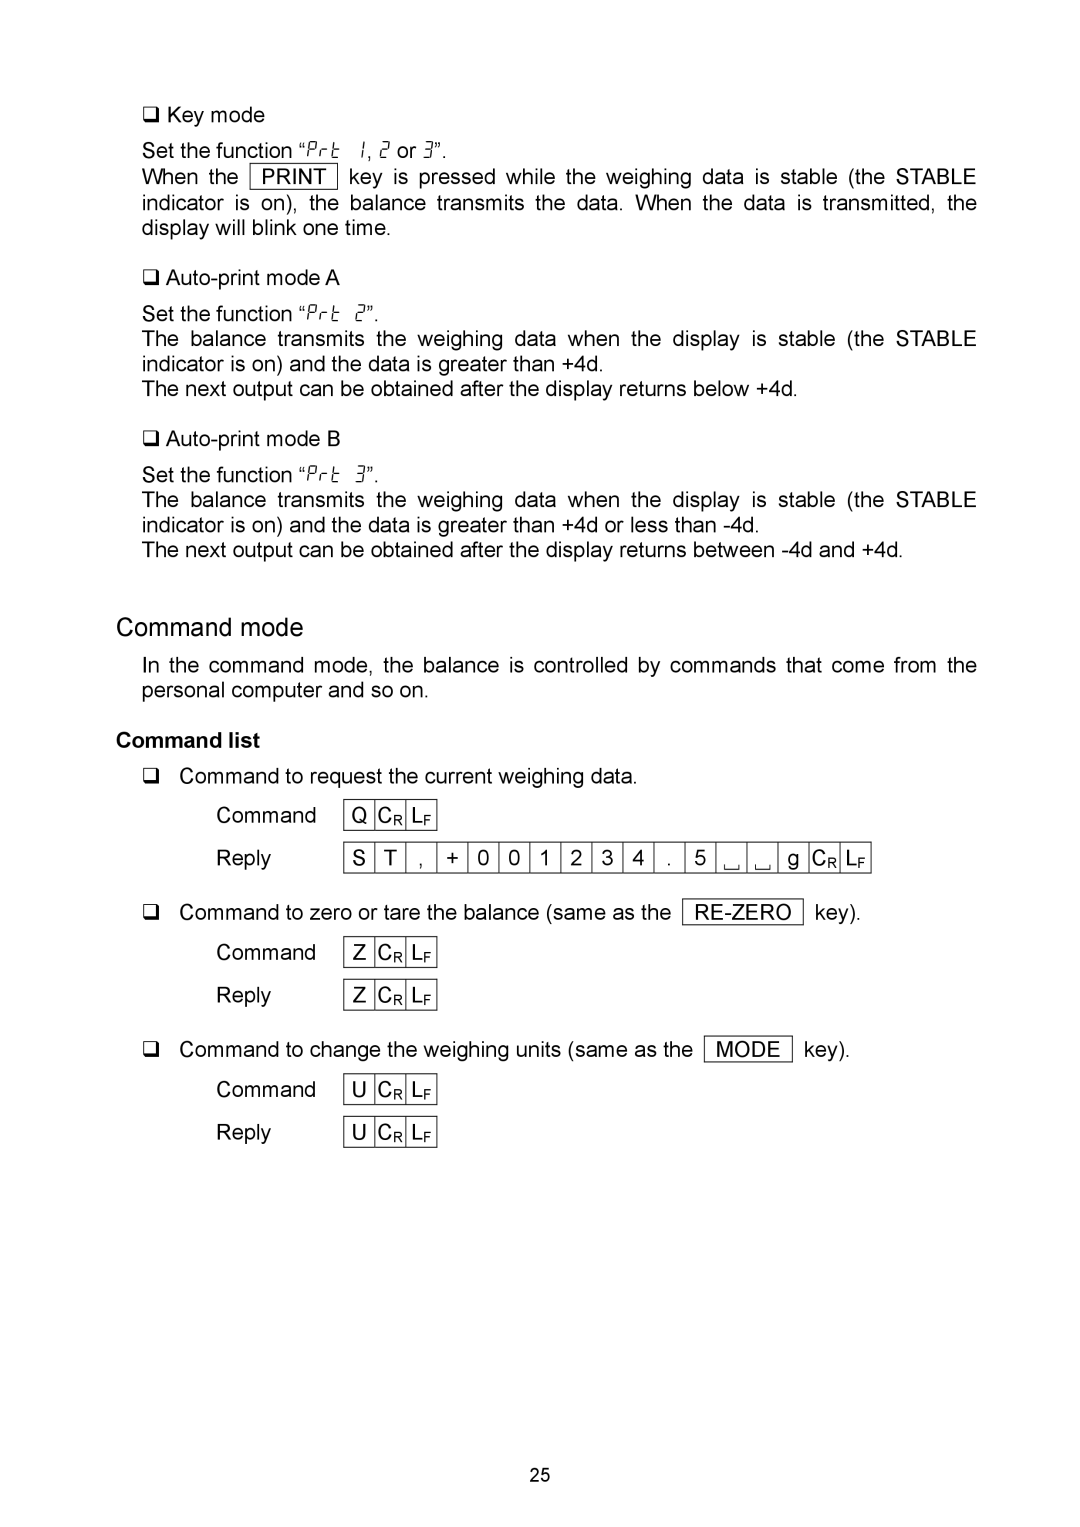
Auto-print mode

Outputs data which meets the

conditions

of auto-print.

Command mode

Controls the balance using commands from a computer.

‰Set the parameters of the data format (bps and btpr) and data output mode (prt), as necessary.

‰Use a D-sub 9 pin cable (straight type) to connect with a computer. Optional cable: AX-KO2466-200 D-Sub 9 pin / 9 pin cable with 2 m long.

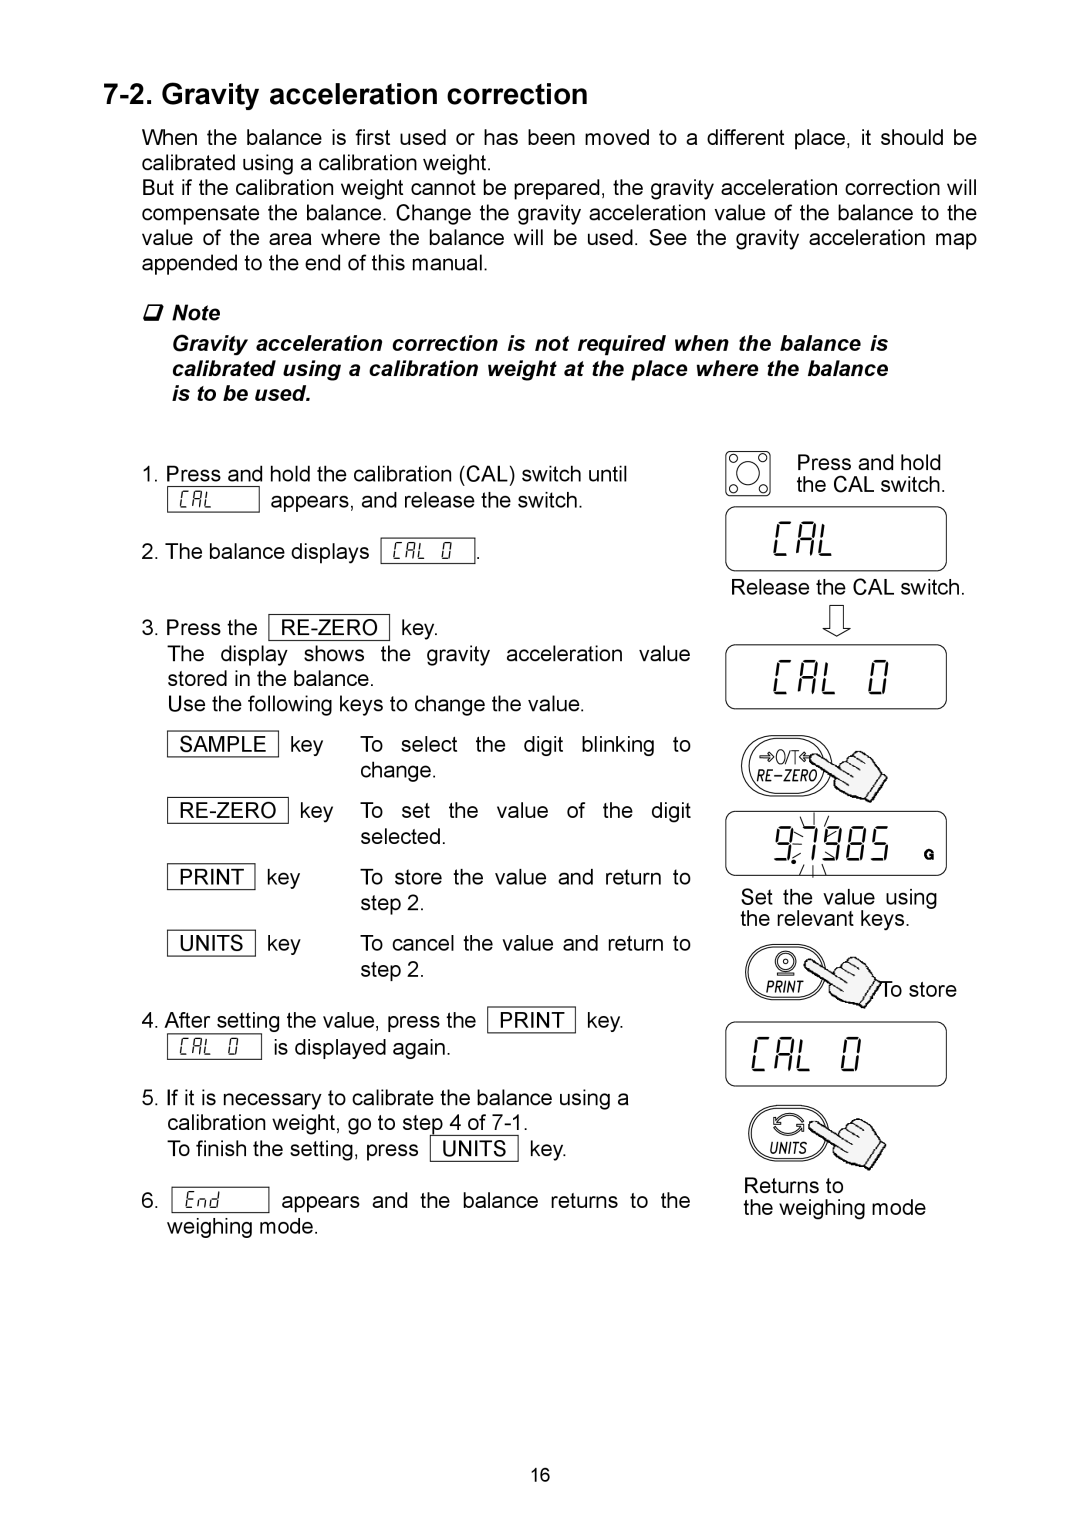
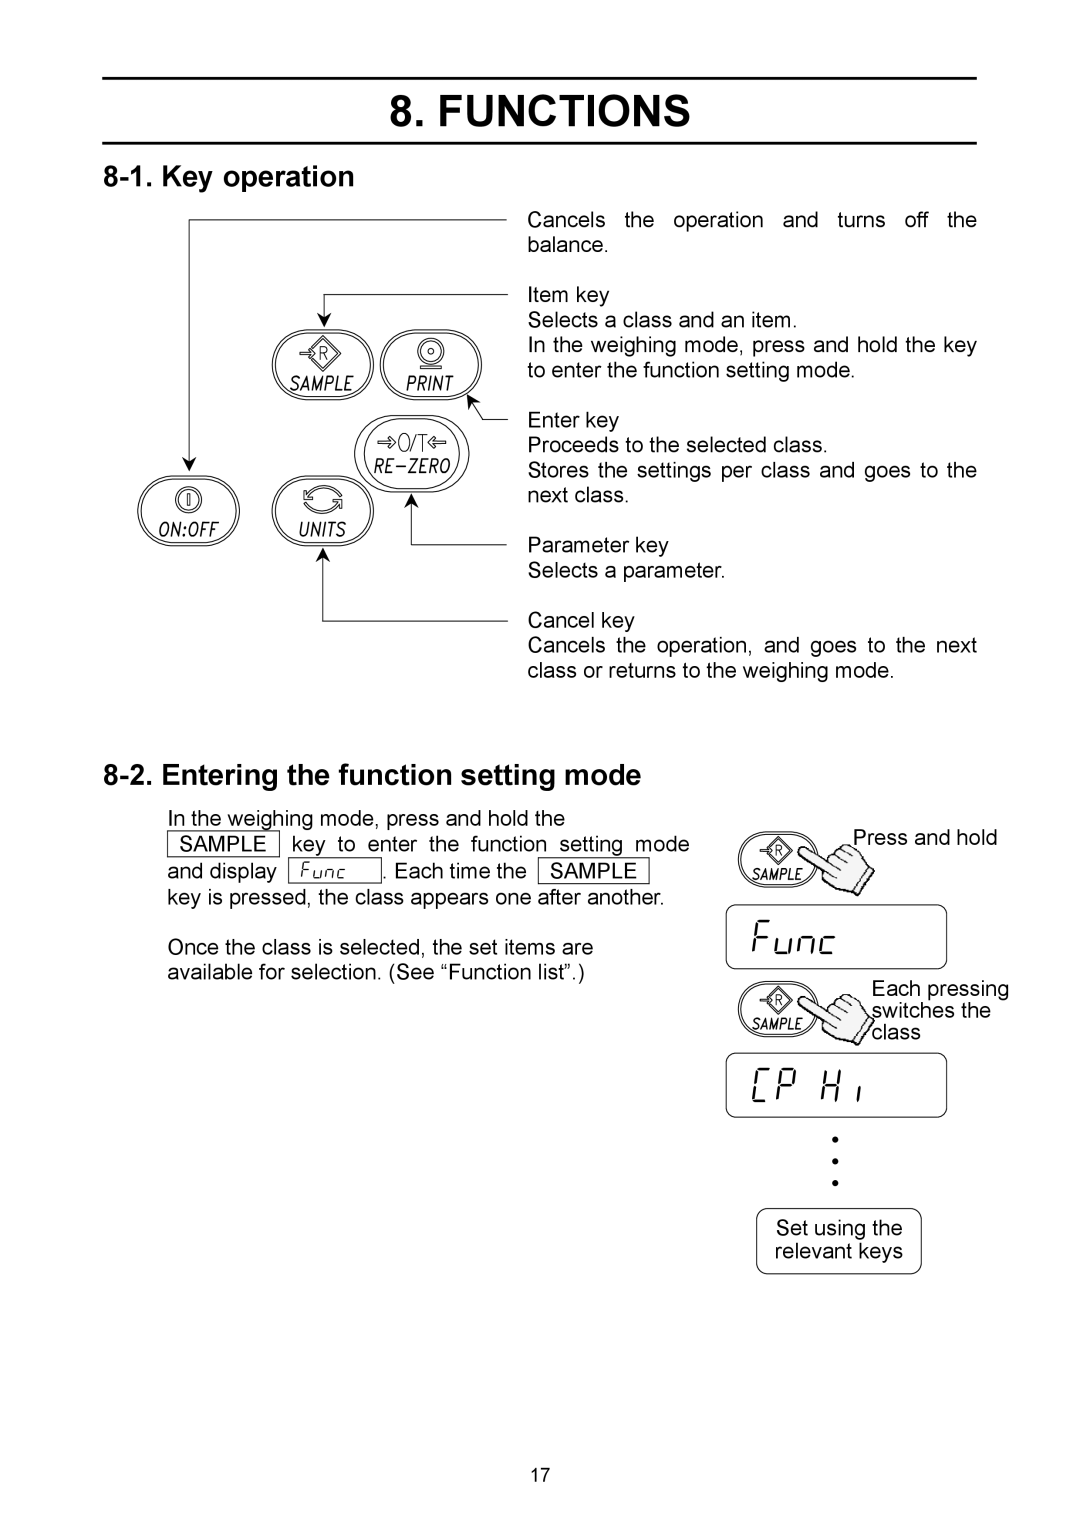
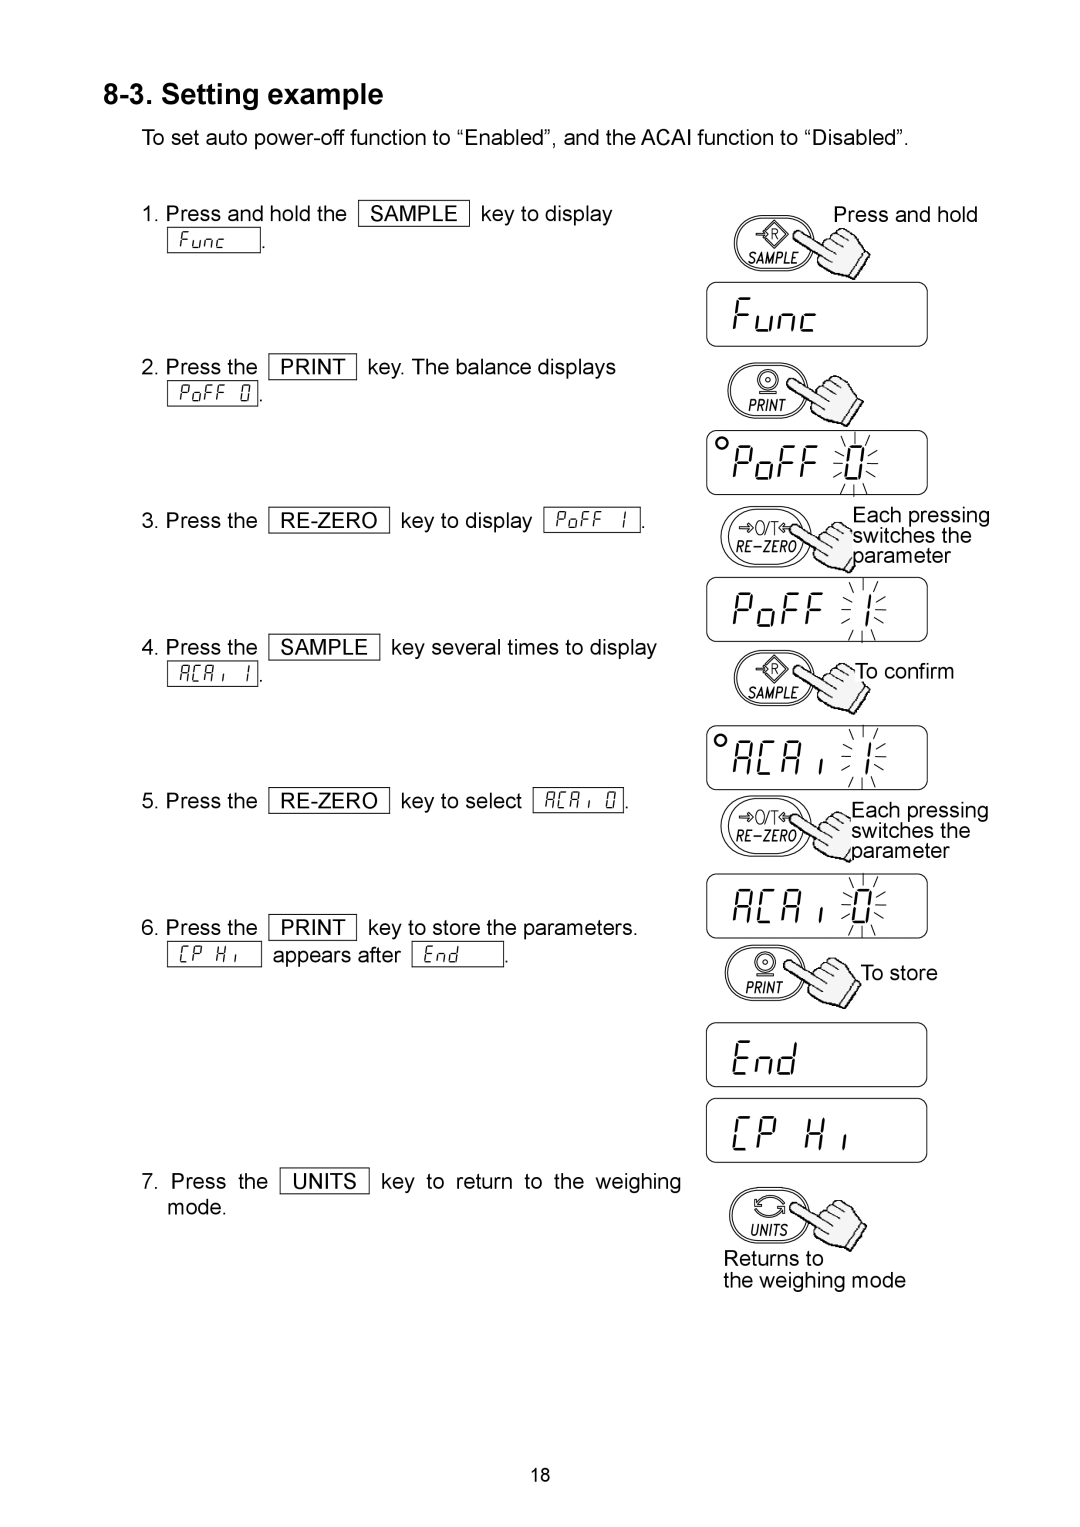
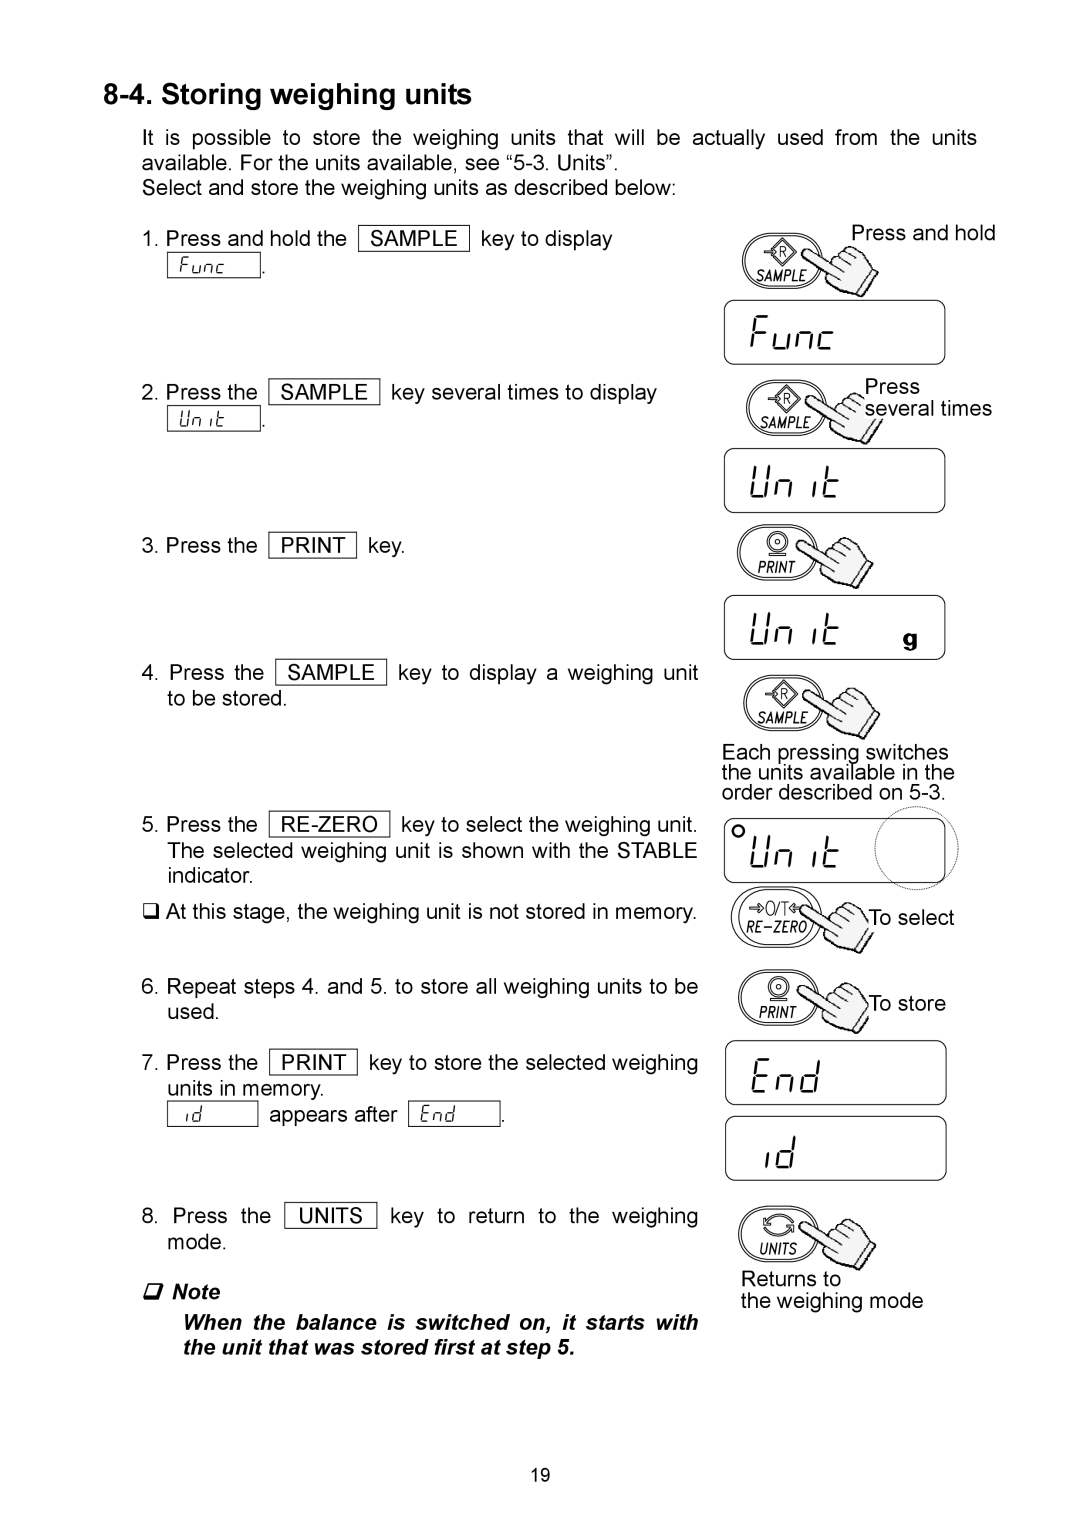
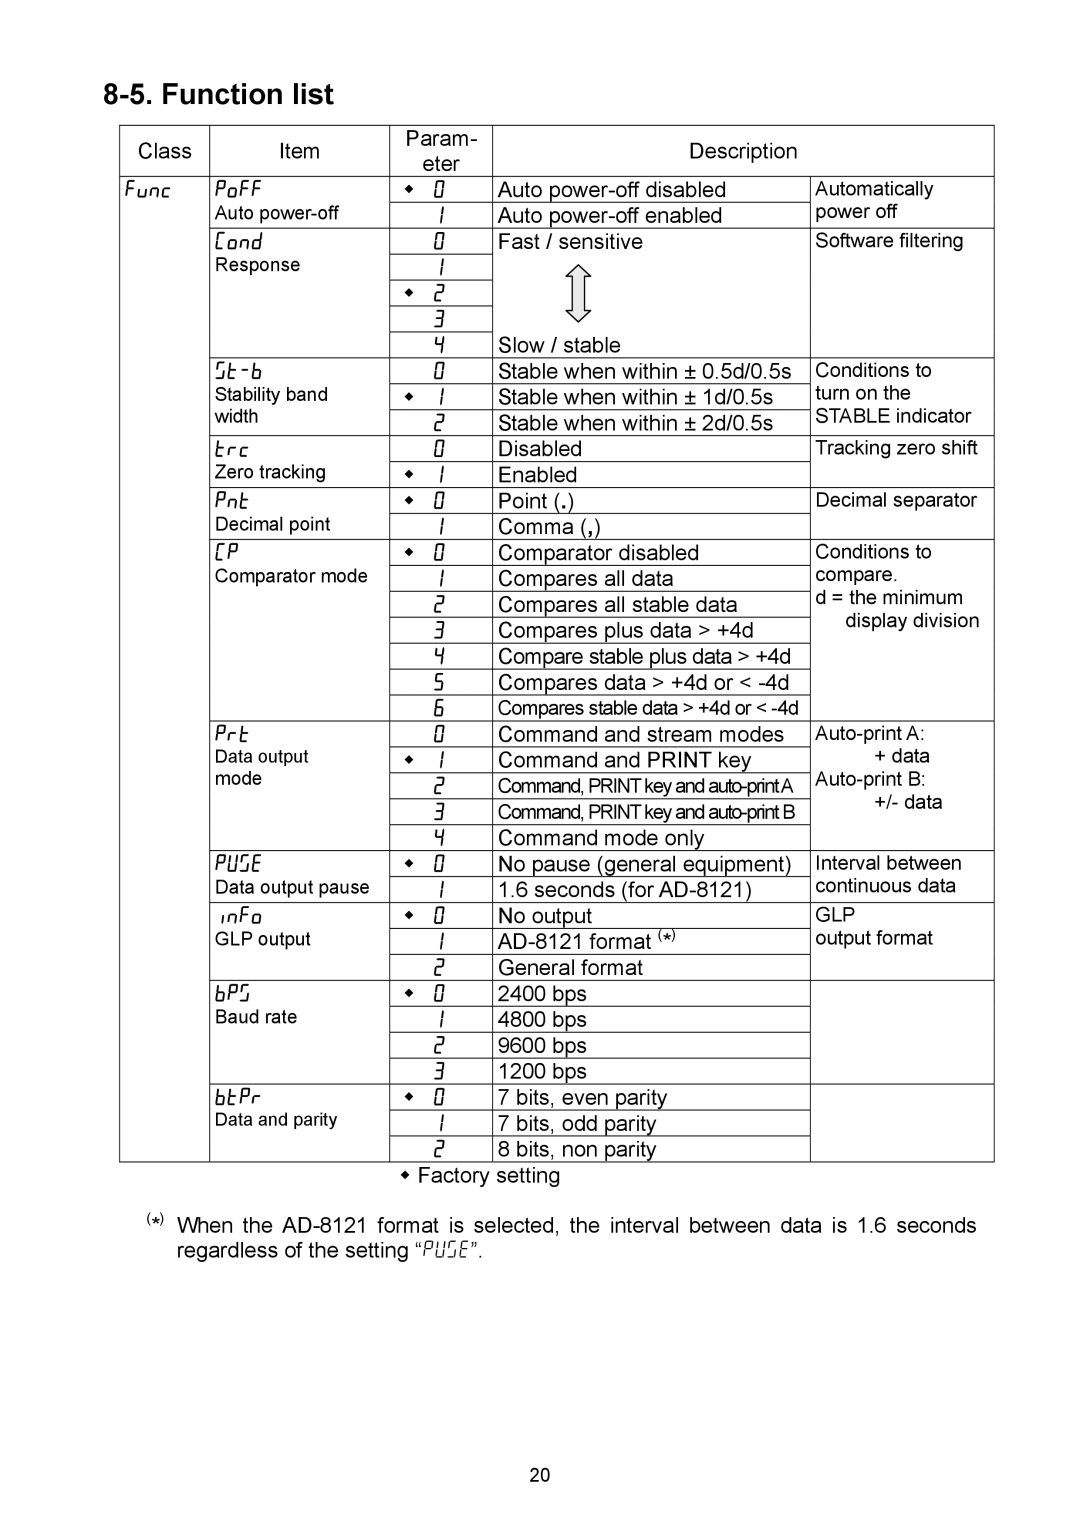
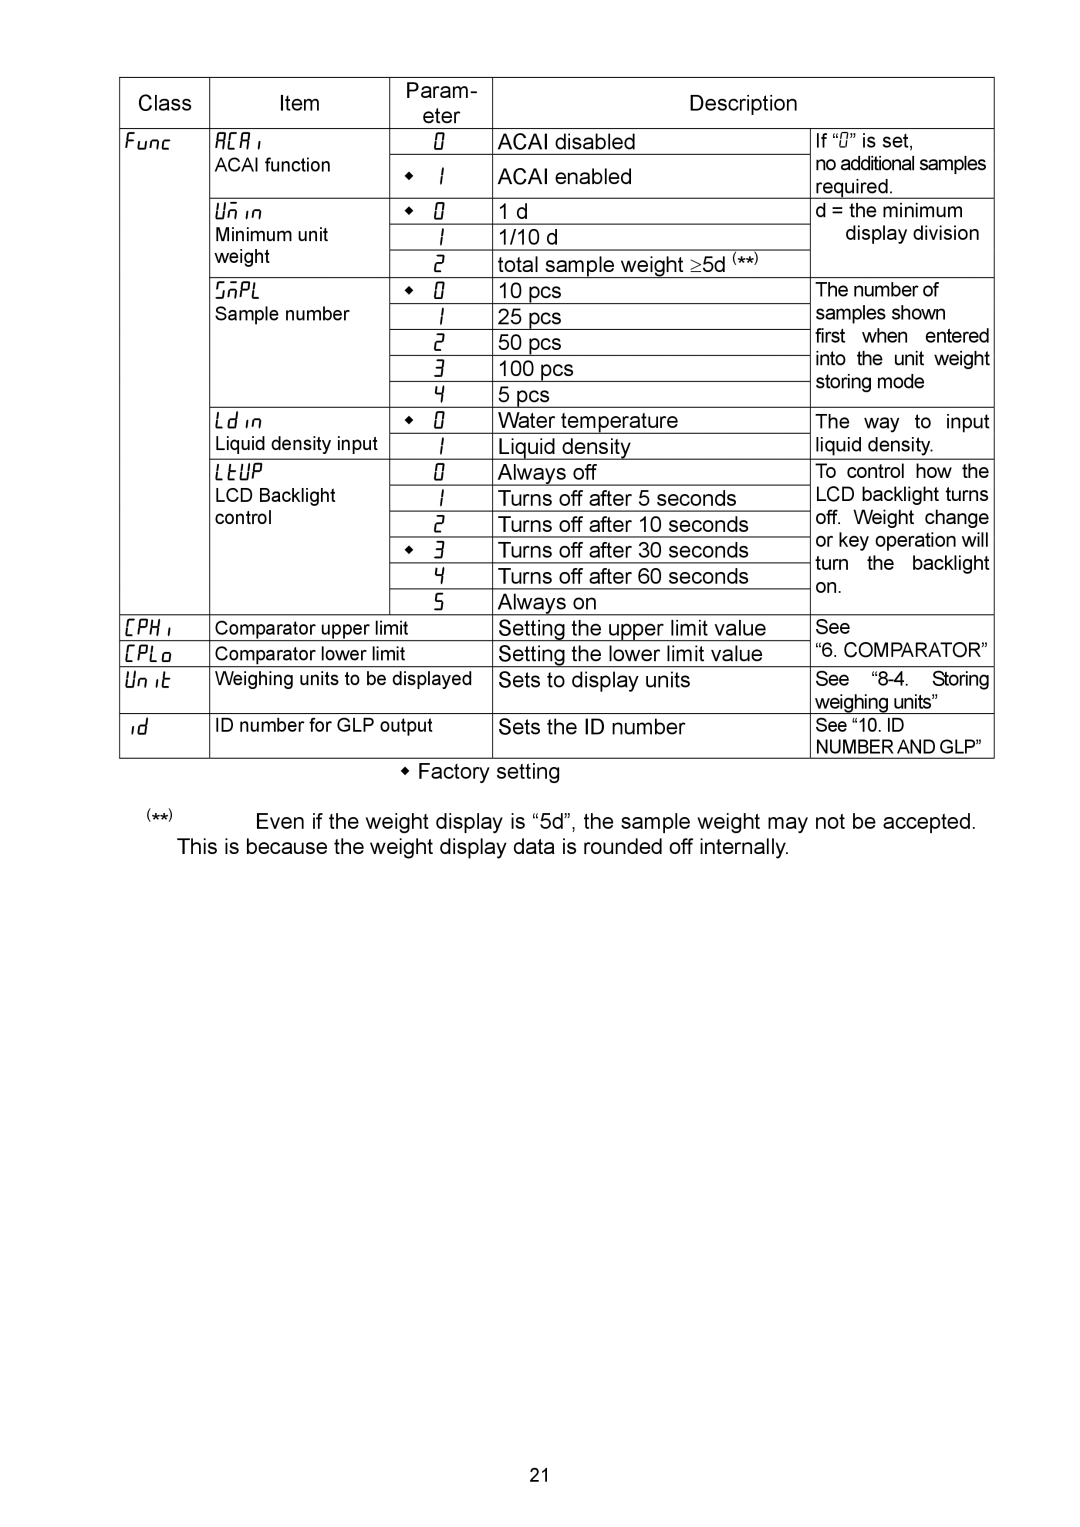
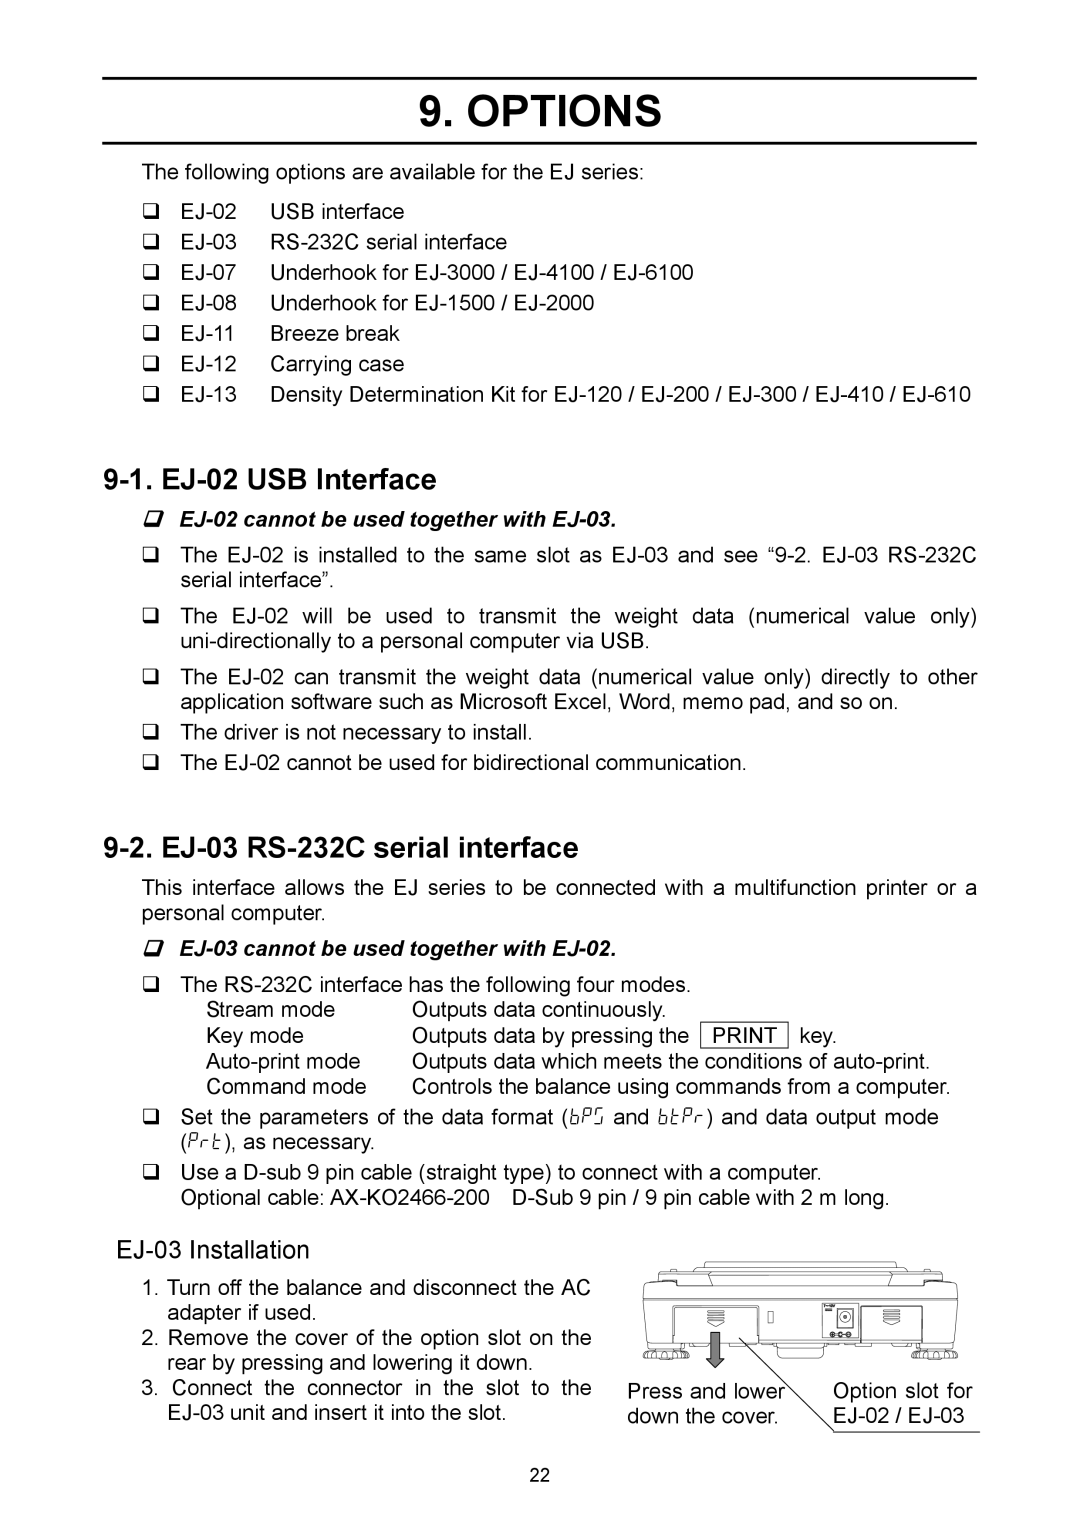
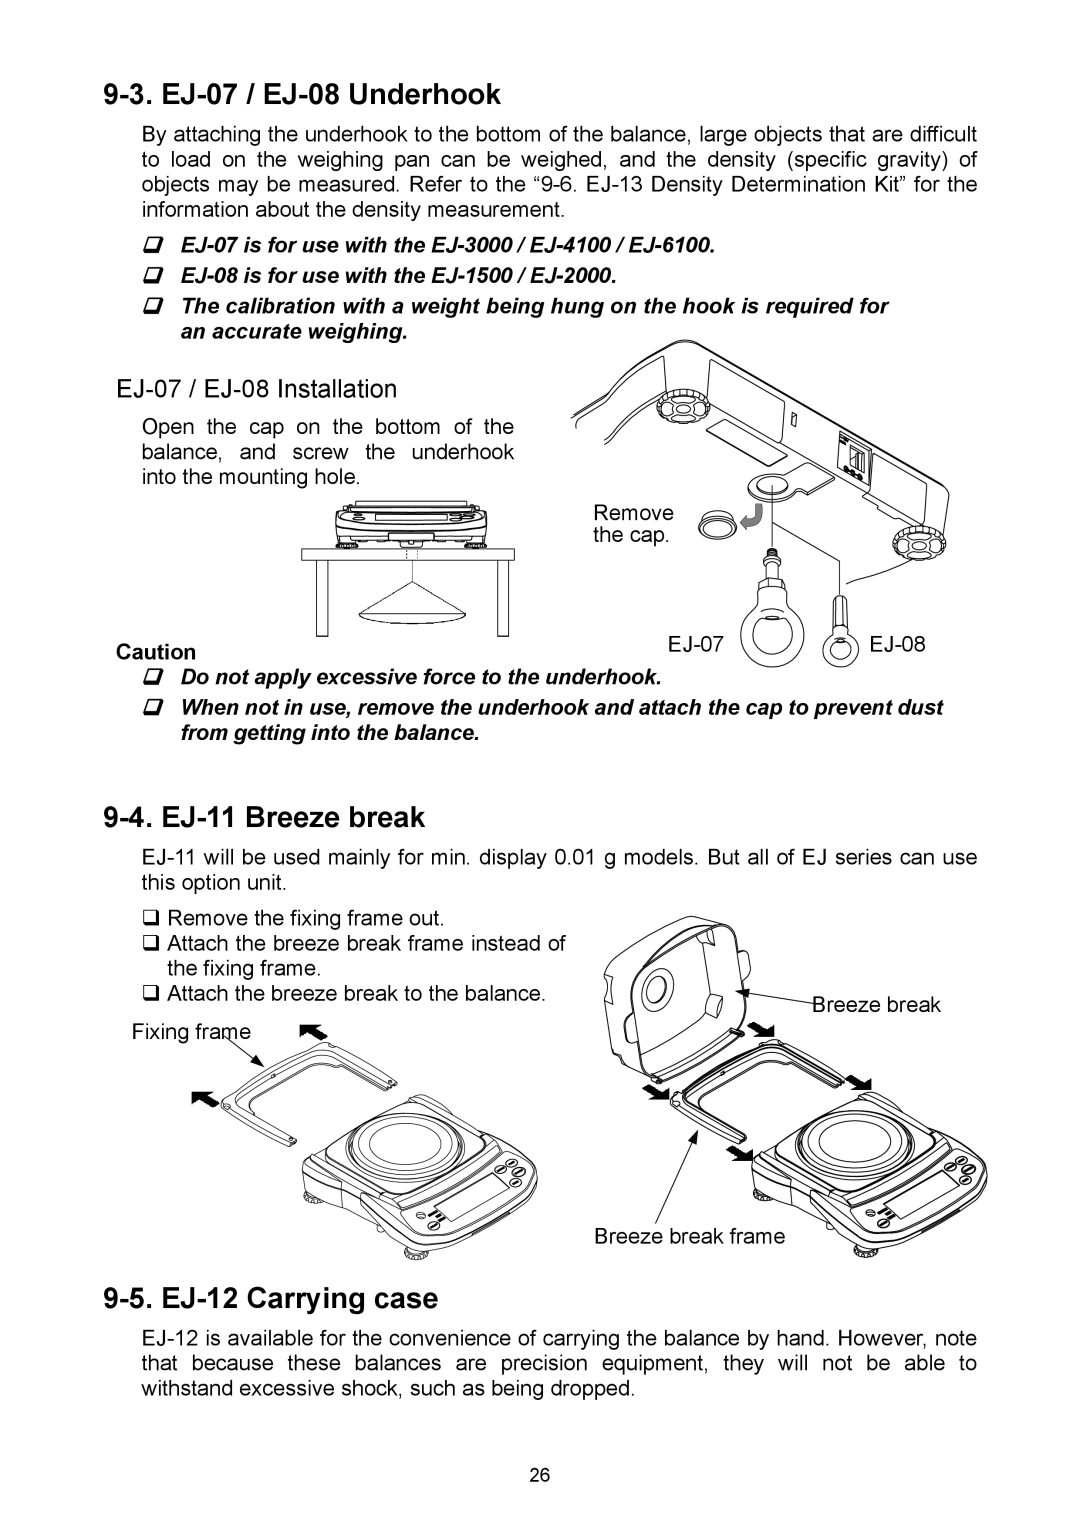
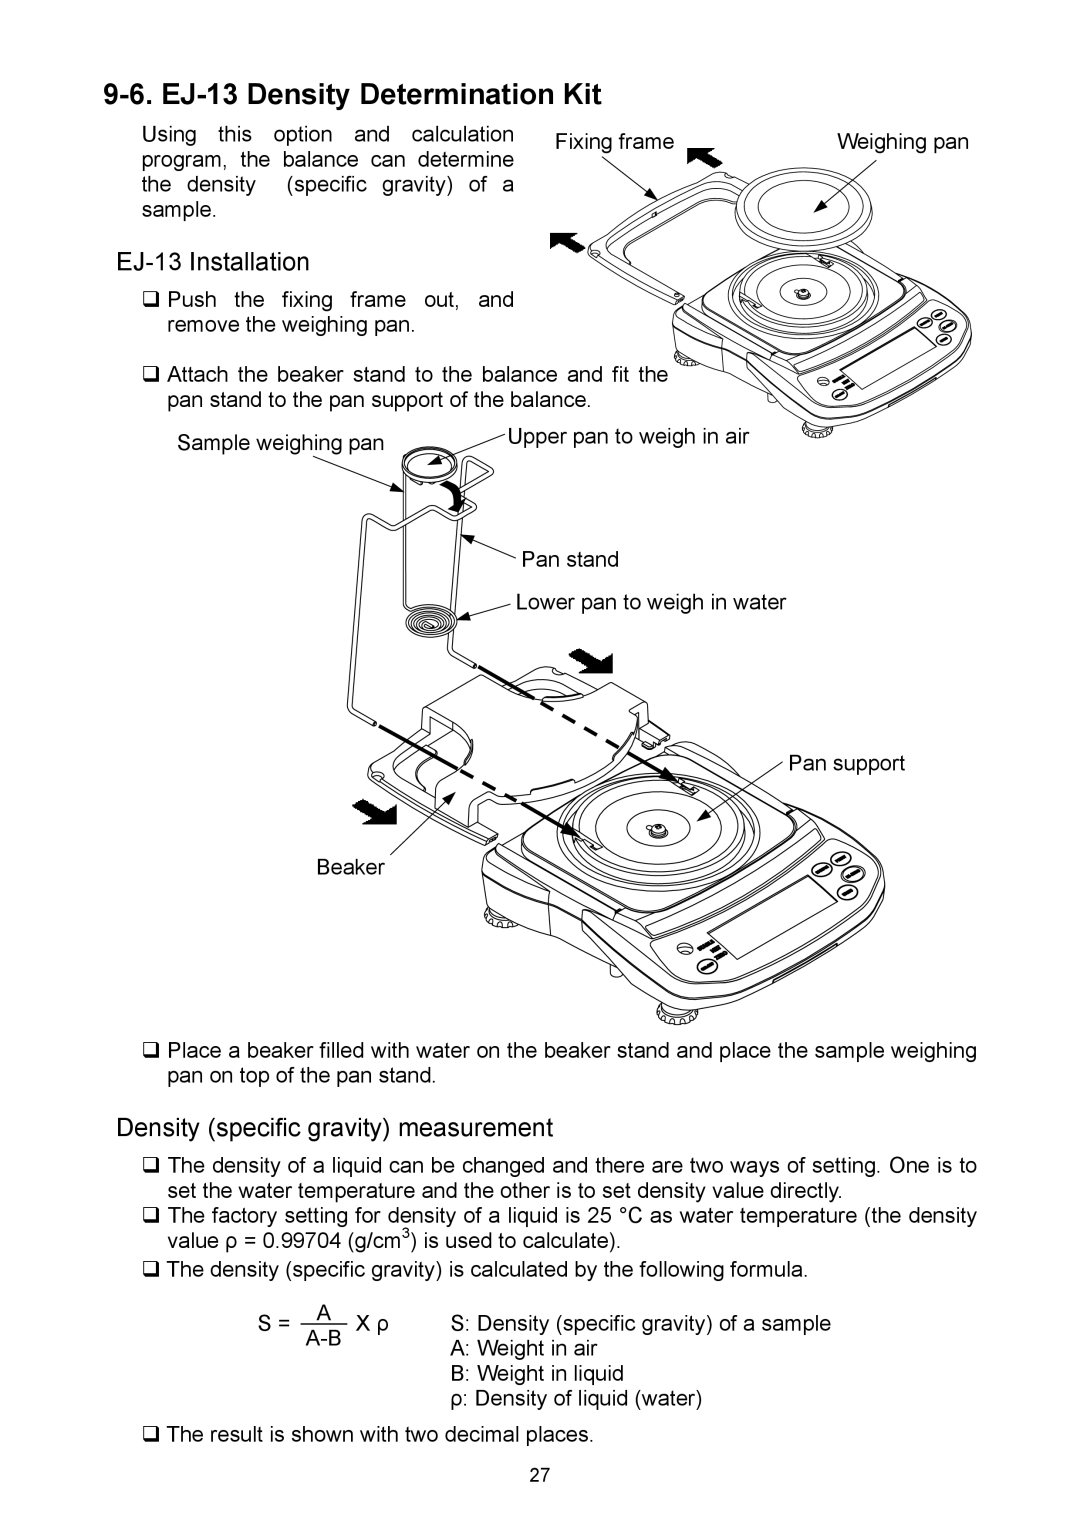
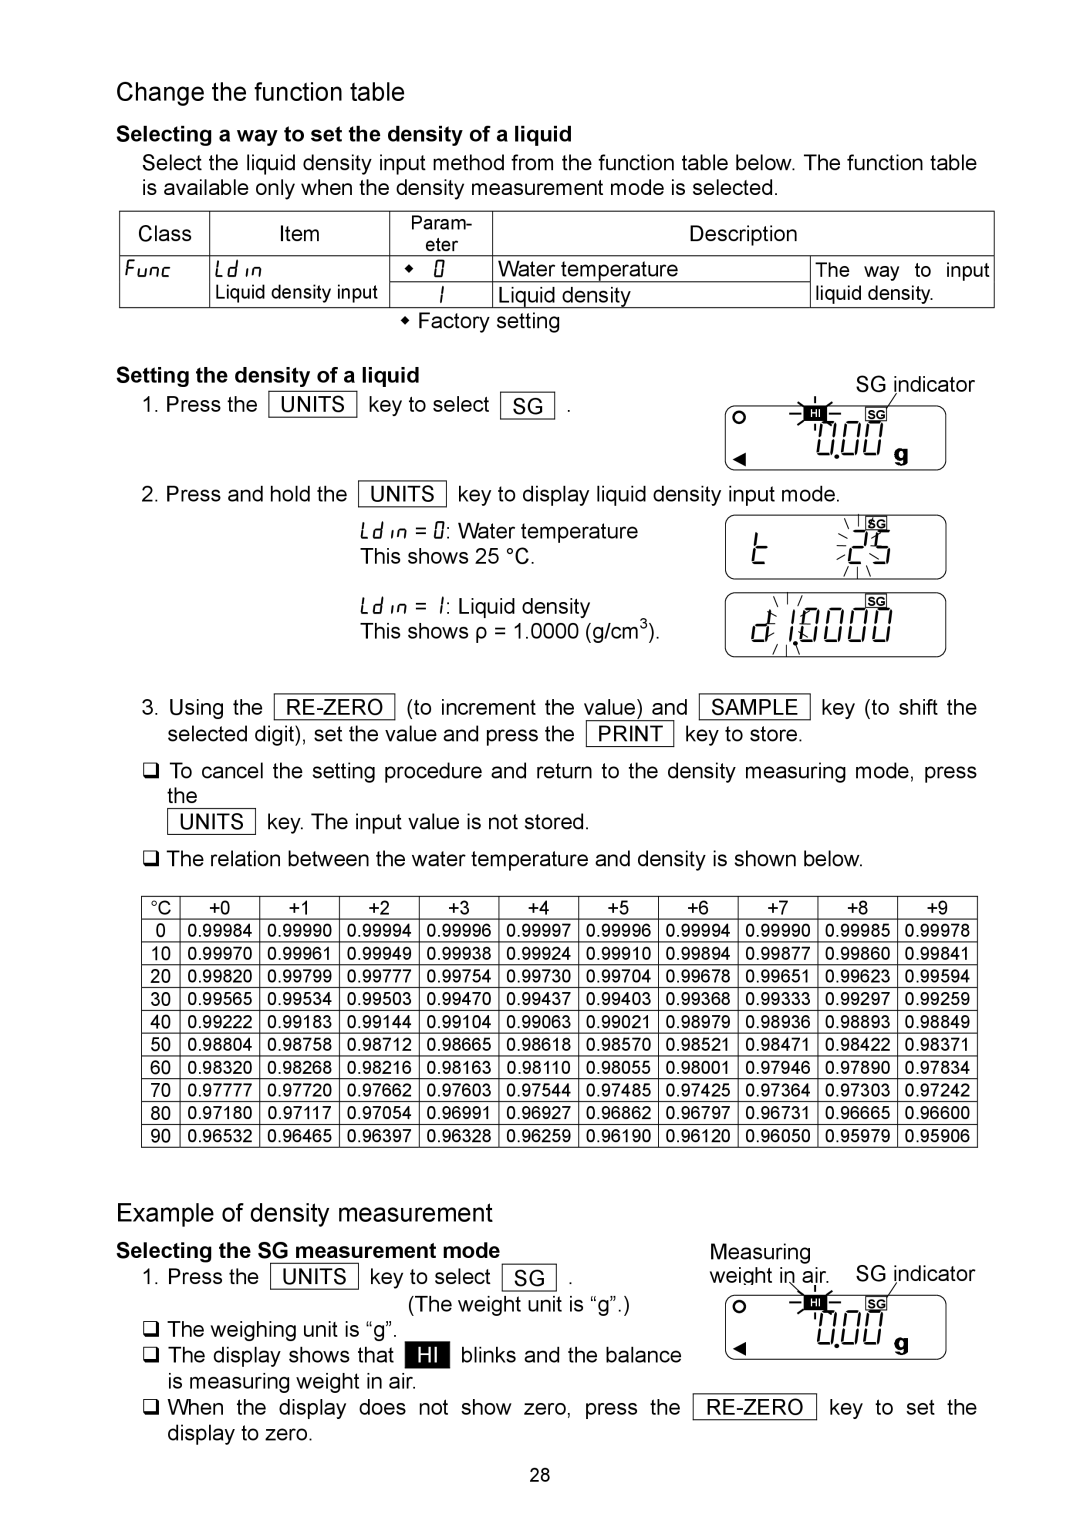
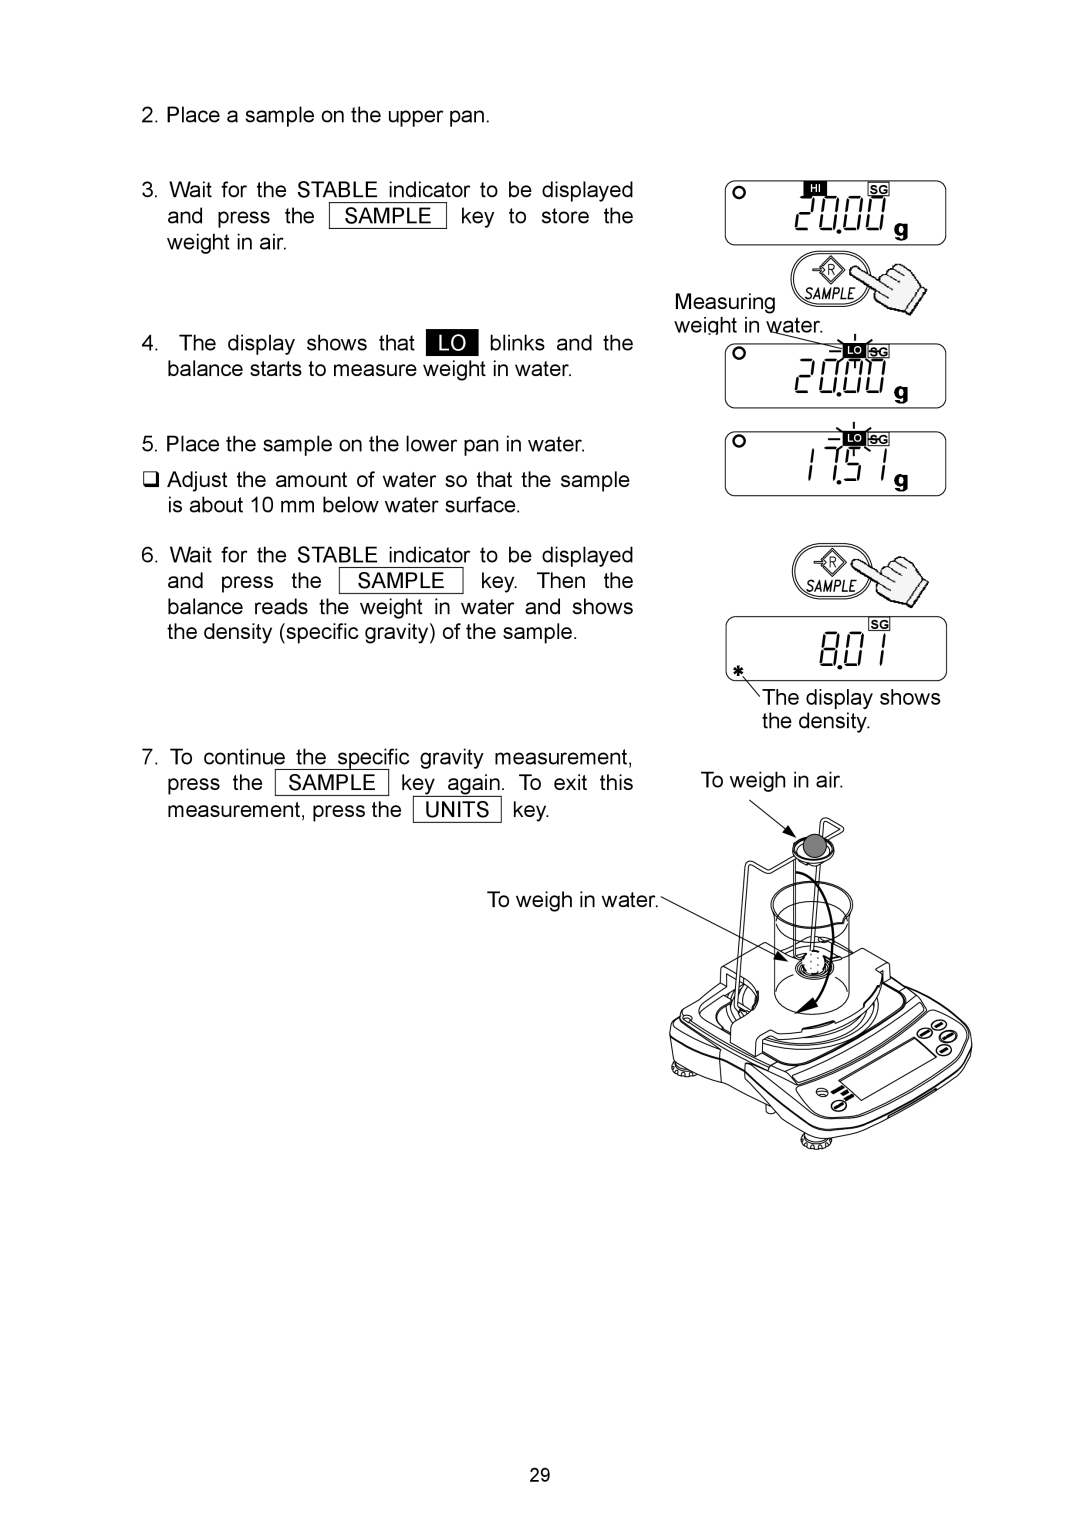
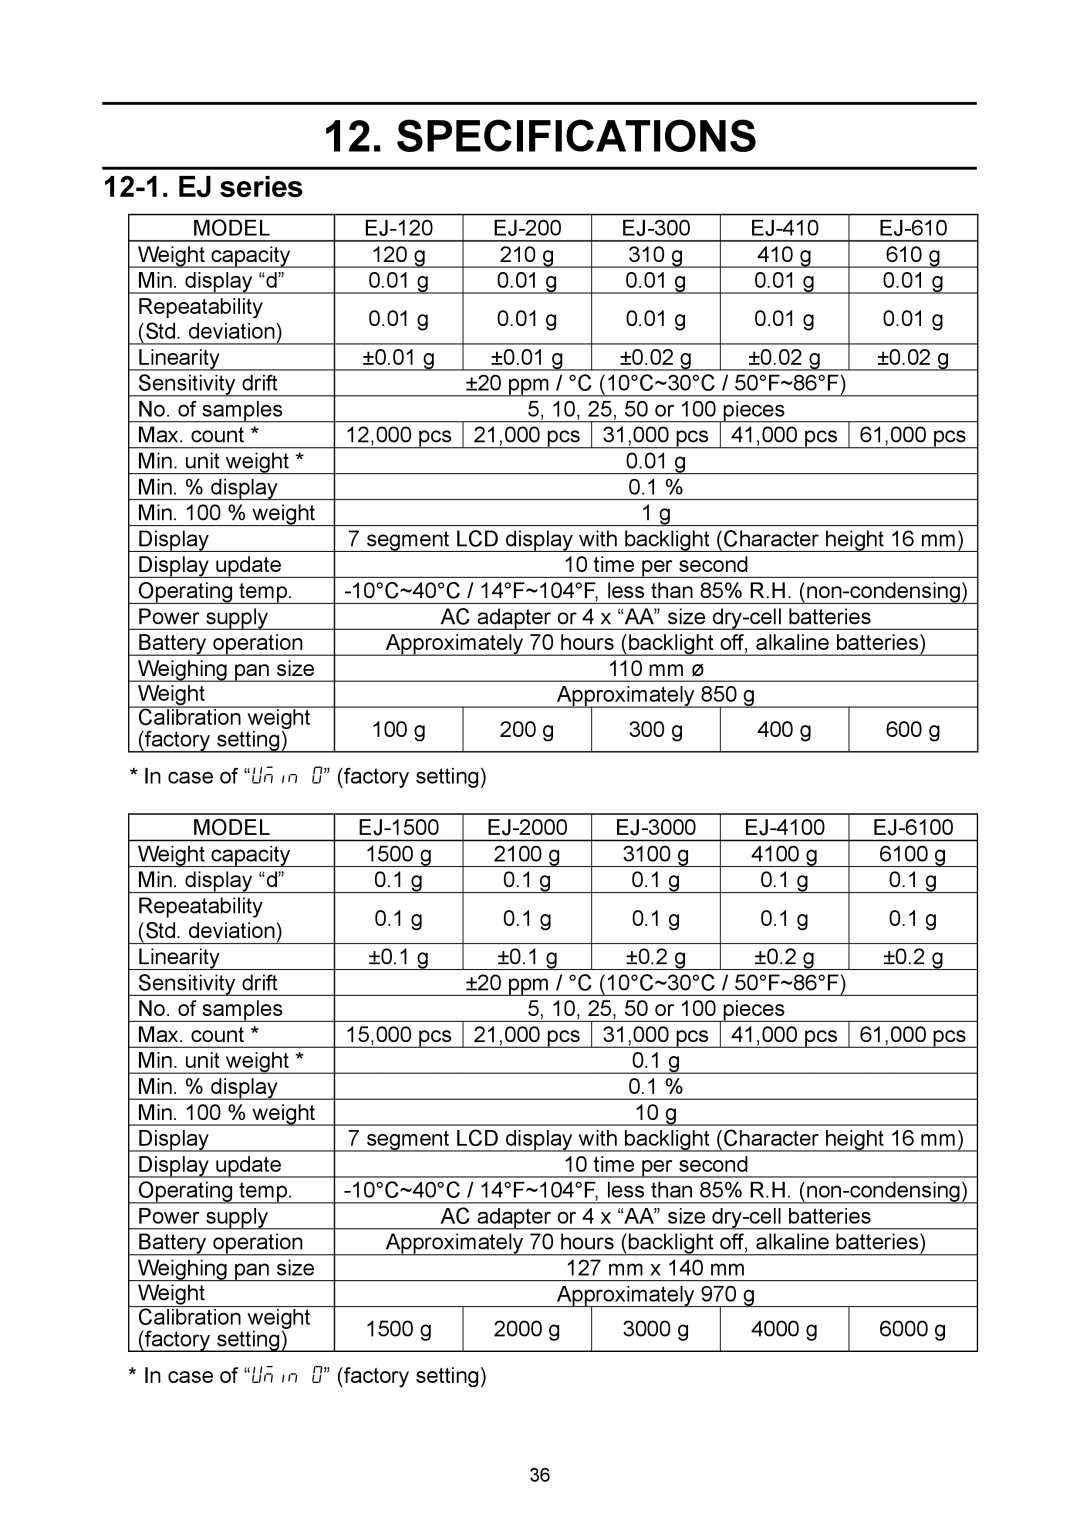
EJ-03 Installation

1.Turn off the balance and disconnect the AC adapter if used.

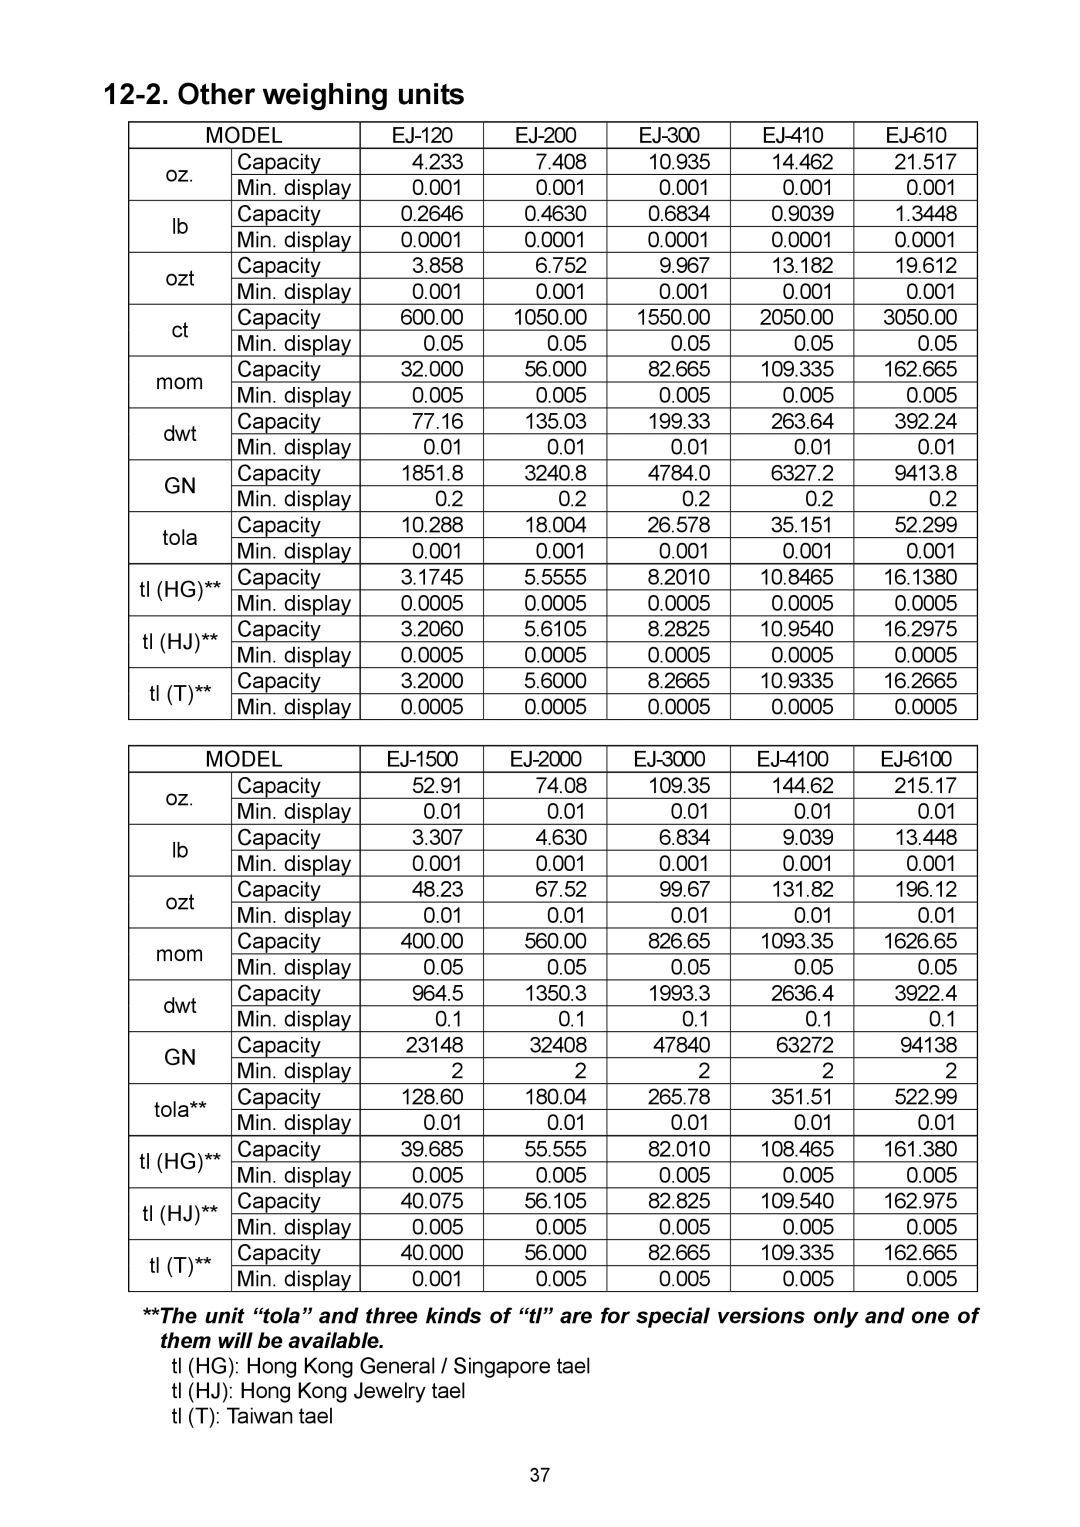
2.Remove the cover of the option slot on the rear by pressing and lowering it down.

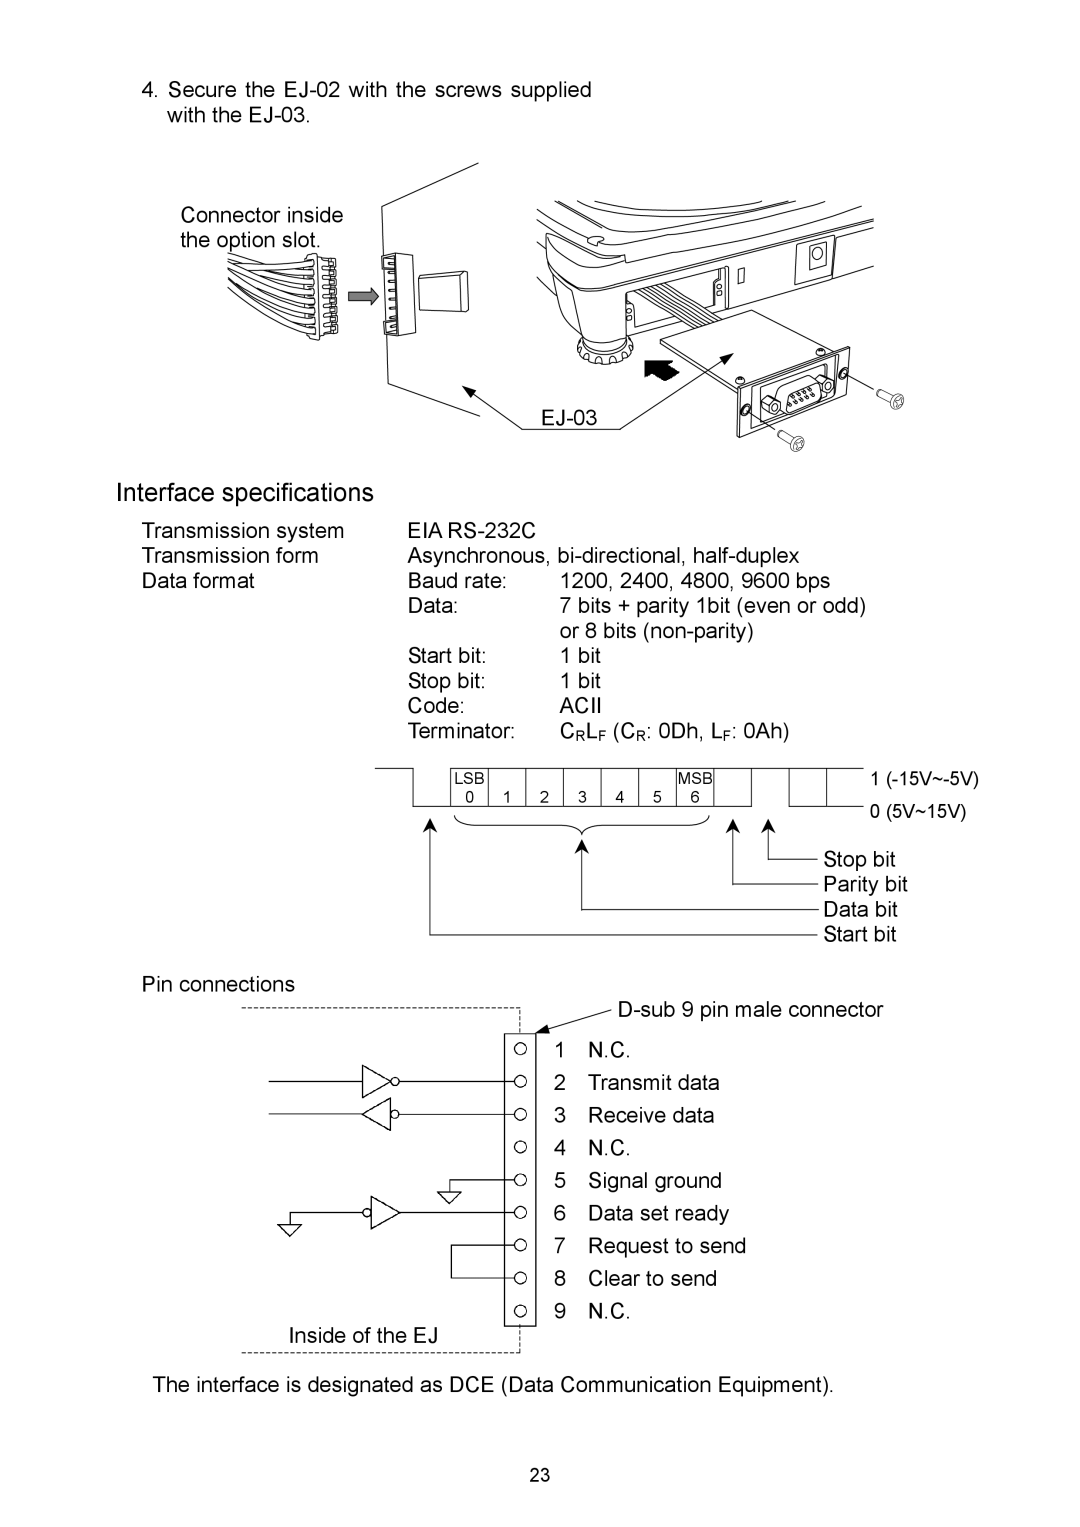
3.Connect the connector in the slot to the EJ-03 unit and insert it into the slot.

Press and lower

Option slot for

down the cover.

EJ-02 / EJ-03

22

Image 24
Contents 1WMPD4001917 This manual and Marks Compliance with FCC rulesContents Maintenance Introduction UnpackingNET indicator Part Names and FunctionsSetting UP Setting up your balancePower source Installing batteries Breeze breakStorage Turn the power on and OFF OperationLCD backlight Units Conversion tableNET Selecting a weighing unitBasic operation Counting mode pcs Selecting the counting modeCounting mode using the Acai function Storing the sample unitPercent mode % 100100 0 % 1000. %Setting example Selecting a comparison modeComparator FuncCp Hi 000000 001234Cp lo 000000 001230Calibration using a weight CalibrationCal 060000Cal 50000 GlpCal 97985 Gravity acceleration correctionEntering the function setting mode FunctionsCp Hi Key operationFunc Poff ACaiEnd Cp Hi Unit End idStoring weighing units Function list Func ACai UminSmpl LdinEJ-03 Installation OptionsEJ-02 USB Interface EJ-03 RS-232C serial interfaceInterface specifications EIA RS-232CData output mode Data formatCommand mode Command listEJ-07 / EJ-08 Installation EJ-07 / EJ-08 UnderhookEJ-11 Breeze break EJ-12 Carrying caseEJ-13 Installation EJ-13 Density Determination KitDensity specific gravity measurement 000 Change the function tableExample of density measurement 2000 1751 8801Setting the ID number ID Number and GLPEnd id func Display character setOutput example Data format for calibration reportData format for calibration test report Calibration test using a weight TitleEnd Block Title block and End block20000 20000 EndMaintenance Error codesOverload error Range over notice Unit weight error Sample quantity noticeError1 Cal e -Cal eLb0 Hb0 Hb1 Lb1Specifications EJ seriesOther weighing units Dimensions OptionsGravity Acceleration MAP Values of gravity at various locationsWorld map