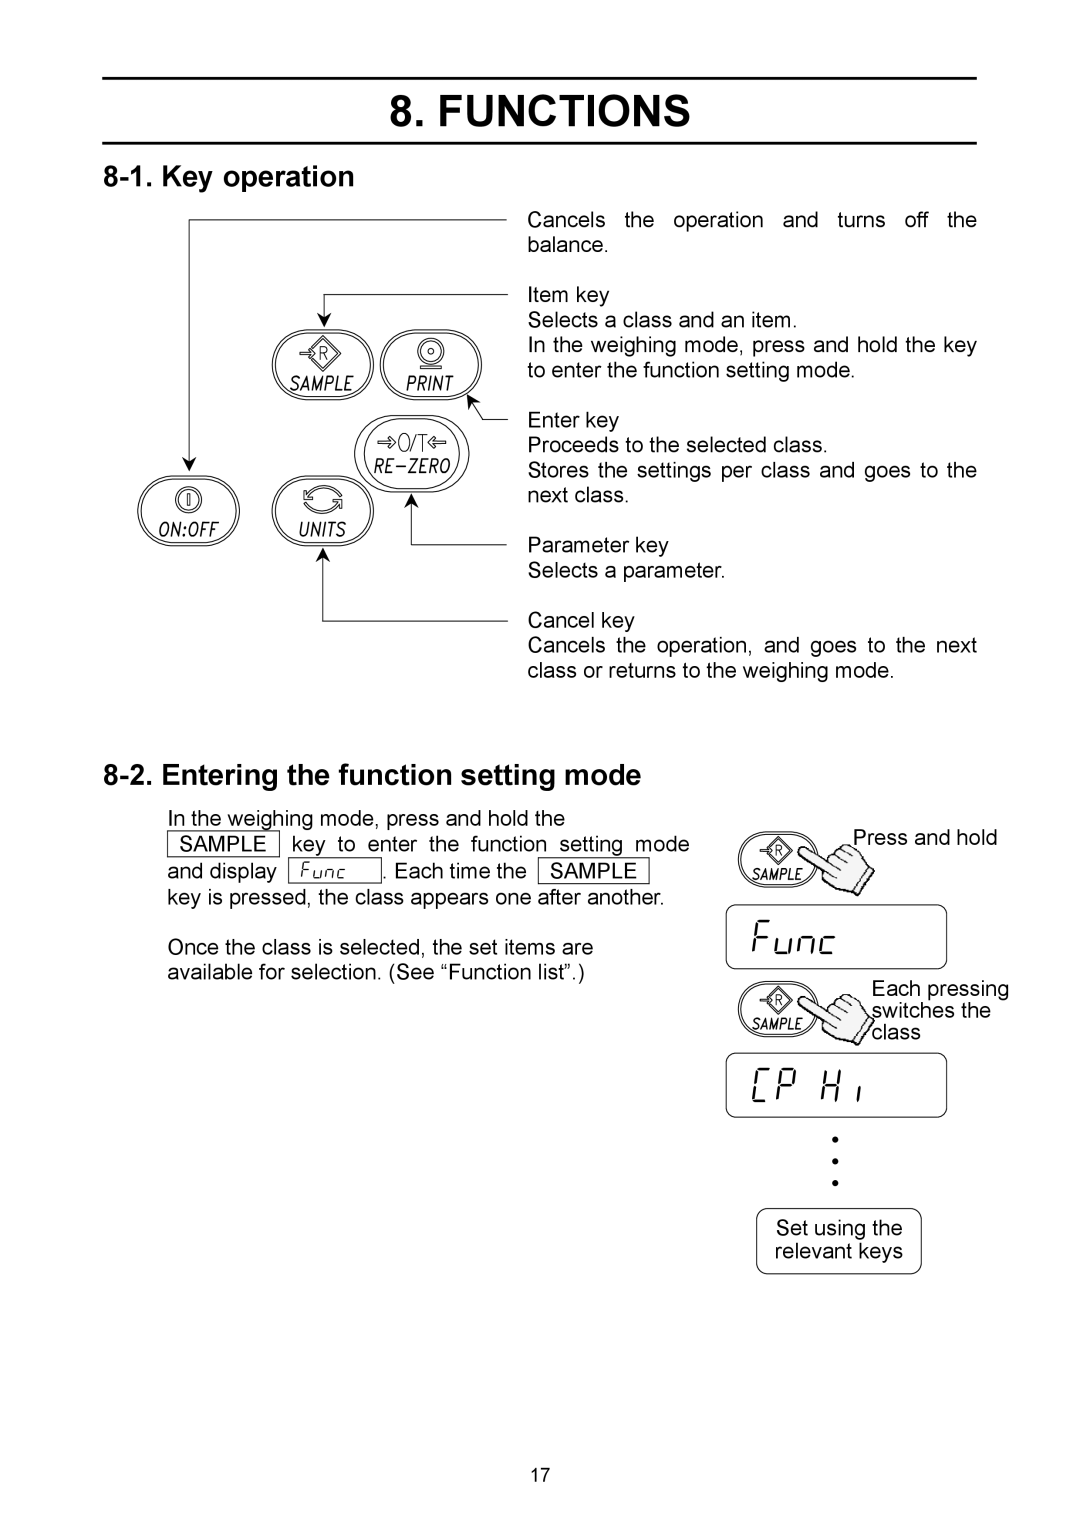
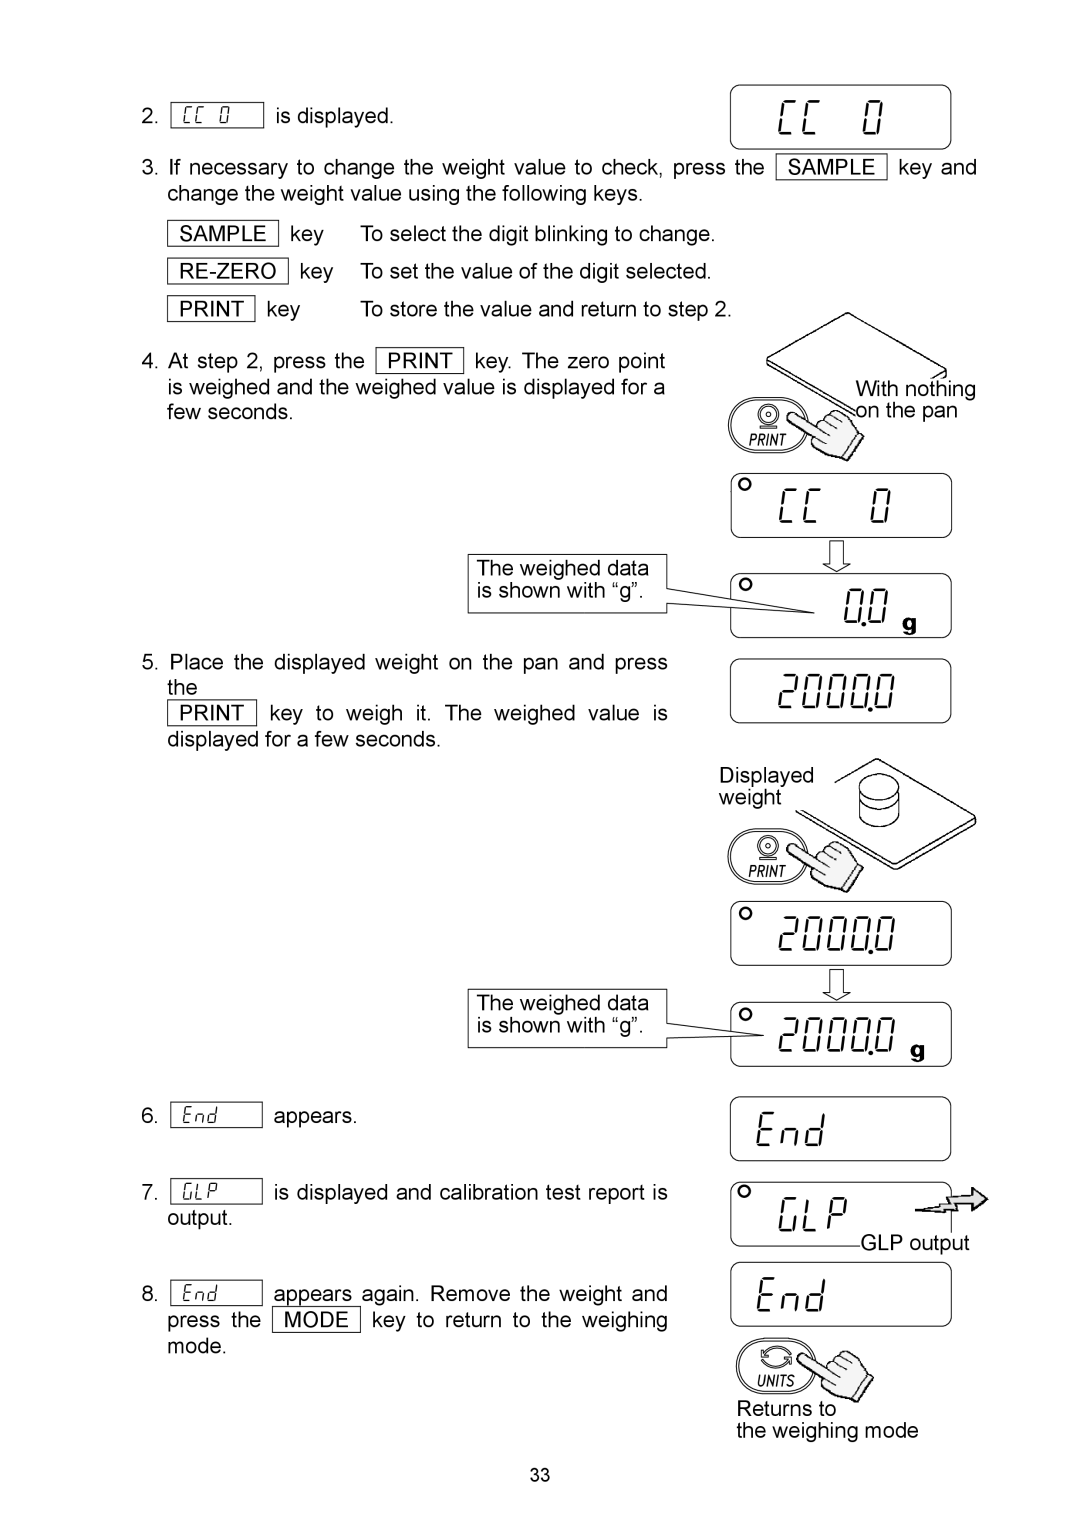
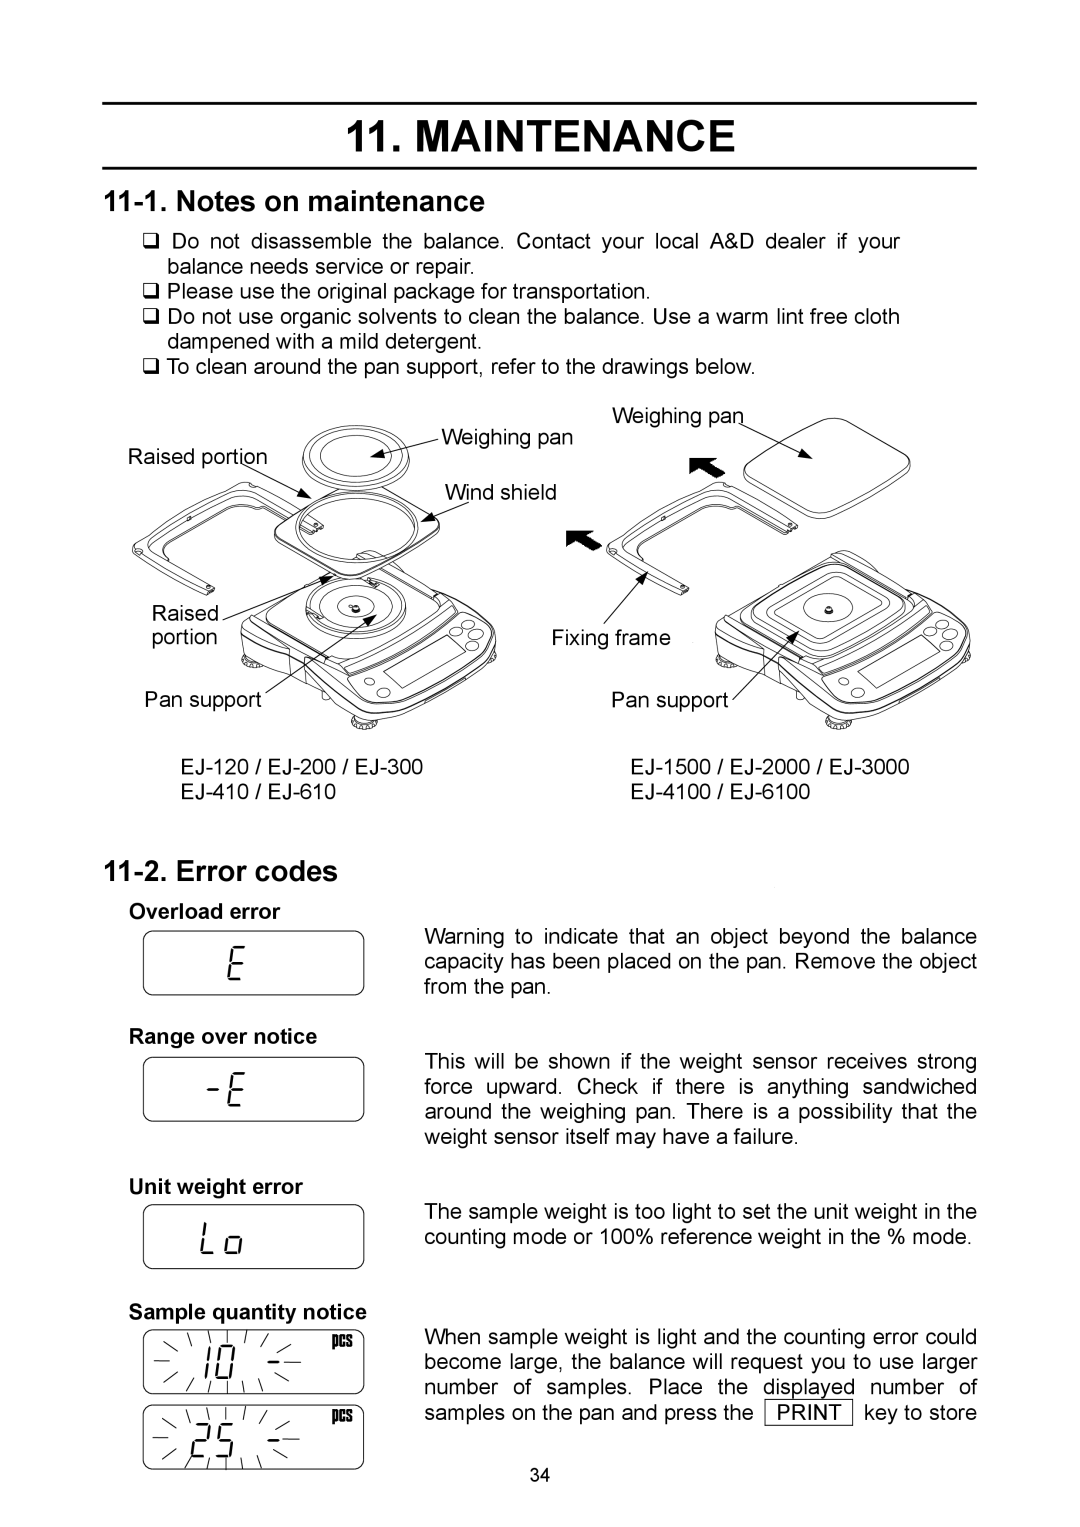
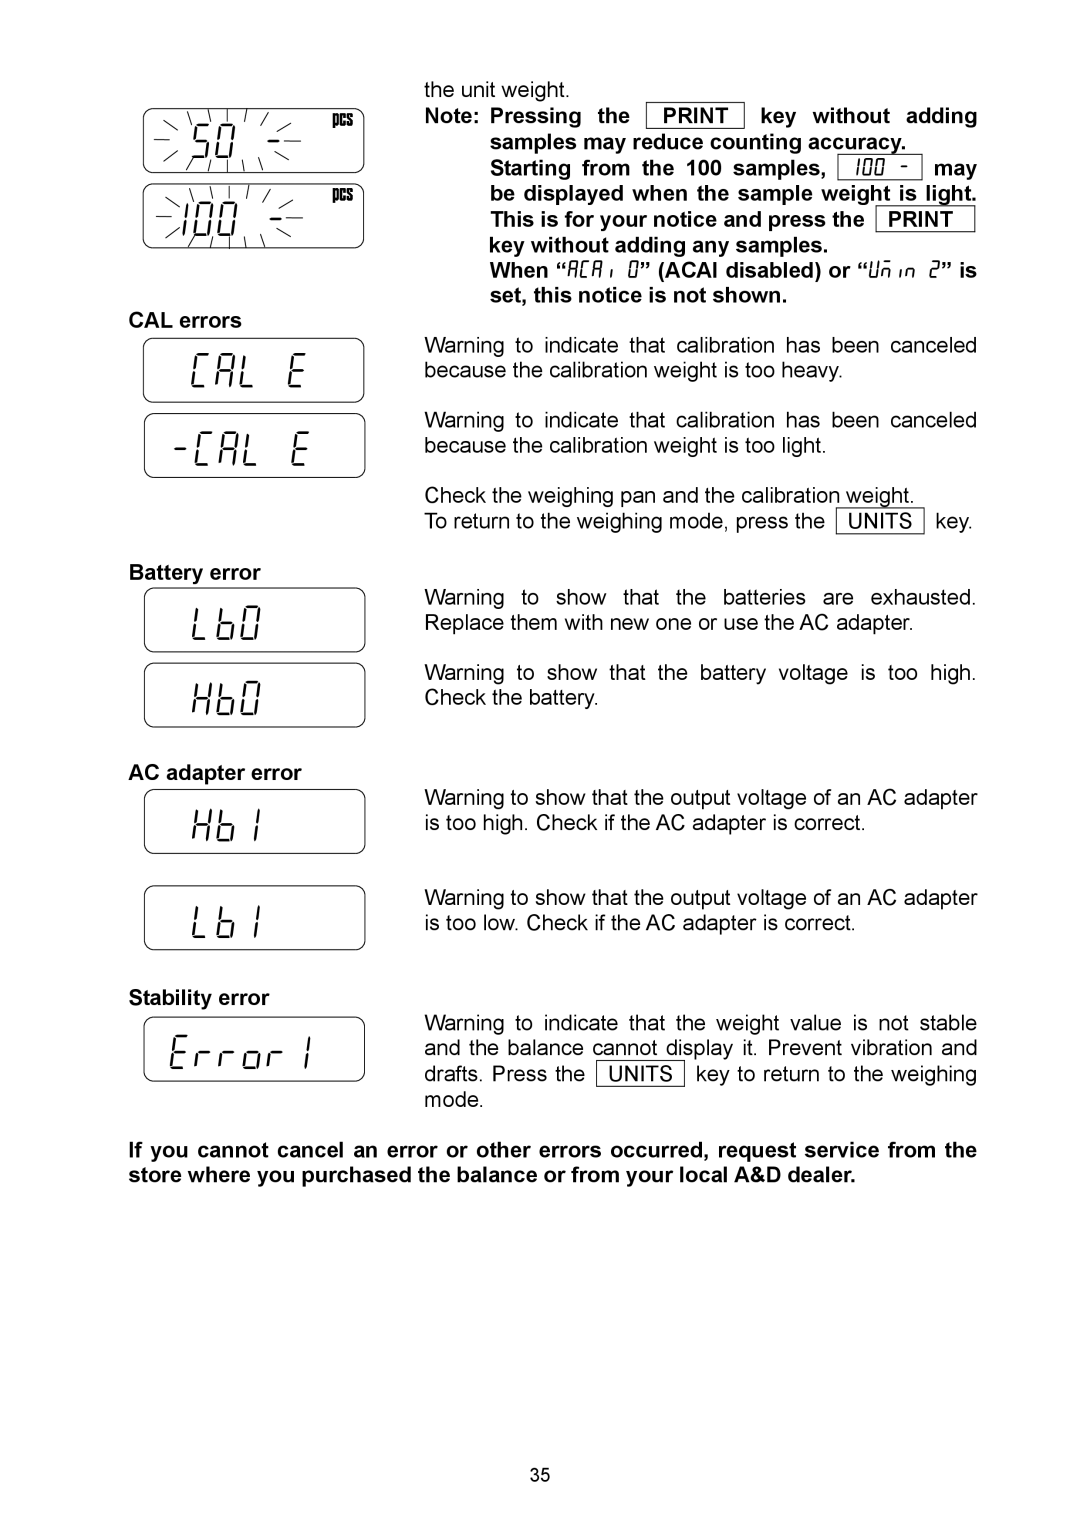
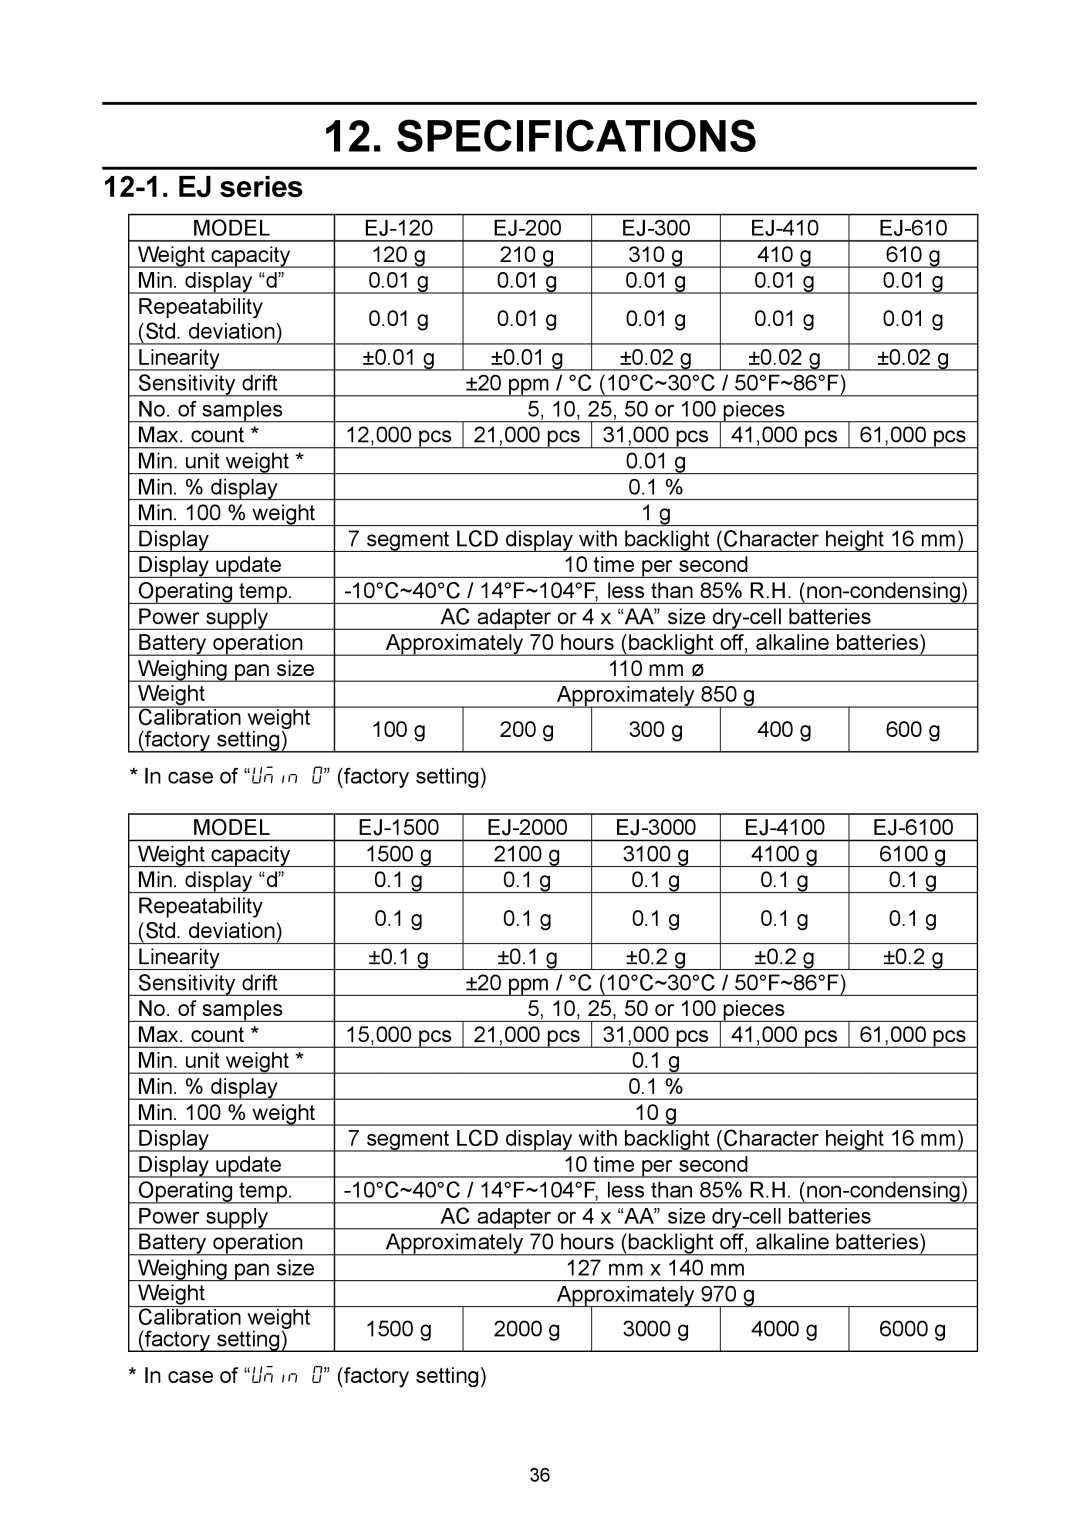
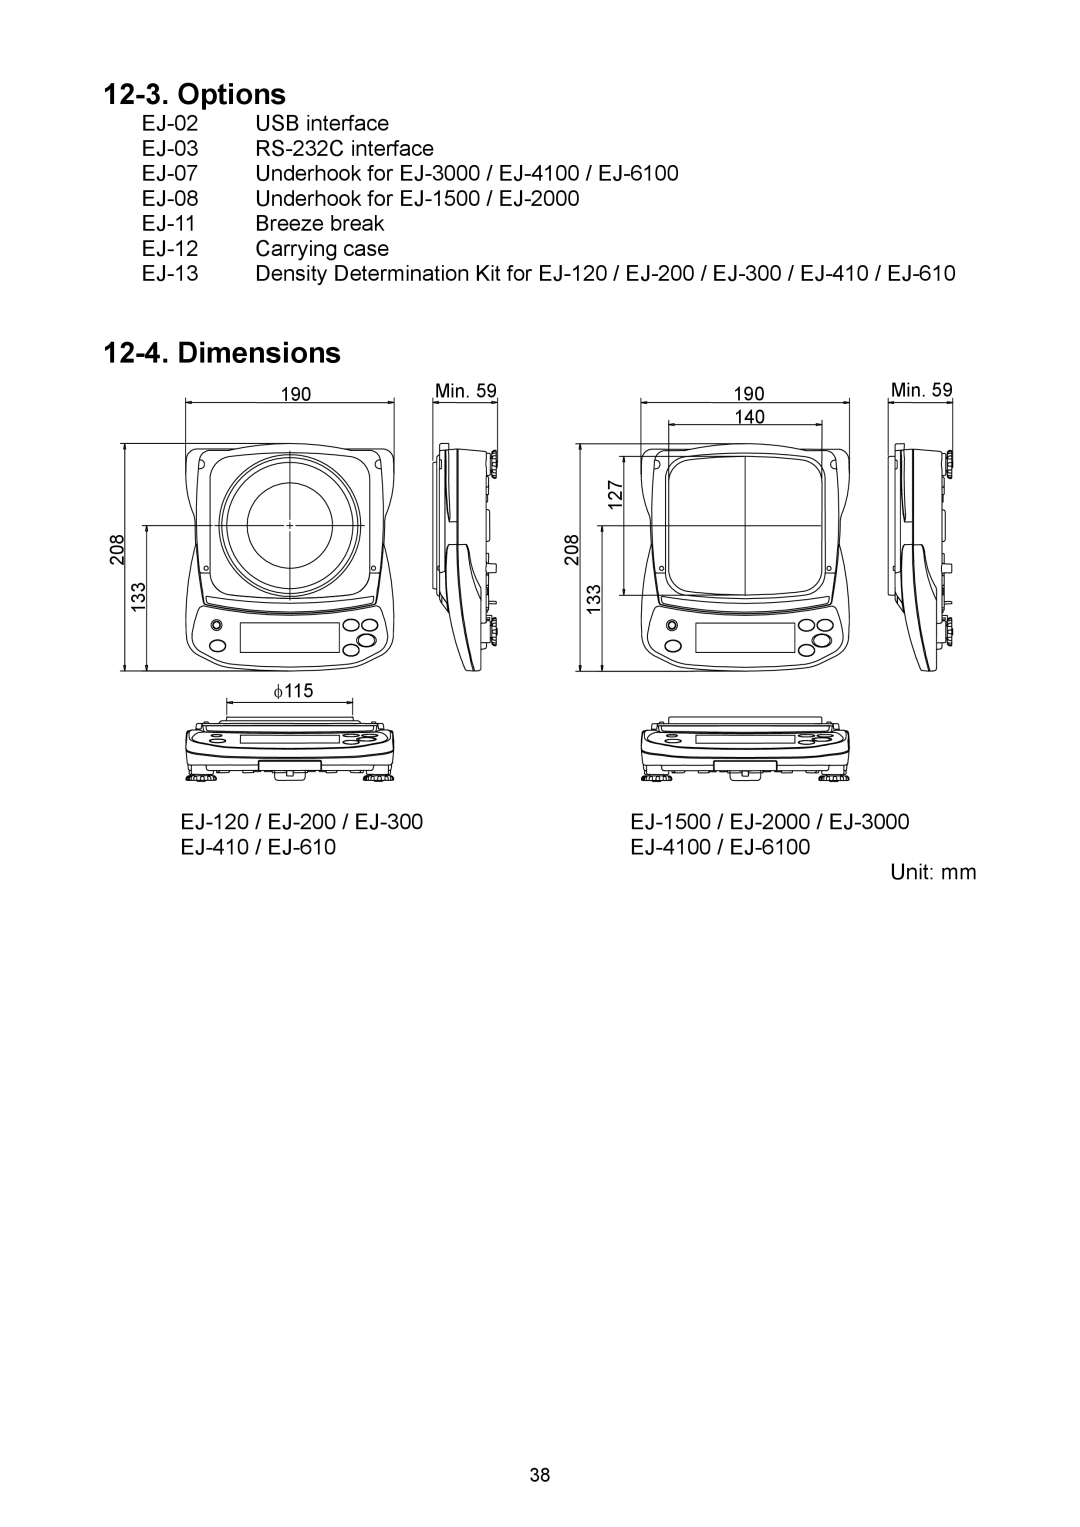
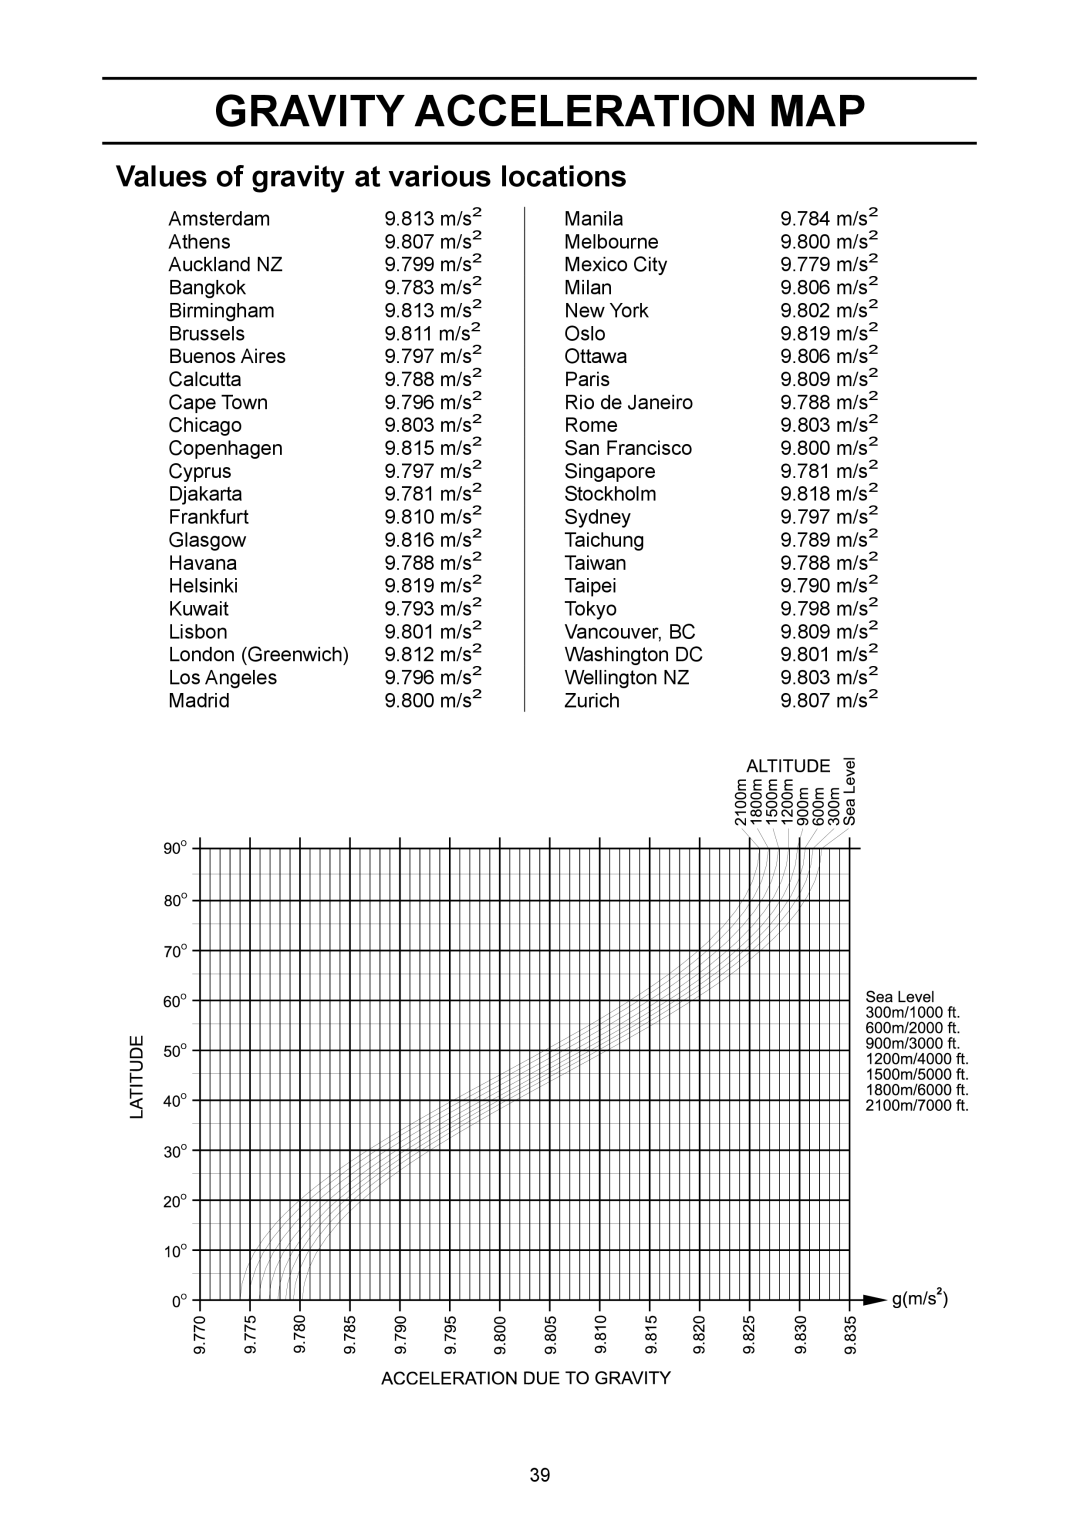
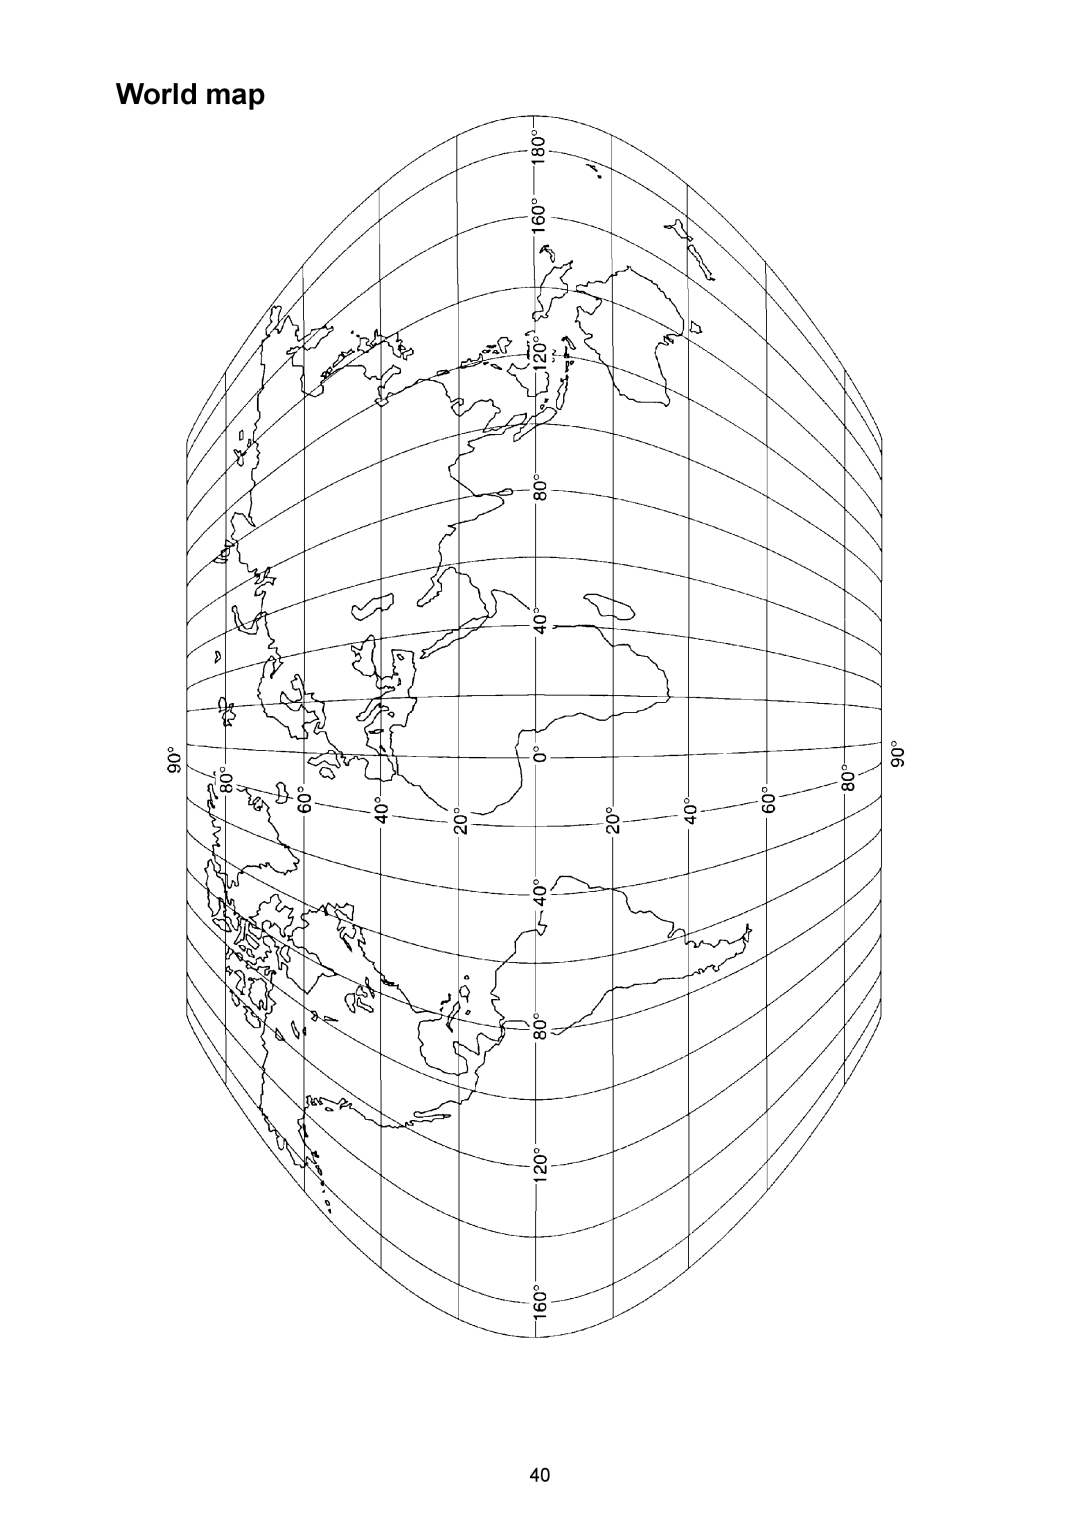
A&D EJ-440, EJ-6100 ID Number and GLP, End id func, Setting the ID number, Display character set

Page 32

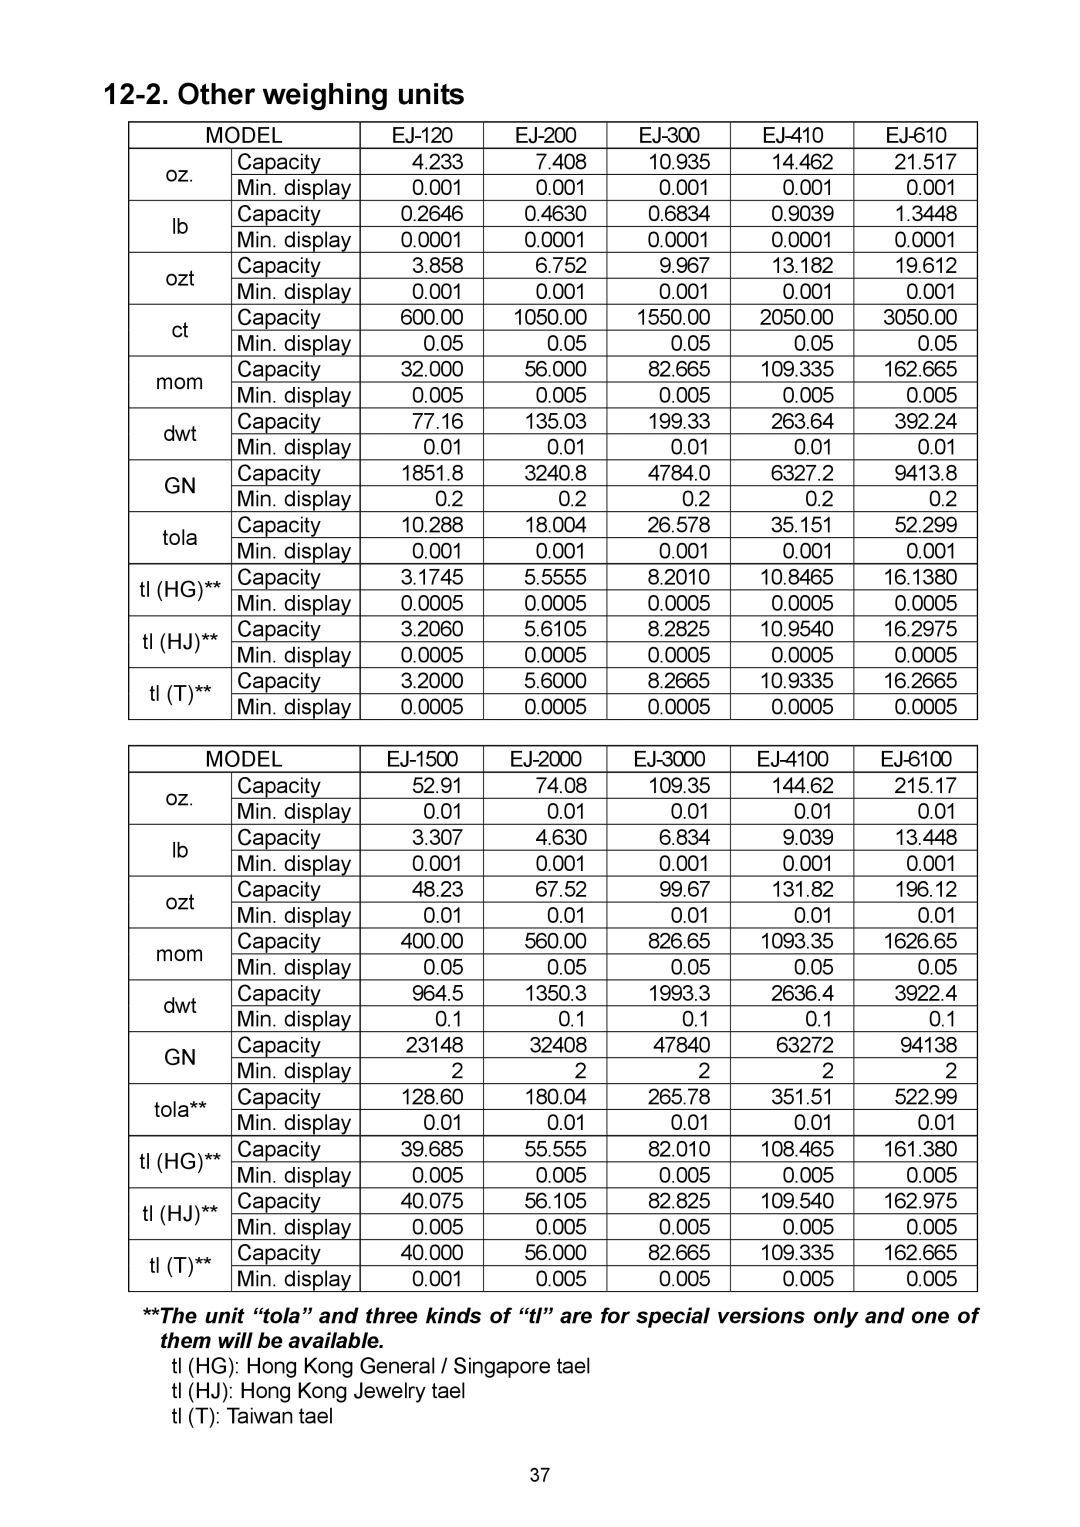
10.ID NUMBER AND GLP

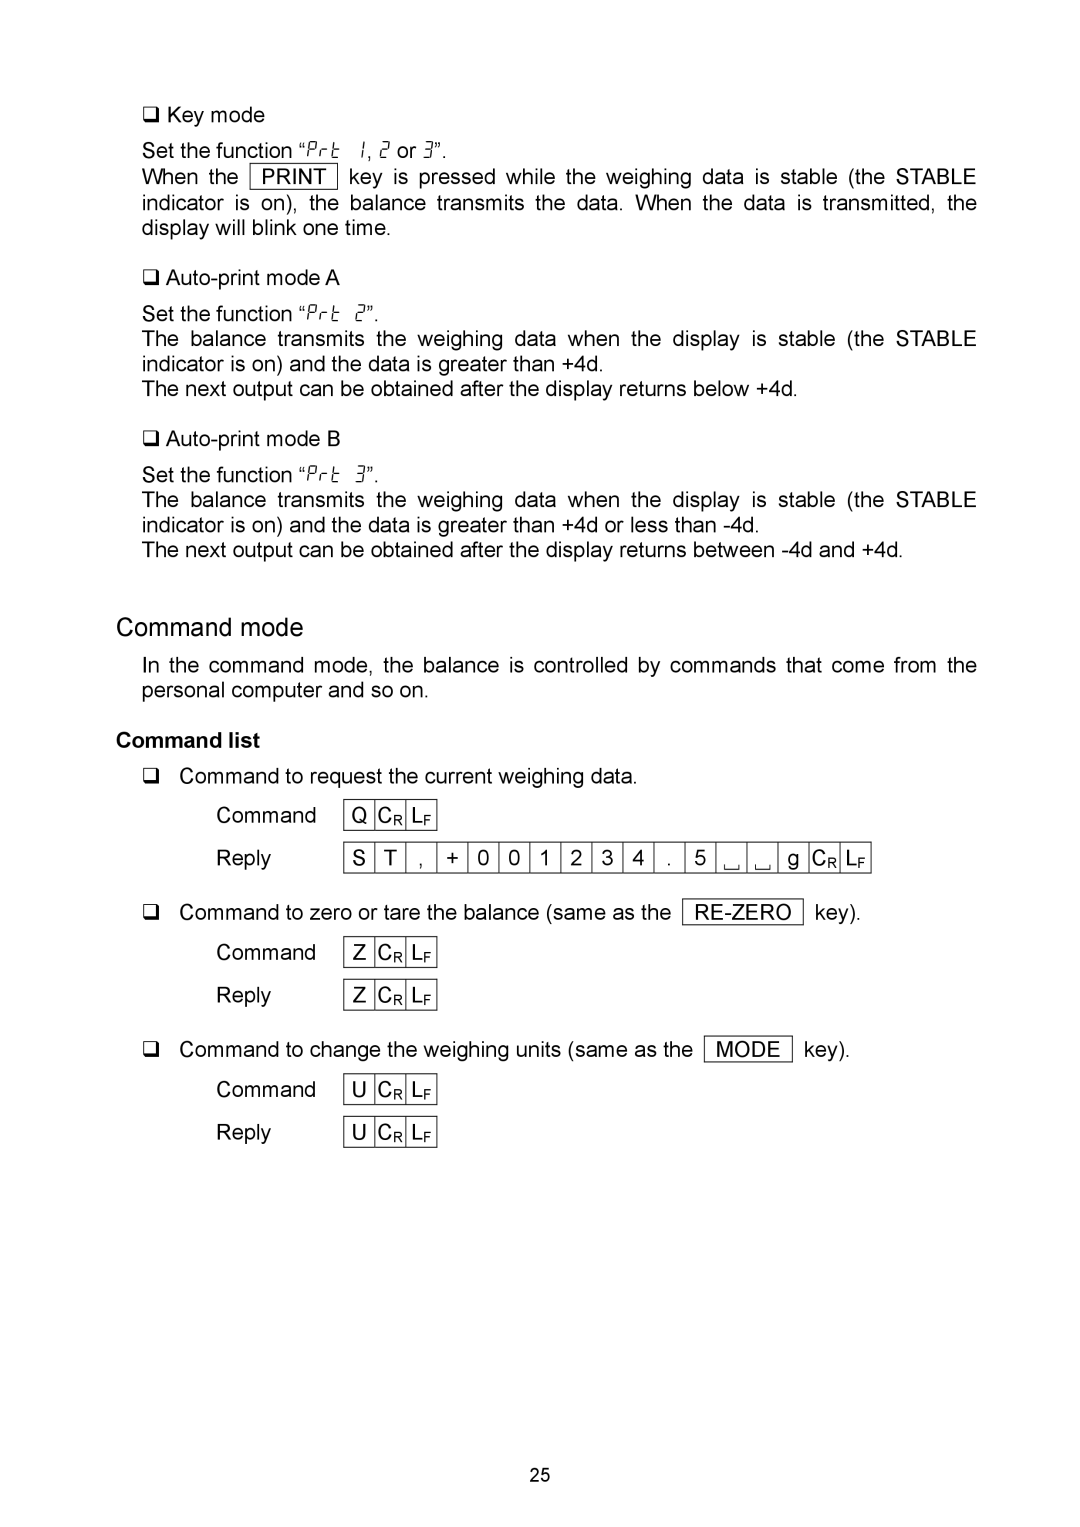
‰The ID number is used to identify the balance when Good Laboratory Practice (GLP) is used.

‰The ID number is held in memory even if power to the balance is switched off.

‰The following GLP data is transmitted to a printer or a computer using the optional RS-232C interface.

The result of calibration (“Calibration report”)

The result of calibration test (“Calibration test report”)

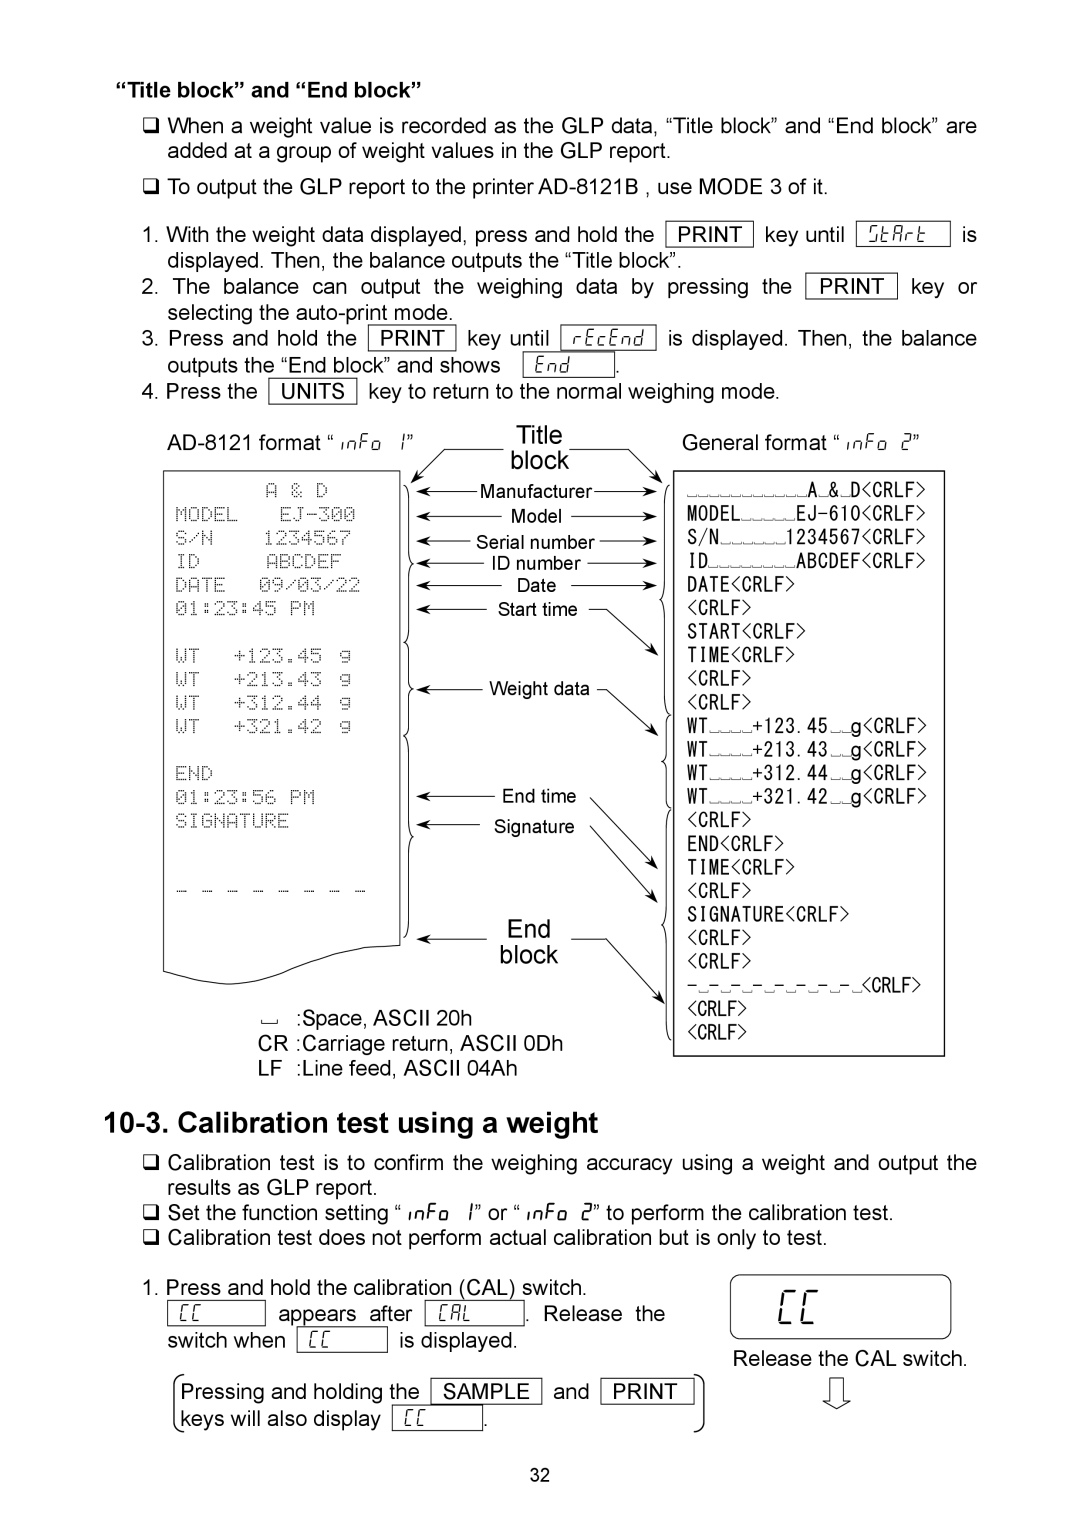
The “Title block” and “End block” for GLP data

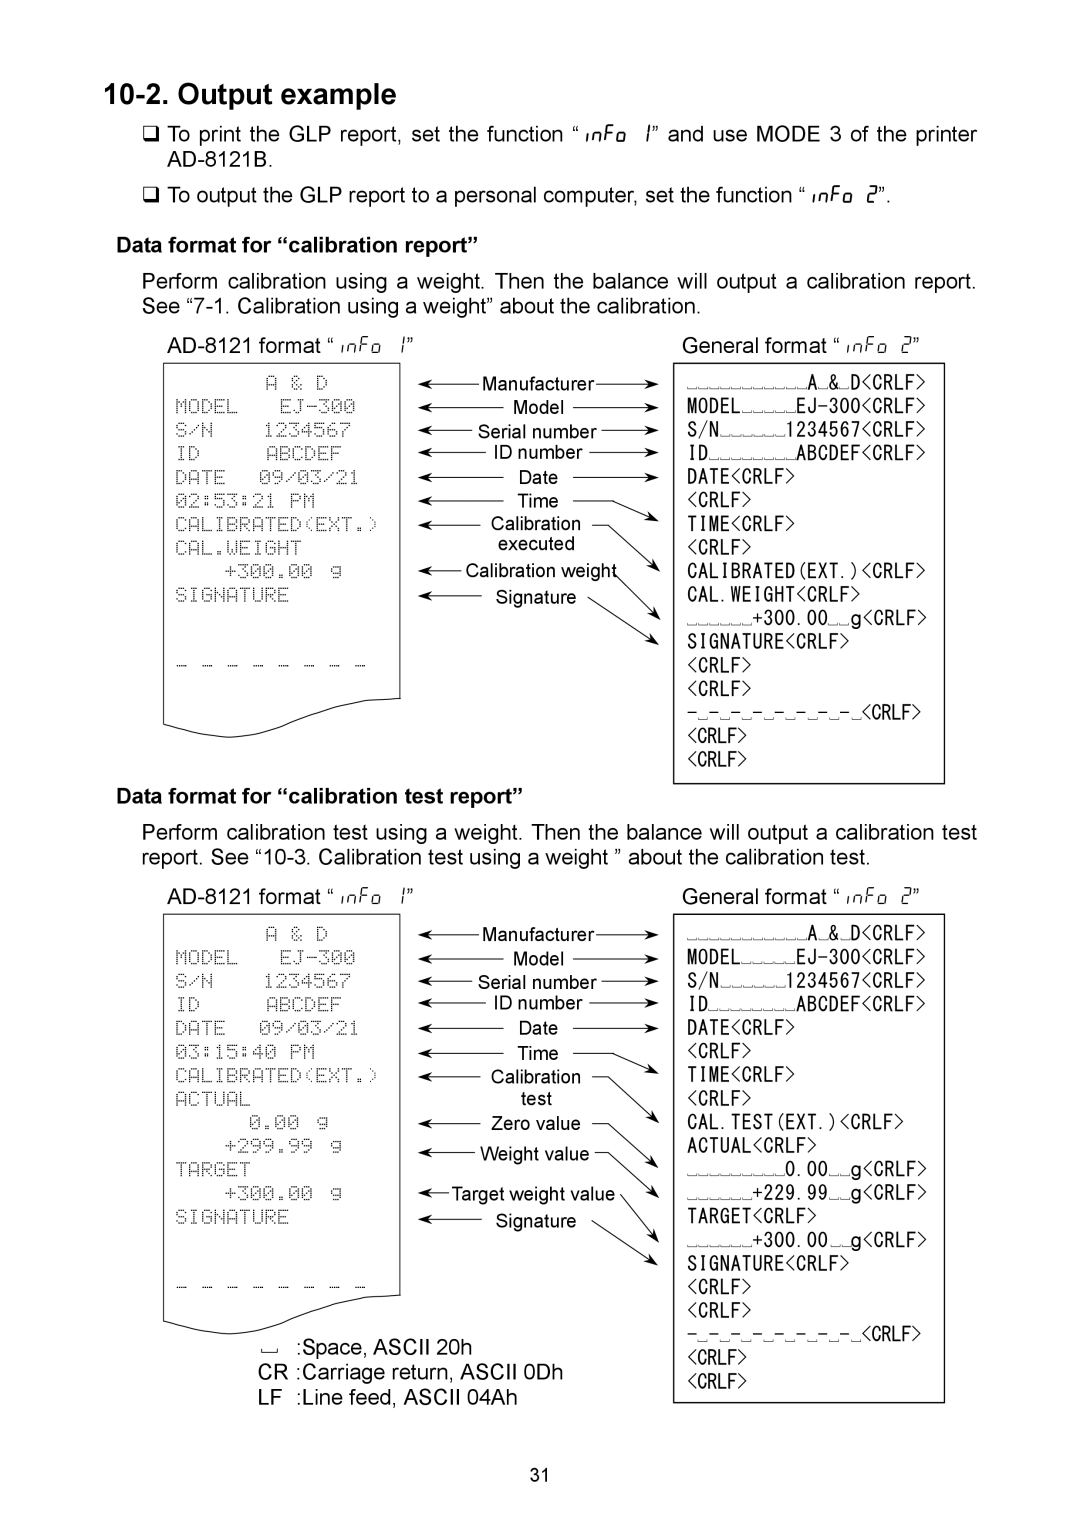
‰The GLP output format includes the balance manufacturer name, model number, serial number, ID number and space for signature.

‰When used with the AD-8121B, the date and time can be printed (GLP output format info = 1).

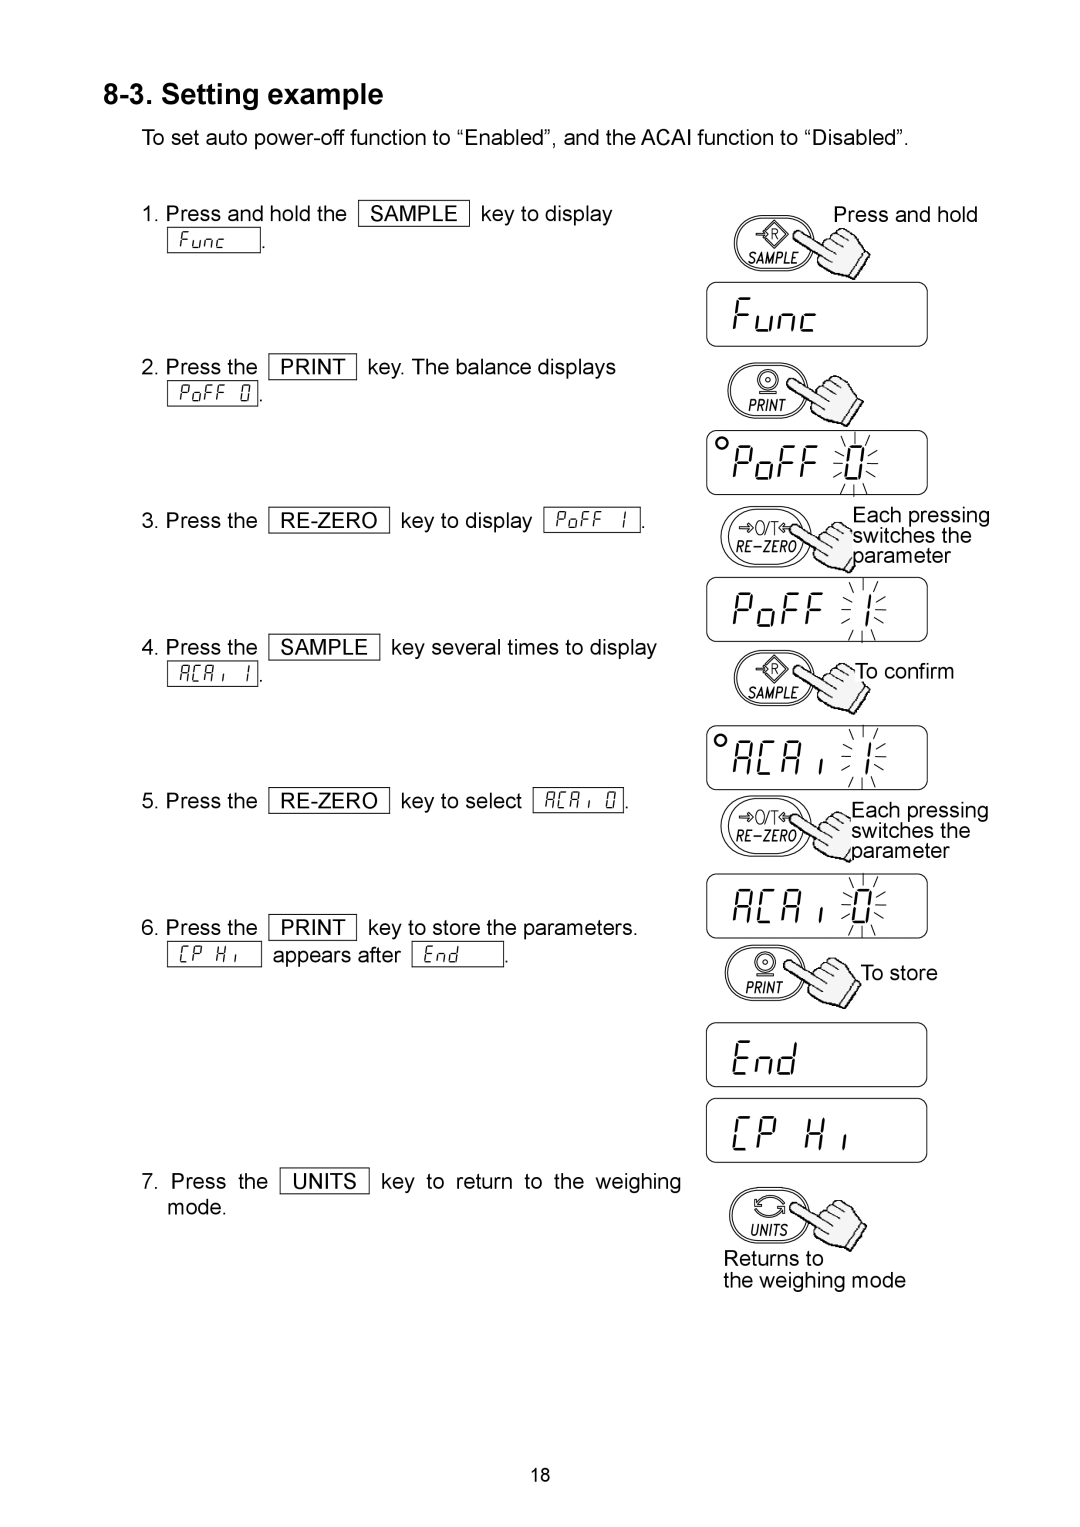
10-1. Setting the ID number

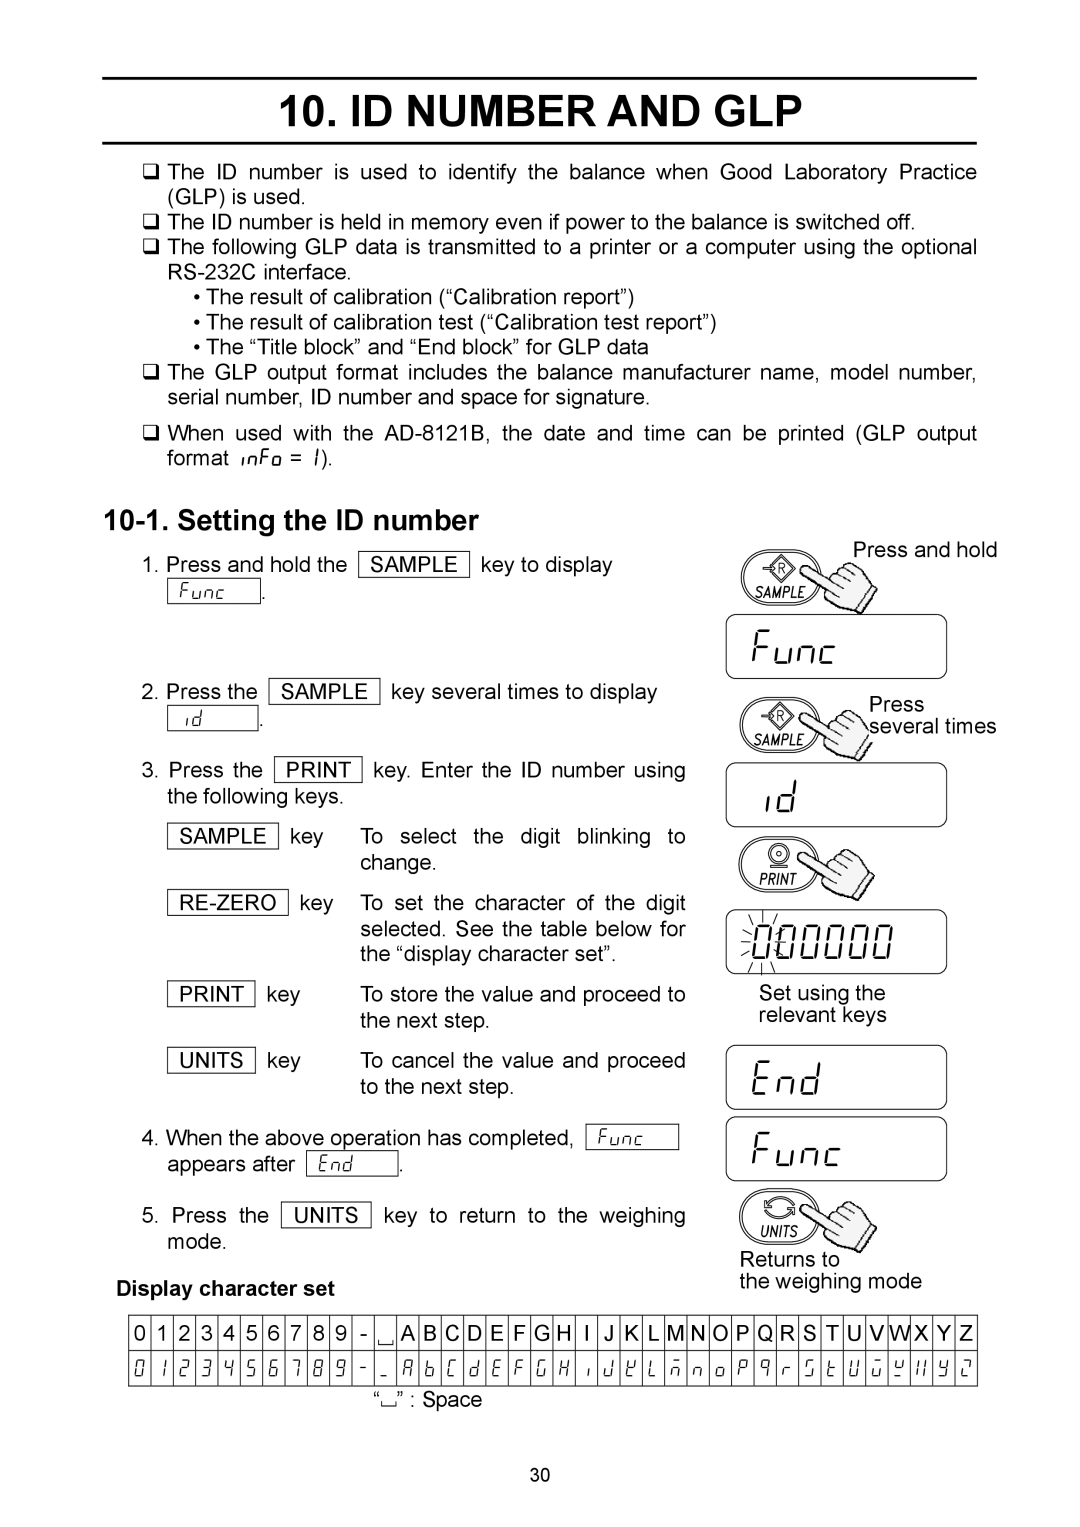
1.Press and hold the func .

SAMPLE

key to display

Press and hold

2. Press the

.

SAMPLE

key several times to display


id


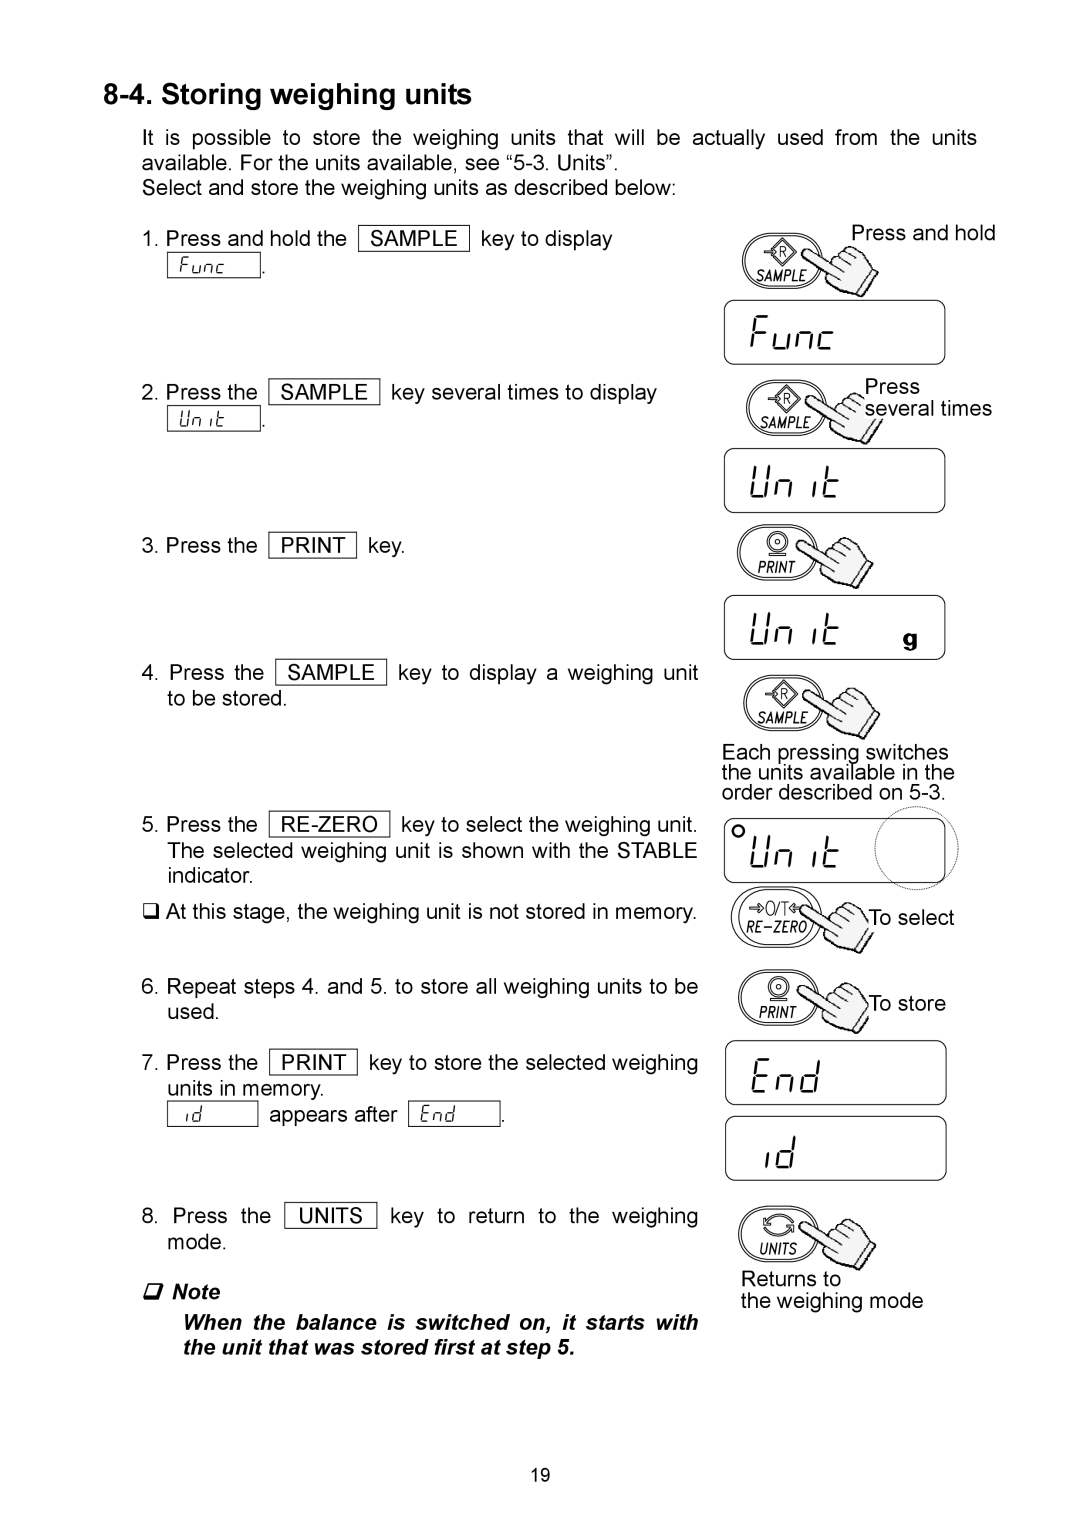
3.Press the PRINT key. Enter the ID number using the following keys.


SAMPLE


key

To select the digit blinking to


change.


key

To set the character of the digit


RE-ZERO


selected. See the table below for


the “display character set”.


key

To store the value and proceed to


PRINT


the next step.


key

To cancel the value and proceed


UNITS


to the next step.

4. When the above operation has completed,


func


appears after


end


.


func

Press several times

id

000000

Set using the relevant keys

end id func

5.Press the UNITS mode.

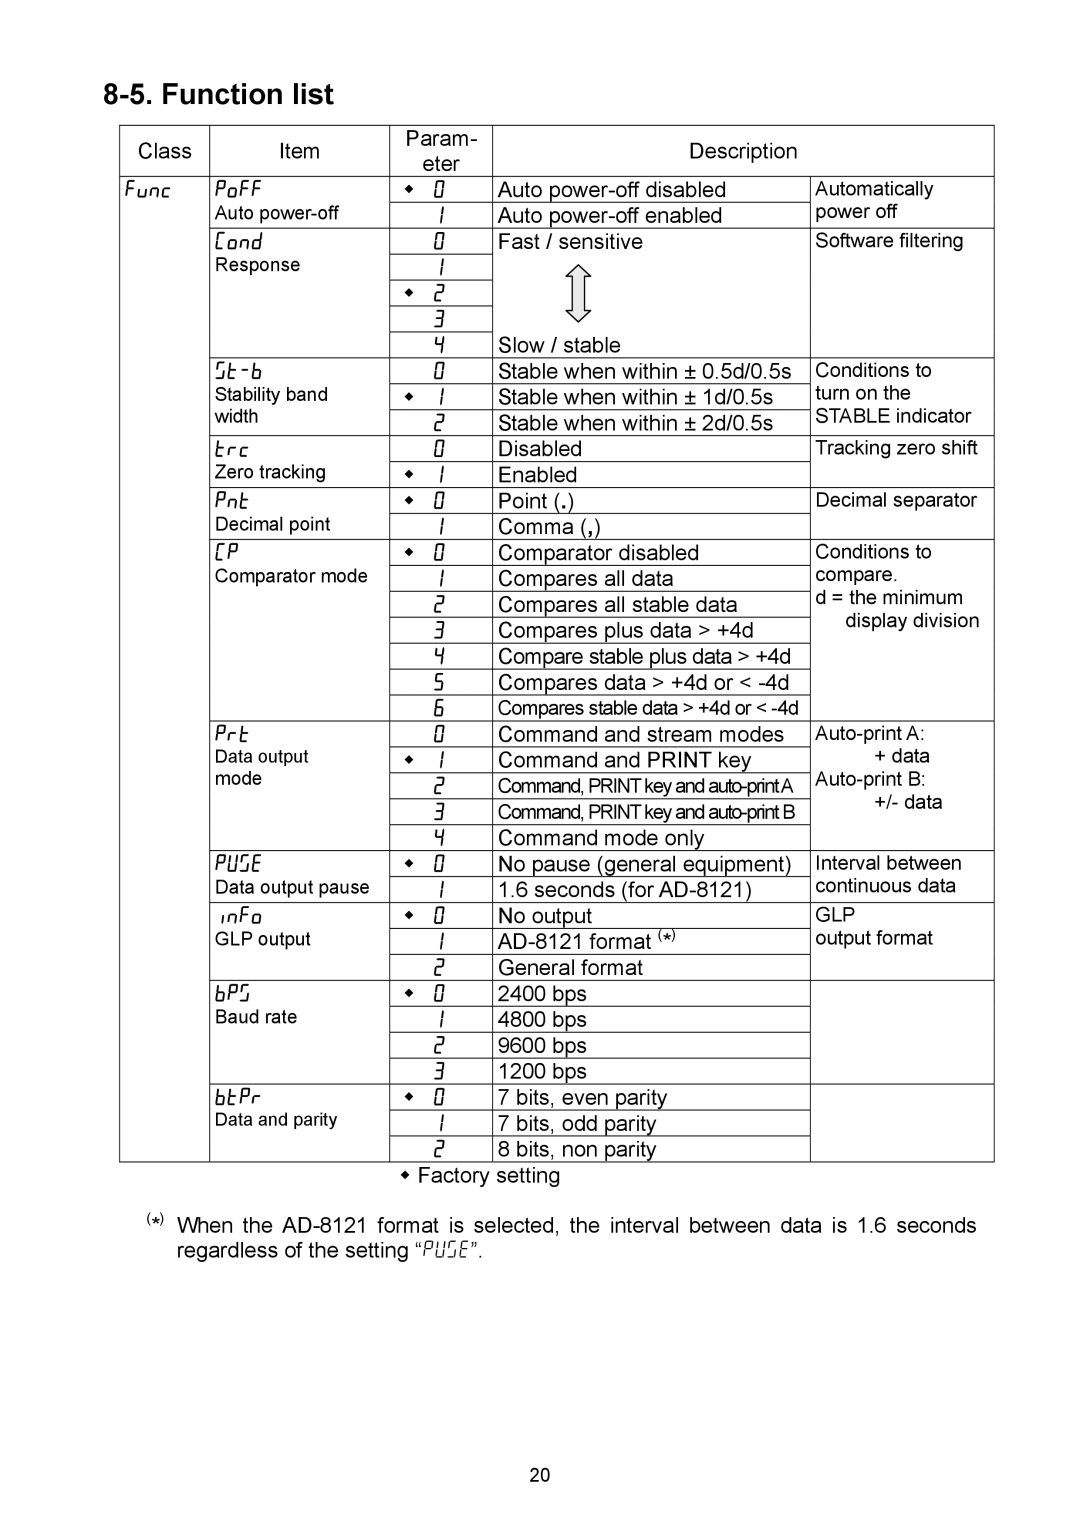
Display character set

key to return to the weighing

Returns to

the weighing mode

0 1 2 3 4 5 6 7 8 9 - A B C D E F G H I J K L M N O P Q R S T U V W X Y Z

0 1 2 3 4 5 6 7 8 9 - _ a b C d e f g H i j k l m n o p q r s t U v w x y z

” : Space

30

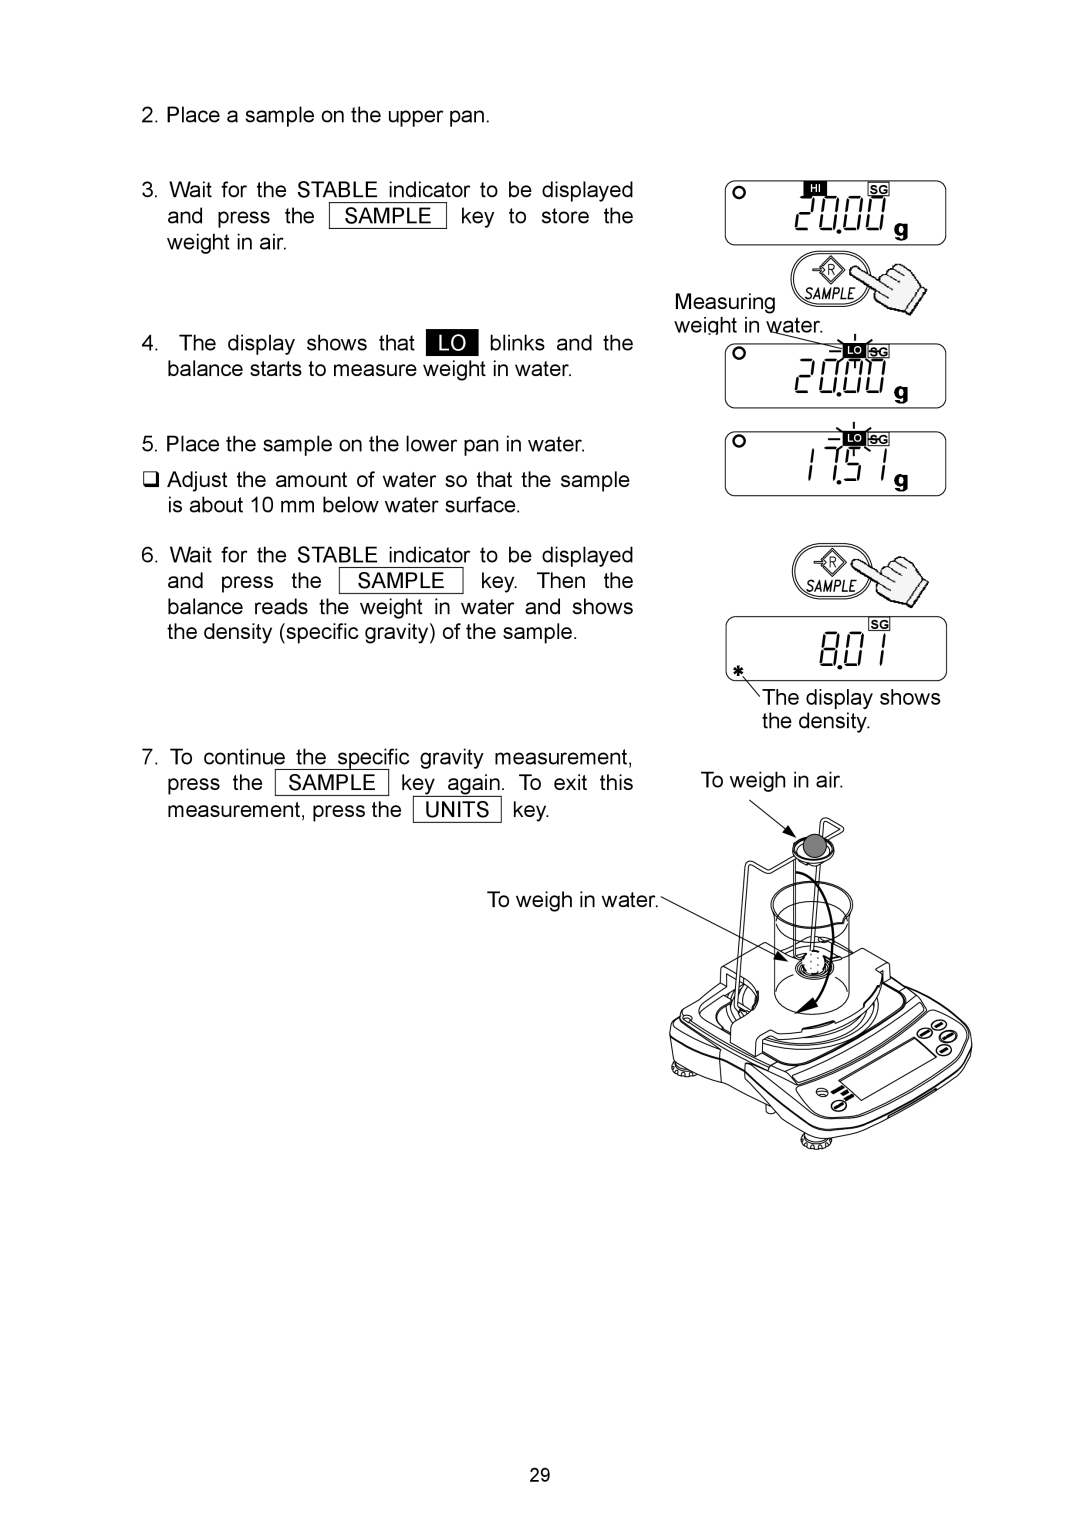
Image 32
Contents 1WMPD4001917 This manual and Marks Compliance with FCC rulesContents Maintenance Introduction UnpackingNET indicator Part Names and FunctionsPower source Setting UPSetting up your balance Storage Installing batteriesBreeze break LCD backlight Turn the power on and OFFOperation Units Conversion tableBasic operation NETSelecting a weighing unit Counting mode pcs Selecting the counting modeCounting mode using the Acai function Storing the sample unitPercent mode % 100100 0 % 1000. %Setting example Selecting a comparison modeComparator FuncCp Hi 000000 001234Cp lo 000000 001230Calibration using a weight CalibrationCal 060000Cal 50000 GlpCal 97985 Gravity acceleration correctionEntering the function setting mode FunctionsCp Hi Key operationEnd Cp Hi Func PoffACai Storing weighing units UnitEnd id Function list Func ACai UminSmpl LdinEJ-03 Installation OptionsEJ-02 USB Interface EJ-03 RS-232C serial interfaceInterface specifications EIA RS-232CData output mode Data formatCommand mode Command listEJ-07 / EJ-08 Installation EJ-07 / EJ-08 UnderhookEJ-11 Breeze break EJ-12 Carrying caseDensity specific gravity measurement EJ-13 InstallationEJ-13 Density Determination Kit Example of density measurement 000Change the function table 2000 1751 8801Setting the ID number ID Number and GLPEnd id func Display character setData format for calibration test report Output exampleData format for calibration report Calibration test using a weight TitleEnd Block Title block and End block20000 20000 EndMaintenance Error codesOverload error Range over notice Unit weight error Sample quantity noticeError1 Cal e -Cal eLb0 Hb0 Hb1 Lb1Specifications EJ seriesOther weighing units Dimensions OptionsGravity Acceleration MAP Values of gravity at various locationsWorld map