HP 5400 manual Labels

Page 34

Chapter 7

4.Carefully push the transparencies into the printer until they stop, so that none of the adhesive strips catch on one another.

5.Slide the paper guide firmly against the edge of the transparencies.

6.Lower the Out tray.

Print

1.If necessary, open the Page Setup dialog box and set the paper size, scaling, and orientation options.

2.Open the Print dialog box.

3.Select the Paper Type/Quality pane, and then specify the following settings:

Paper Type: The appropriate transparency type

Quality: Normal or Best

4.Select any other print settings that you want, and then click Print.

Labels

To print labels, use the Paper Type/Quality pane in the Print dialog box to select the paper type and print quality. For great results, use HP Address Labels.

Guidelines

Use only paper, plastic, or clear labels that are designed specifically for inkjet printers.

Use only full sheets of labels.

Avoid using labels that are sticky, wrinkled, or pulling away from the protective backing.

Do not exceed the In tray capacity: 20 sheets of labels (use only Letter or A4-size sheets).

Prepare to print

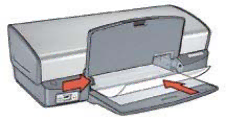
1.Raise the Out tray, and then remove all paper from the In tray.

2.Slide the paper guide all the way to the left.

3.Fan the edges of the label sheets to separate them, and then align the edges.

4.Place the label sheets in the In tray with the label side facing down.

5.Push the sheets into the printer until they stop.

6.Slide the paper guide firmly against the edge of the sheets.

32

HP Deskjet 5400 series

Image 34
Contents Users guide Acknowledgements Hewlett-Packard Company noticesTerms and conventions Contents HP Deskjet 5400 series Welcome Special features Printer features Get startedPower button and light Buttons and lightsPrint Cancel and Resume buttons PictBridge lights Paper traysUnfold the paper trays Tray Paper guideOut tray Fold the paper trays Use print cartridges Print cartridgesReplace print cartridges Installed print Result Cartridge Ink-backup modeInk-backup mode output Exit ink-backup modeConnect through a networked computer Connect to the printerNetworking Use an HP Jetdirect print serverGuidelines Print photosPrint borderless photos Prepare to printPrint Print photos with a borderQuality Best or Maximum dpi Small photos Large photos HP Real Life technologies Open HP Real Life technologiesPhoto print cartridge Color optionsStorage Maximum dpiStore and handle photo paper HandlingSave money when printing photos About PictBridge Print photos from a digitalCamera PictBridge printingPrint borderless photos Print photos with a border Print other documents MailLetters Documents Envelopes Brochures Quality Normal or Best Greeting cardsPrint borderless brochures Print brochures with bordersPostcards Transparencies Quality Normal, Best, or Maximum dpiLabels Index cards and other small media Paper Size A4 or US LetterIron-on transfers Print Select a print quality Printing tipsSet the page order Resize a document Print multiple pages on a single sheet of paperSelect a paper type Print previewChapter Printer software Print settingsSetup dialog box Print dialog boxAdd a printer Set a default printerManage the printer Mac OS X Delete a printerView and change the status of a print job Mac OS X Click Add PrinterView and change the status of a print job Mac OS X Print cartridge combinations MaintenanceInstall print cartridges Selection numbersInk-backup mode Installation instructionsRemove plastic tape Calibrate color Set the auto-off featureAlign the print cartridges Calibrate print qualityView estimated ink levels Automatically clean print cartridgesPrint a test Maintain the printer bodyManually clean print cartridges Remove ink from your skin and clothingMaintain print cartridges Store print cartridgesHP Printer Utility Open the HP Printer UtilityHP Printer Utility panes Mac OS XVerify the following TroubleshootingPrinter does not print Check the printer lightsCheck the print queue Paper jamIf the printer still does not print Printer ejects paper Paper problemsPrinter does not feed paper Out-of-paper messagePrinter prints on multiple sheets at once Paper weightPrinter is stalled Printer prints on multiple sheets at oncePrint cartridge problem message Print cartridge problemsIncorrect print cartridge Print cartridge is in the wrong slot message Printing in ink-backup mode messagePhotos do not print correctly Check the paper trayColors are tinted or incorrect Check the printer settingsHorizontal lines appear on a photo Fading occurs on the edges of a photo Part of the photo is fadedPart of the photo is faded Fading occurs near the edges of a photoImages in a connected digital camera do not print PictBridge problemsPictBridge lights are flashing State of the lights Streaks and missing lines Print quality is poorPrint is faded Blank pages print Too much or too little ink appears onProblems with borderless documents Document is misprintedStreaks appear in a light portion of a photo Image is printed at an angle Ink smearsPhoto has unwanted border For most paper types Photo has an unwanted borderFor photo paper with a tear-off tab Out-of-paper message Error messagesPrinting in ink-backup mode Out of paper messageIf the In tray is empty Power light is flashingPrinter lights are on or flashing What the lights indicateBoth lights are flashing Document prints slowlyResume light is flashing Multiple software programs are openIf you continue to have problems Paper SuppliesUSB cables Specifications Printer specificationsReduction and elimination Environmental informationEnvironmental statement RecyclingPrint cartridge recovery Chapter Index USB