Started
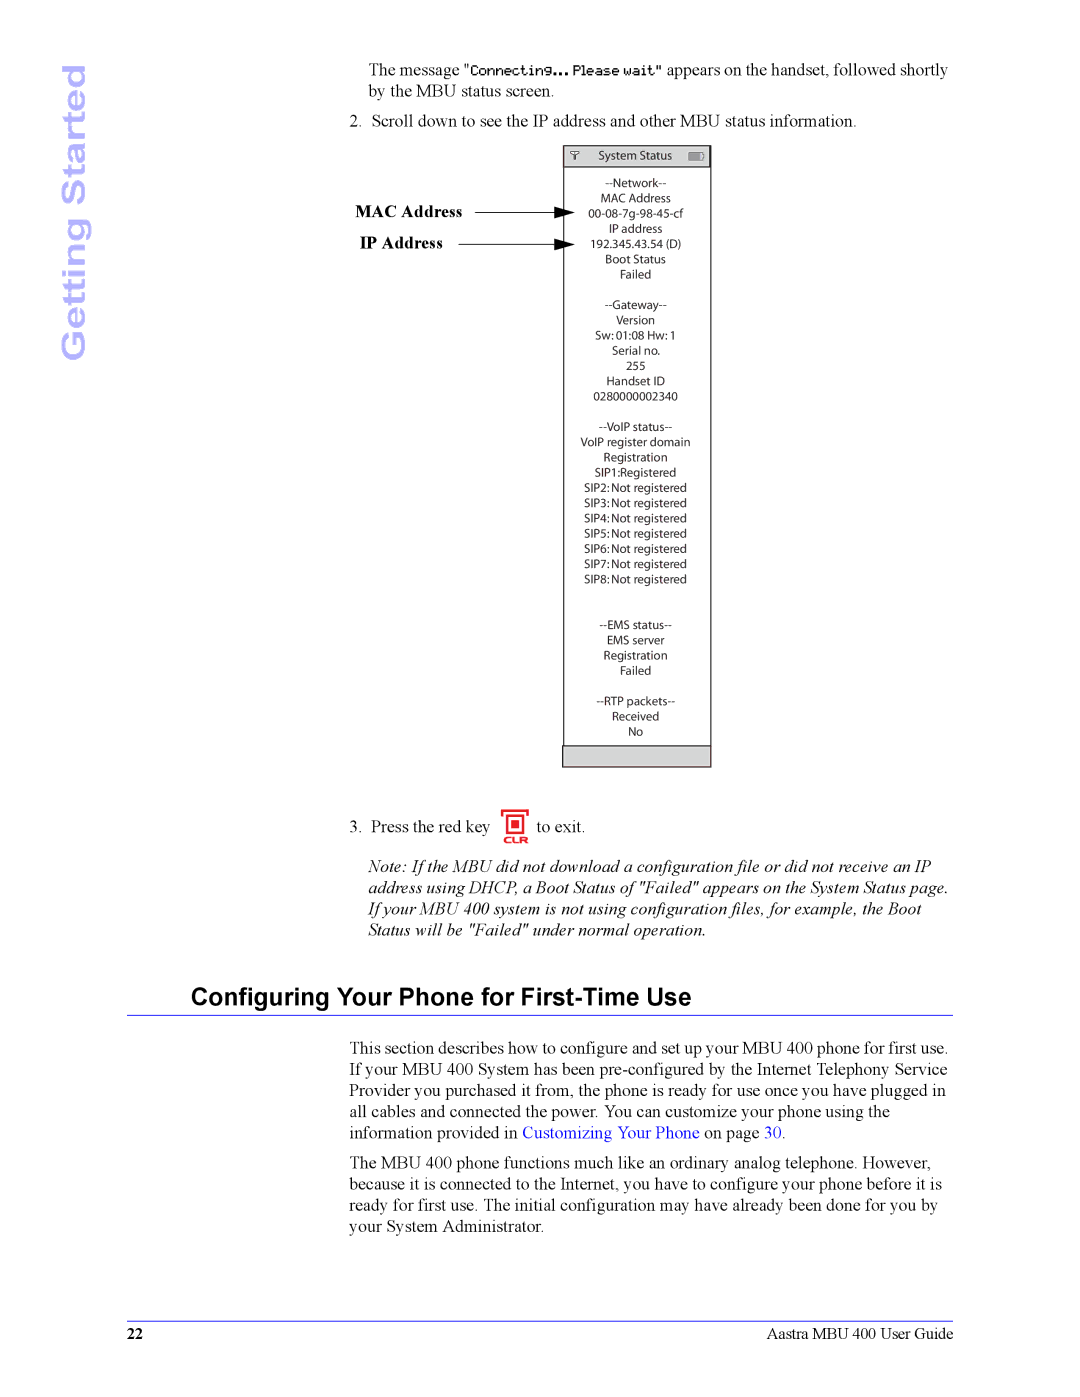
The message "Connecting... Please wait" appears on the handset, followed shortly by the MBU status screen.
2. Scroll down to see the IP address and other MBU status information.
Getting
MAC Address IP Address
System Status
MAC Address
IP address
192.345.43.54 (D)
Boot Status
Failed
Version
Sw: 01:08 Hw: 1 Serial no.
255
Handset ID
0280000002340
VoIP register domain
Registration
SIP1:Registered
SIP2: Not registered
SIP3: Not registered
SIP4: Not registered
SIP5: Not registered
SIP6: Not registered
SIP7: Not registered
SIP8: Not registered
EMS server Registration Failed
Received
No
3. Press the red key | to exit. |
| CLR |
Note: If the MBU did not download a configuration file or did not receive an IP address using DHCP, a Boot Status of "Failed" appears on the System Status page. If your MBU 400 system is not using configuration files, for example, the Boot Status will be "Failed" under normal operation.
Configuring Your Phone for First-Time Use
This section describes how to configure and set up your MBU 400 phone for first use. If your MBU 400 System has been
The MBU 400 phone functions much like an ordinary analog telephone. However, because it is connected to the Internet, you have to configure your phone before it is ready for first use. The initial configuration may have already been done for you by your System Administrator.
22 | Aastra MBU 400 User Guide |