AXIS 2120 User’s Manual | The AXIS 2191 Audio Module | 47 |
Installing the Audio Module
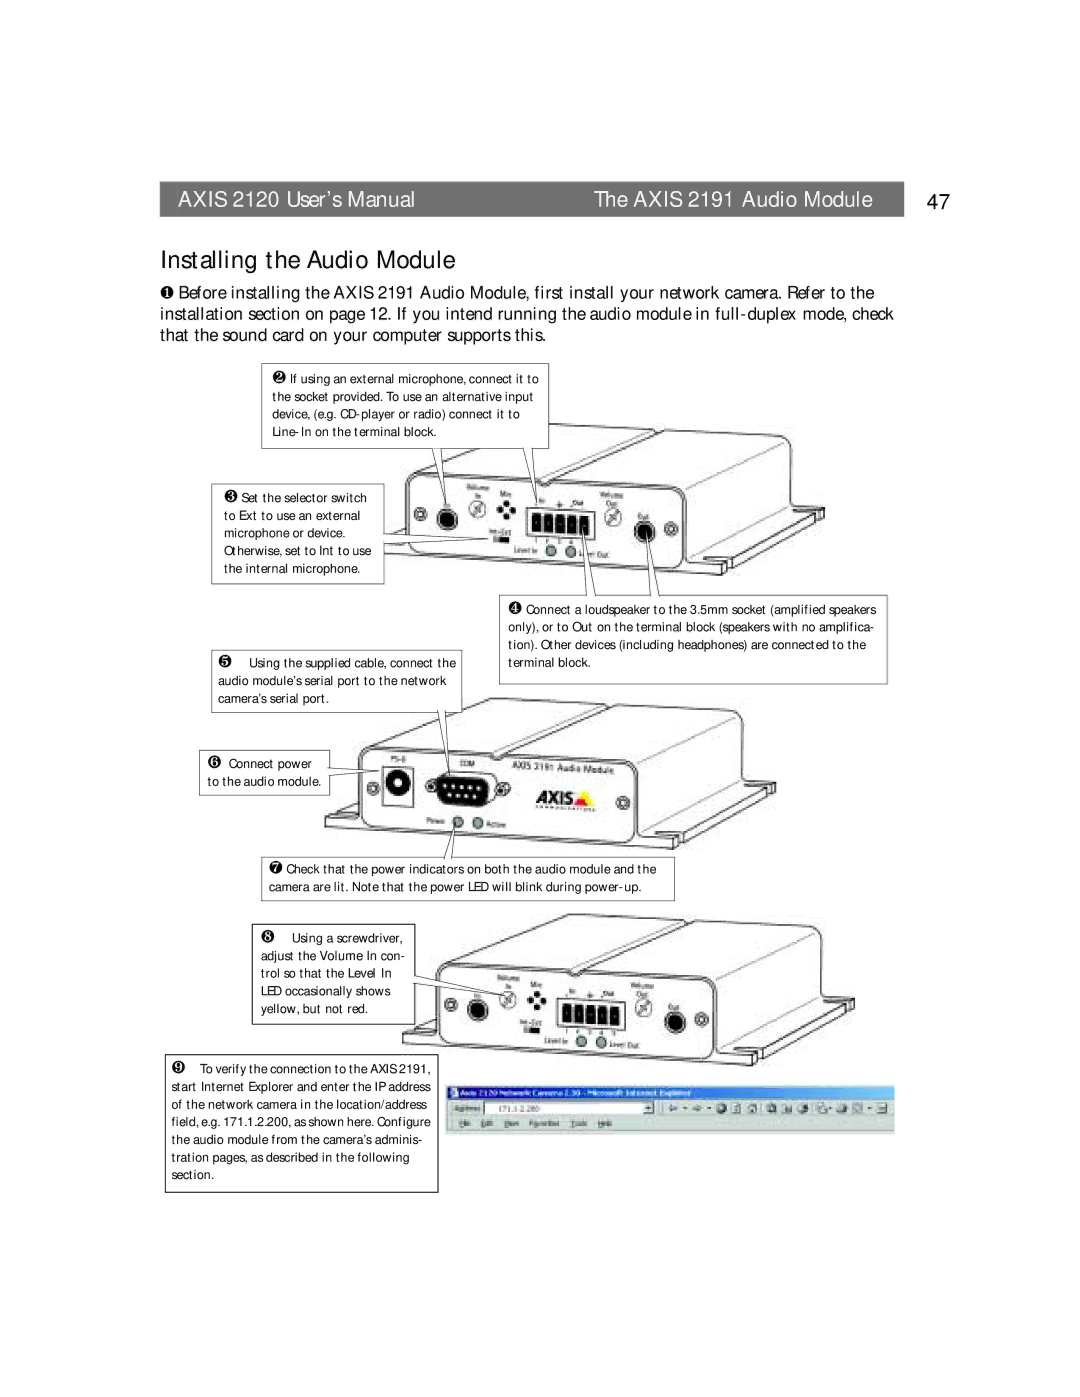
❶Before installing the AXIS 2191 Audio Module, first install your network camera. Refer to the installation section on page 12. If you intend running the audio module in
❷If using an external microphone, connect it to the socket provided. To use an alternative input device, (e.g.
❸Set the selector switch to Ext to use an external
microphone or device. Otherwise, set to Int to use the internal microphone.
❺Using the supplied cable, connect the audio module’s serial port to the network camera’s serial port.
❻Connect power
to the audio module.
❹Connect a loudspeaker to the 3.5mm socket (amplified speakers only), or to Out on the terminal block (speakers with no amplifica- tion). Other devices (including headphones) are connected to the terminal block.
❼Check that the power indicators on both the audio module and the camera are lit. Note that the power LED will blink during
❽Using a screwdriver,
adjust the Volume In con- trol so that the Level In LED occasionally shows yellow, but not red.
❾To verify the connection to the AXIS 2191, start Internet Explorer and enter the IP address of the network camera in the location/address field, e.g. 171.1.2.200, as shown here. Configure the audio module from the camera’s adminis- tration pages, as described in the following section.