AXIS 213 - Installing the AXIS 213 11
Manual Installation using ARP and Ping in Windows
Follow these instructions to assign a unique IP address to your product from a computer on your network:
1.Acquire an unused IP address for the AXIS 213 from your network administrator.
2.Connect a standard network cable to your AXIS 213 and connect it to the network.
3.Locate the serial number/MAC Address (S/N) found on the label on the AXIS 213.
4.From a computer on your network, open a Command Prompt, i.e. from the Windows Start menu, select Run... and type cmd in the field. Click OK.
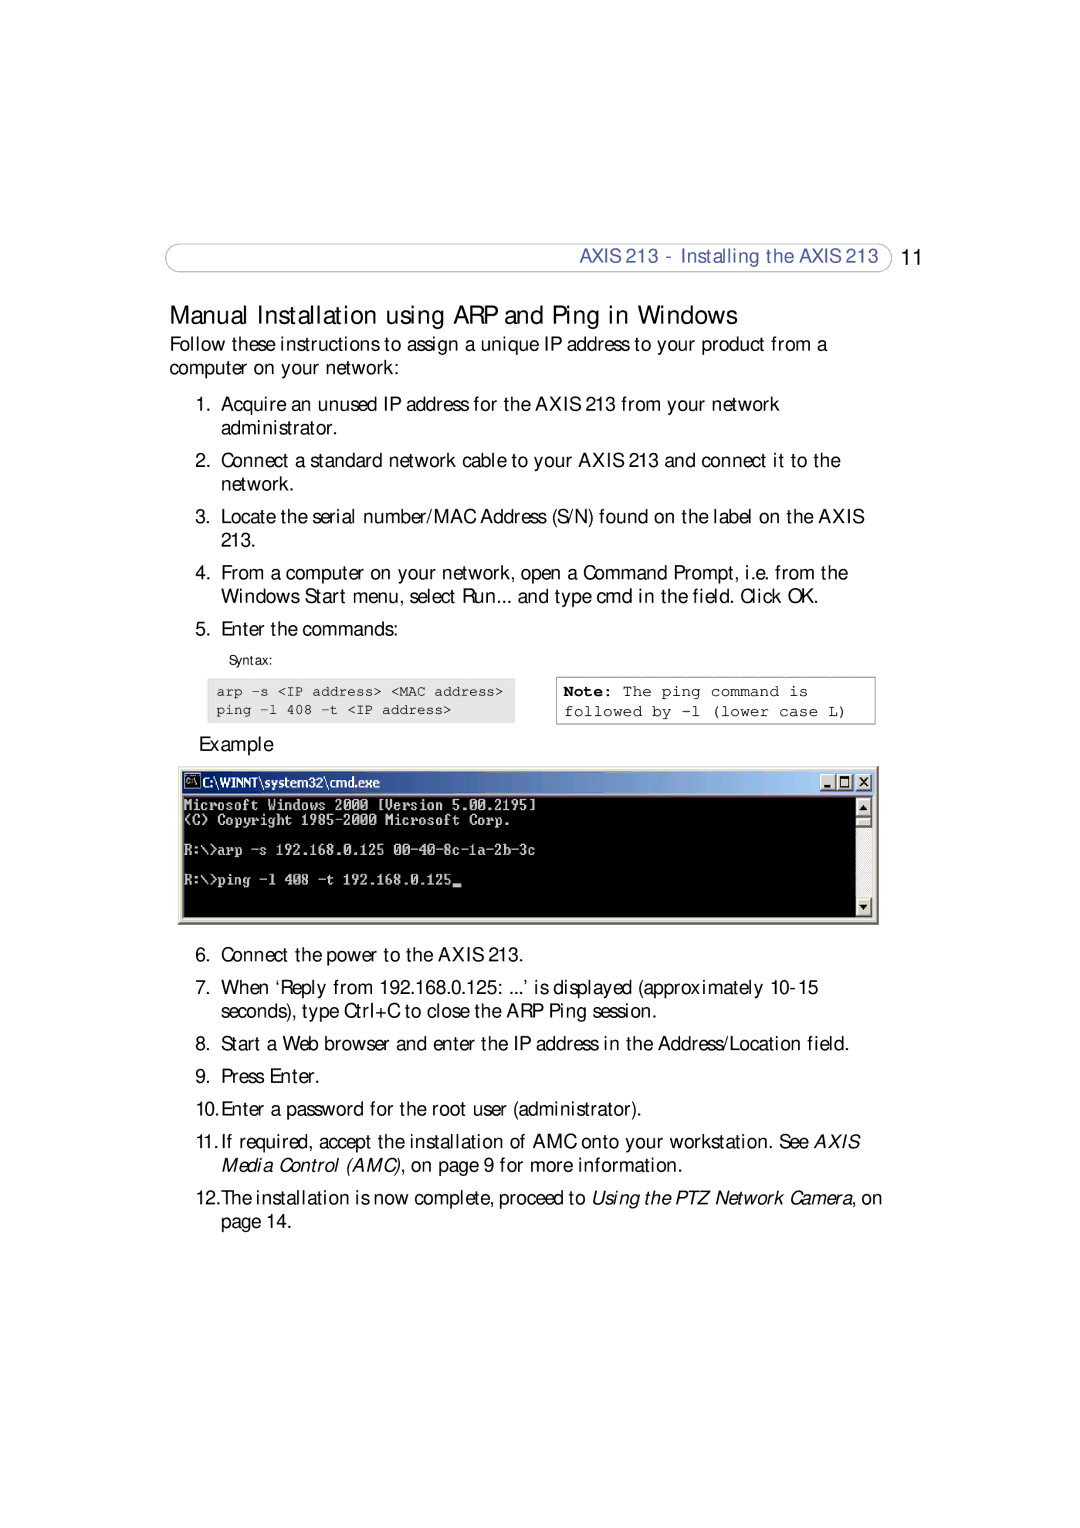
5. Enter the commands:
Syntax:
arp
Note: The ping command is followed by
Example
6.Connect the power to the AXIS 213.
7.When ‘Reply from 192.168.0.125: ...’ is displayed (approximately
8.Start a Web browser and enter the IP address in the Address/Location field.
9.Press Enter.
10.Enter a password for the root user (administrator).
11.If required, accept the installation of AMC onto your workstation. See AXIS Media Control (AMC), on page 9 for more information.
12.The installation is now complete, proceed to Using the PTZ Network Camera, on page 14.