

 Hardware Installation
2.2.1 Installing the DIM Module
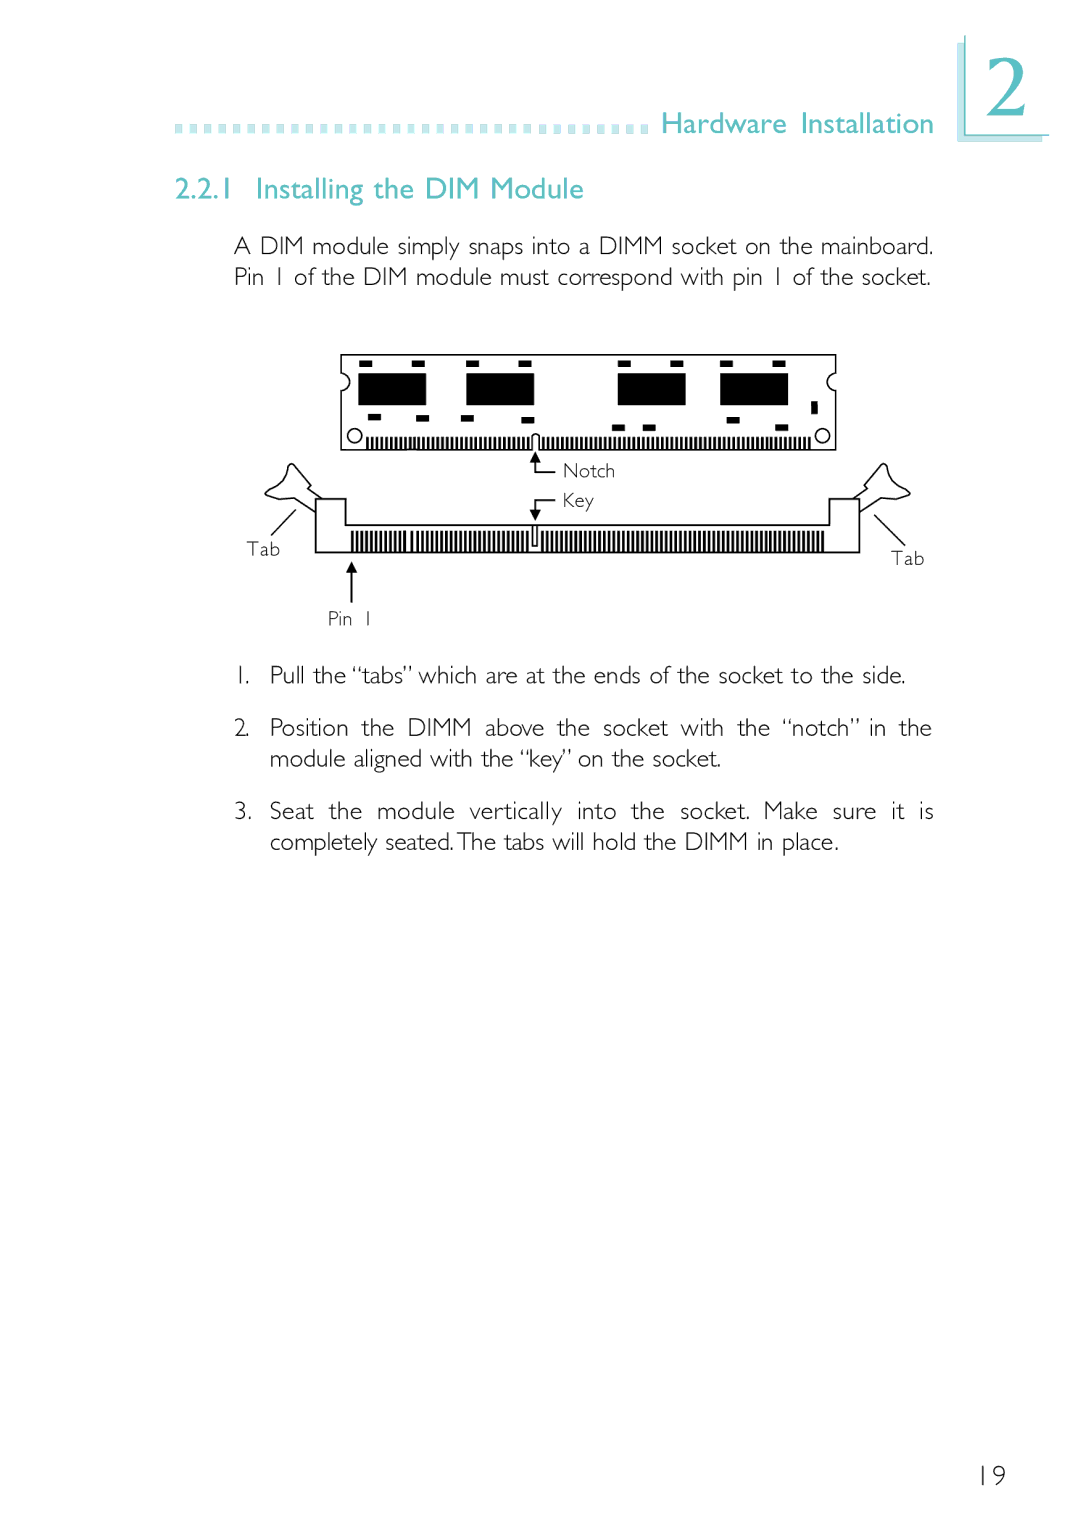
A DIM module simply snaps into a DIMM socket on the mainboard. Pin 1 of the DIM module must correspond with pin 1 of the socket.
2
Tab
Pin 1
![]() Notch
Notch
![]() Key
Key
Tab
1.Pull the “tabs” which are at the ends of the socket to the side.
2.Position the DIMM above the socket with the “notch” in the module aligned with the “key” on the socket.
3.Seat the module vertically into the socket. Make sure it is completely seated. The tabs will hold the DIMM in place.
19
