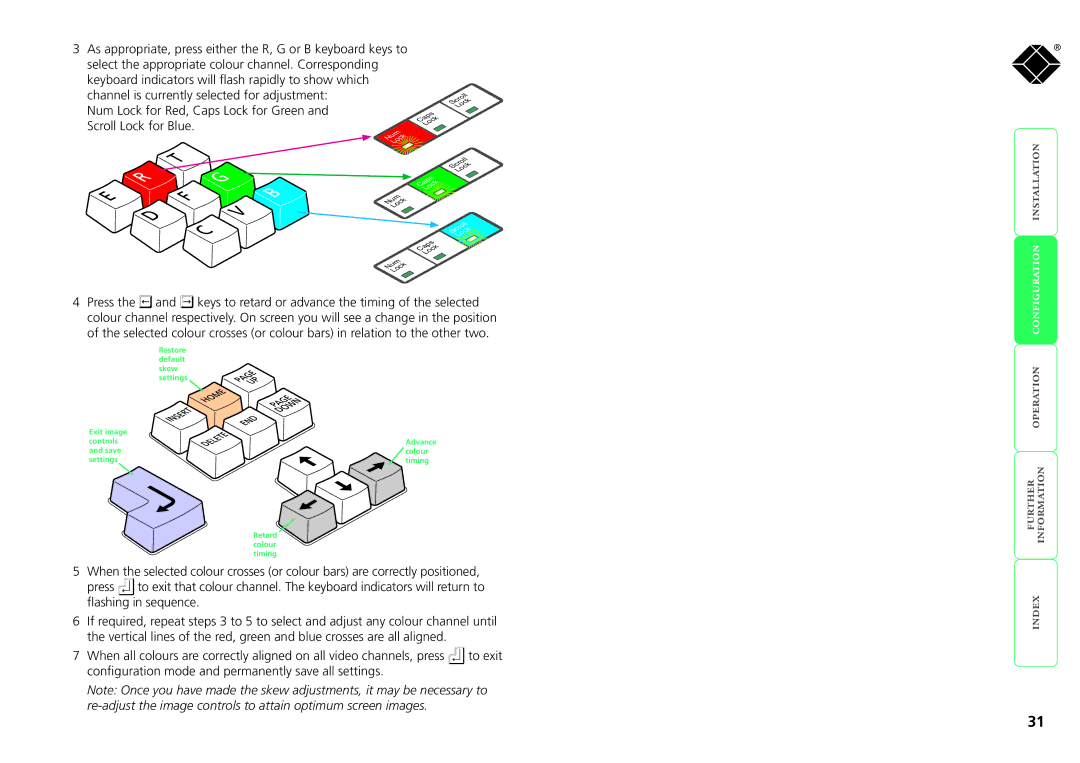
3 As appropriate, press either the R, G or B keyboard keys to
select the appropriate colour channel. Corresponding |
|
|
|
|
|
|
keyboard indicators will flash rapidly to show which |
|
|
|
|
|
|
channel is currently selected for adjustment: |
|
|
|
| Scroll | |
|
|
|
|
| ||
Num Lock for Red, Caps Lock for Green and |
|
|
|
| Lock | |
|
| Caps | ||||
|
|
| ||||
Scroll Lock for Blue. |
|
| Lock | |||
Num |
|
|
|
|
| |
|
|
|
|
|
| |
| Lock |
|
|
|
| |
|
|
|
|
|
|
|
|
|
|
|
|
|
|
|
|
|
|
|
|
|
|
|
|
|
|
|
|
Exit image controls and save settings
Retard colour timing
5 When the selected colour crosses (or colour bars) are correctly positioned, press to exit that colour channel. The keyboard indicators will return to flashing in sequence.
6If required, repeat steps 3 to 5 to select and adjust any colour channel until the vertical lines of the red, green and blue crosses are all aligned.
7 When all colours are correctly aligned on all video channels, press | to exit |
configuration mode and permanently save all settings. |
|
Note: Once you have made the skew adjustments, it may be necessary to
®
31