16 en Mounting | MIC Series 500 Camera |
|
|
3.Grasp the lower camera body beneath the pan body joint and then carefully twist the upper camera body clockwise until the camera body has rotated 180° around, canting the top part of the camera to the 45° angle. Ensure that the securing bolt holes are aligned.
Figure 4.6 Canting in progress
4.Carefully replace and tighten the pan body securing the supplied
Figure 4.7 Camera canted
5.The MIC 500 Series Camera is now ready to be installed and configured.
NOTICE!
Installation should be made by qualified service personnel and conform to the National Electrical Code and applicable local codes. Ensure a strong safety chain is used to secure the MIC 500 Series Camera to prevent any danger of dropping the product during installation.
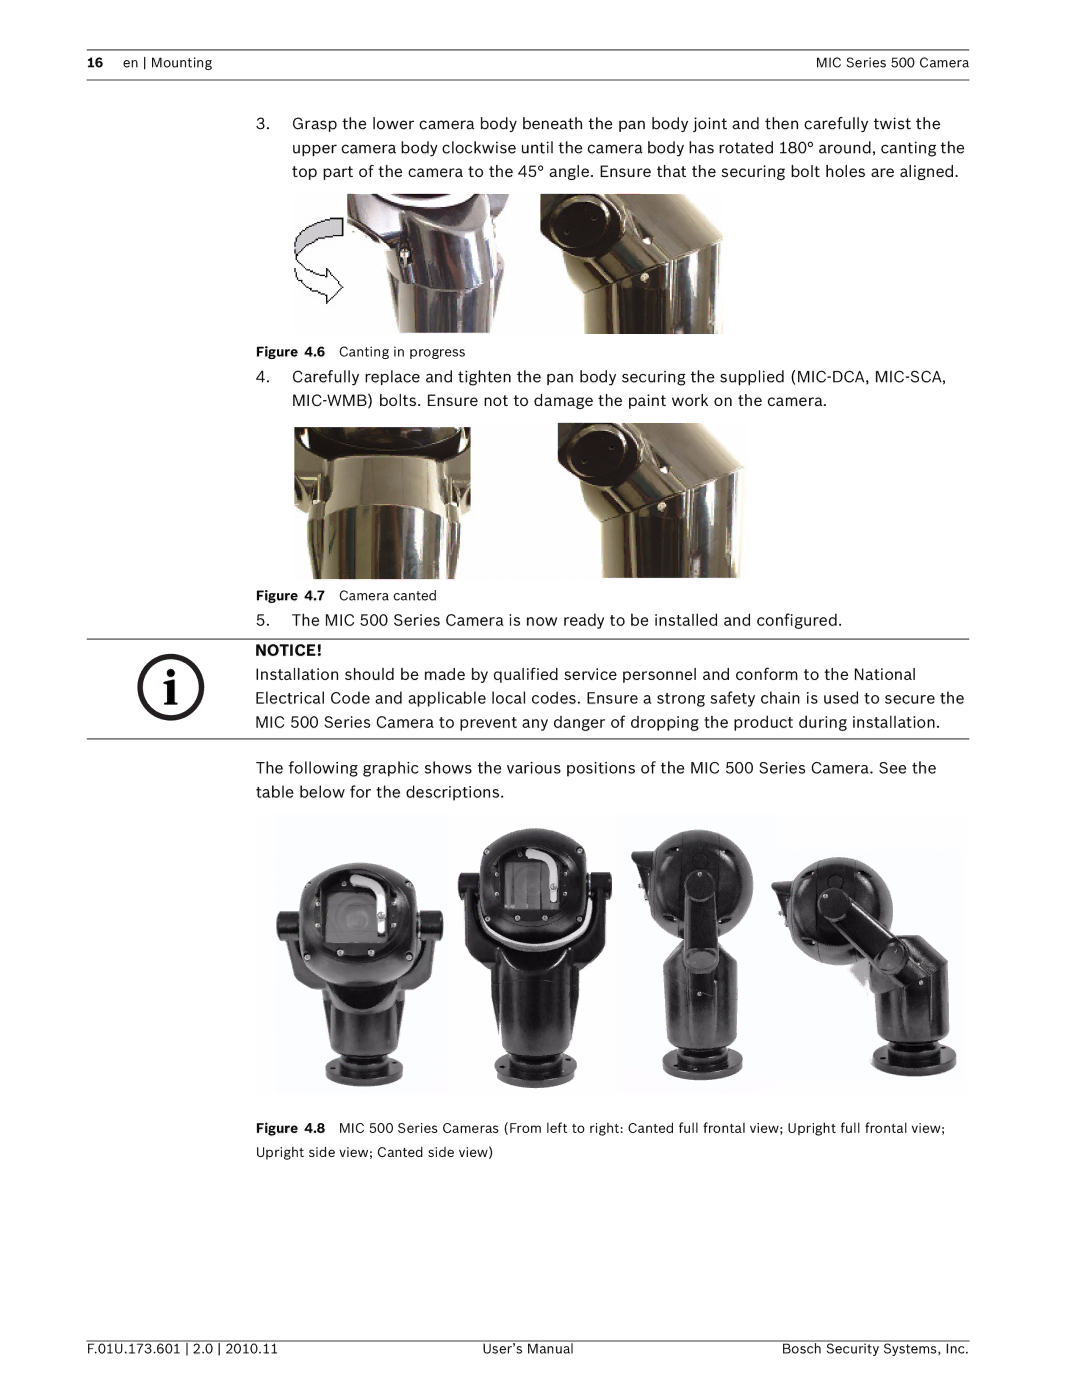
The following graphic shows the various positions of the MIC 500 Series Camera. See the table below for the descriptions.
Figure 4.8 MIC 500 Series Cameras (From left to right: Canted full frontal view; Upright full frontal view; Upright side view; Canted side view)
F.01U.173.601 2.0 2010.11 | User’s Manual | Bosch Security Systems, Inc. |
