Creating Embroidery Patterns
2.Move the pointer over ![]() ,
, ![]() or
or ![]() , and then, while holding down the left mouse button, drag the mouse to adjust the size, position or curve of the text.
, and then, while holding down the left mouse button, drag the mouse to adjust the size, position or curve of the text.
: Adjusts the text size.
: Moves the text along the circle.
: Adjusts the radius of the circle.
c “Transforming text” on page 33
3.To adjust the positions of the embroidery patterns, click the pattern, and then position the pointer over the pattern. When the shape
of the pointer changes to ![]() , hold down the left mouse button and drag the pattern to the desired location.
, hold down the left mouse button and drag the pattern to the desired location.
c “Editing Embroidery Designs” on page 37
Step 5 Importing and rotating an embroidery pattern
Now, we will import the embroidery pattern for the rose.
1. Click | , then | , |
then ![]() .
.
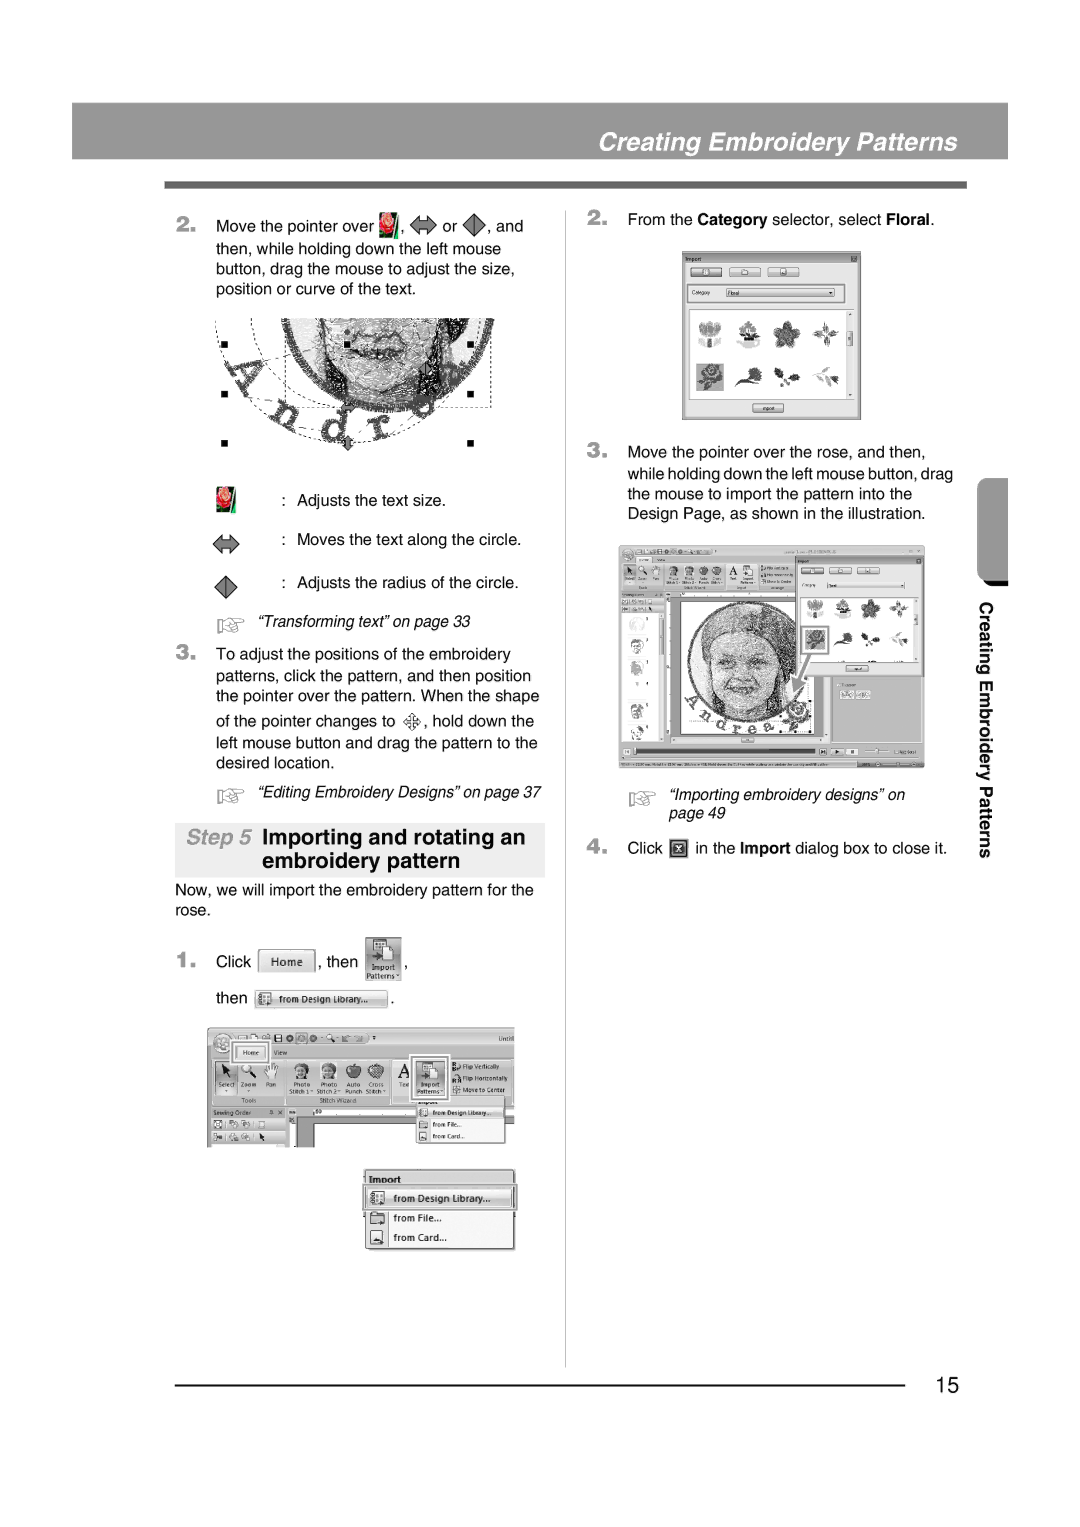
2.From the Category selector, select Floral.
3.Move the pointer over the rose, and then, while holding down the left mouse button, drag the mouse to import the pattern into the Design Page, as shown in the illustration.
4. Click |
|
|
| Creating Embroidery | |
|
|
| |||
in the Import dialog box to close it. | |||||
Patterns | |||||
c | “Importing embroidery designs” on |
| |||
| page 49 |
| |||
15