Creating Embroidery Patterns
4.Click Next.
In this dialog box, the cross size and the number of colors can be specified. For this example, we will use the default settings.
5.Click Finish.
In this dialog box, stitches can be added, deleted or edited, and colors and the number of times each stitch is sewn can be specified. For this example, we will use the default settings.
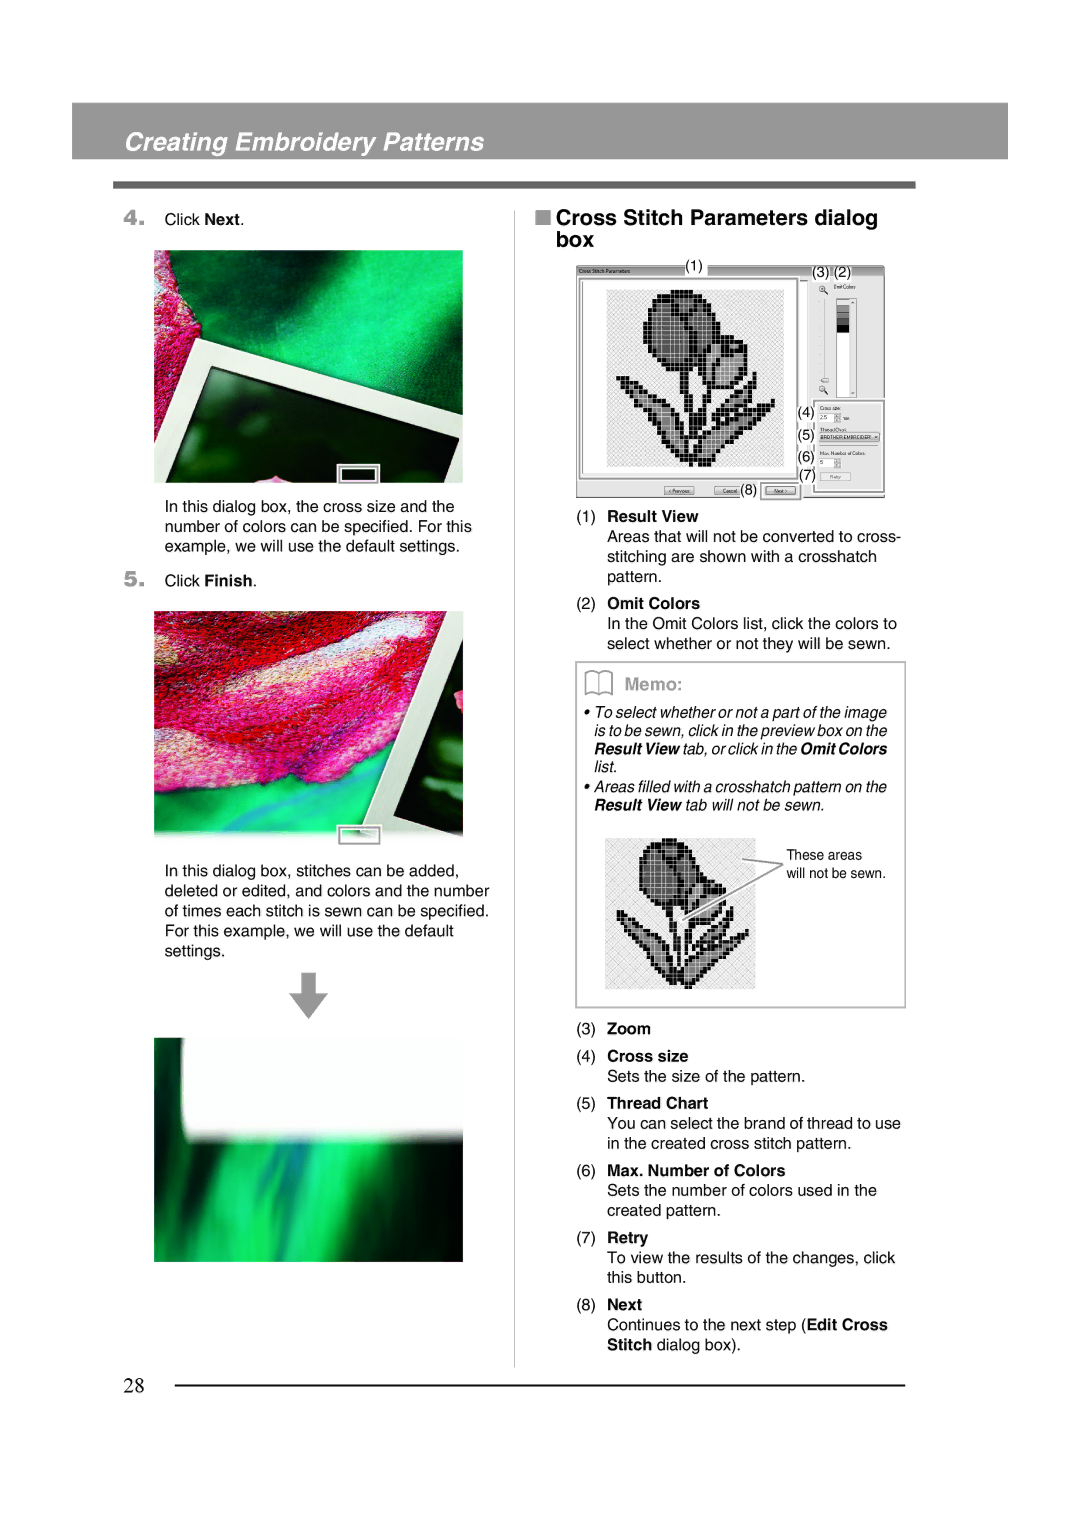
■Cross Stitch Parameters dialog box
(1) | (3) (2) |
| |
| (4) |
| (5) |
| (6) |
| (7) |
| (8) |
(1)Result View
Areas that will not be converted to cross- stitching are shown with a crosshatch pattern.
(2)Omit Colors
In the Omit Colors list, click the colors to select whether or not they will be sewn.
b Memo:
•To select whether or not a part of the image is to be sewn, click in the preview box on the Result View tab, or click in the Omit Colors list.
•Areas filled with a crosshatch pattern on the Result View tab will not be sewn.
These areas will not be sewn.
(3)Zoom
(4)Cross size
Sets the size of the pattern.
(5)Thread Chart
You can select the brand of thread to use in the created cross stitch pattern.
(6)Max. Number of Colors
Sets the number of colors used in the created pattern.
(7)Retry
To view the results of the changes, click this button.
(8)Next
Continues to the next step (Edit Cross Stitch dialog box).
28