
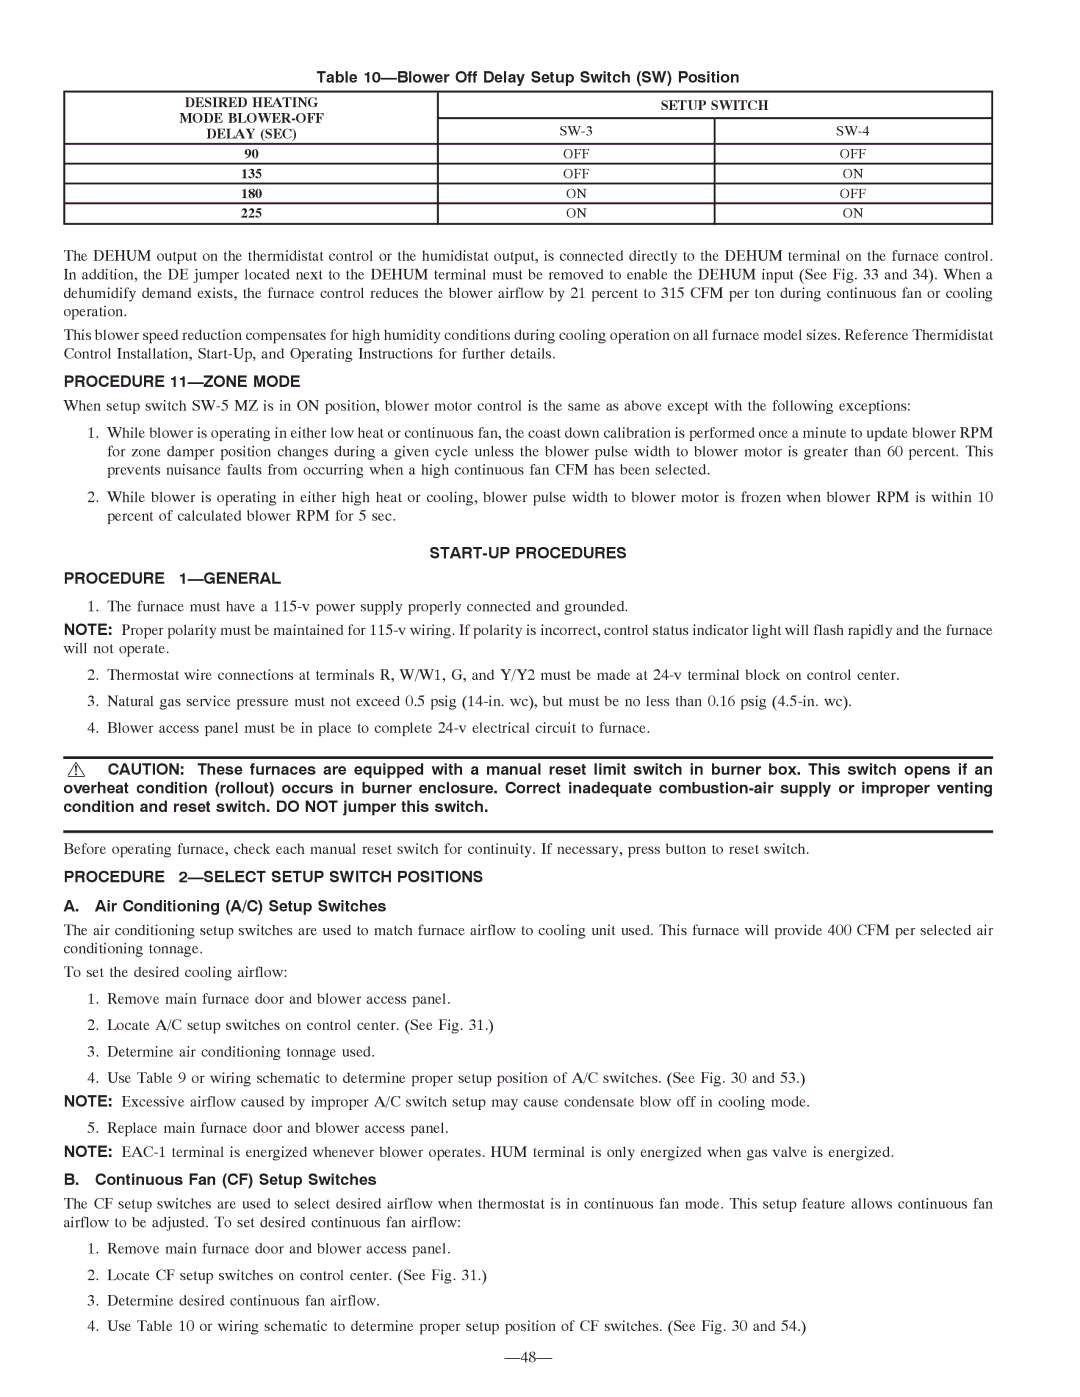
355MAV specifications
The Bryant 355MAV is a remarkable model that stands out in the HVAC (heating, ventilation, and air conditioning) industry for its efficiency, reliability, and advanced technology. This unit is specifically designed to provide homeowners with excellent comfort while maintaining energy efficiency, making it an ideal choice for residential applications.One of the standout features of the Bryant 355MAV is its variable speed compressor. This technology allows the system to adjust its cooling output based on the current temperature needs of the home. By operating at multiple speed levels, the compressor can maintain a more consistent indoor climate while using significantly less energy than traditional single-speed systems. This capability translates to lower energy bills and enhanced comfort.
Additionally, the Bryant 355MAV integrates an advanced control system that offers precise temperature regulation. Homeowners can easily set their desired indoor conditions, and the thermostat will communicate with the system to ensure optimal performance. This smart technology not only enhances comfort but also extends the lifespan of the unit by preventing unnecessary strain during operation.
The 355MAV also features significant advancements in sound reduction technology. Designed with noise-absorbing materials and a quiet operation mode, this unit ensures that indoor comfort is maintained without the disruption of loud operational sounds. This makes it a perfect choice for residential settings, particularly in areas where noise sensitivity is a concern.
Energy efficiency is another key characteristic of the Bryant 355MAV. The unit is certified with a high Seasonal Energy Efficiency Ratio (SEER) rating, which means it meets strict energy consumption standards. This not only reflects its eco-friendliness but also contributes to significant savings on utility bills over time.
Moreover, the Bryant 355MAV uses environmentally friendly refrigerants that comply with EPA regulations, further solidifying its commitment to sustainability. This, combined with durable construction and a reliable warranty, ensures that homeowners can expect lasting performance from the system.
In conclusion, the Bryant 355MAV offers an impressive array of features, including a variable speed compressor, advanced control systems, sound reduction technology, and high energy efficiency. These characteristics make it an exceptional option for those seeking a reliable and efficient HVAC solution in their homes. With its commitment to comfort, savings, and sustainability, the Bryant 355MAV continues to be a popular choice among homeowners looking to enhance their indoor environments.