![]() NOTE
NOTE
If AUTO SORT in Copy Settings (from the Additional Functions menu) is set to ‘01 ON’, the Collate and Offset Collate mode is automatically set if you place your originals in the feeder. (See “Auto Sort,” on p.
F4
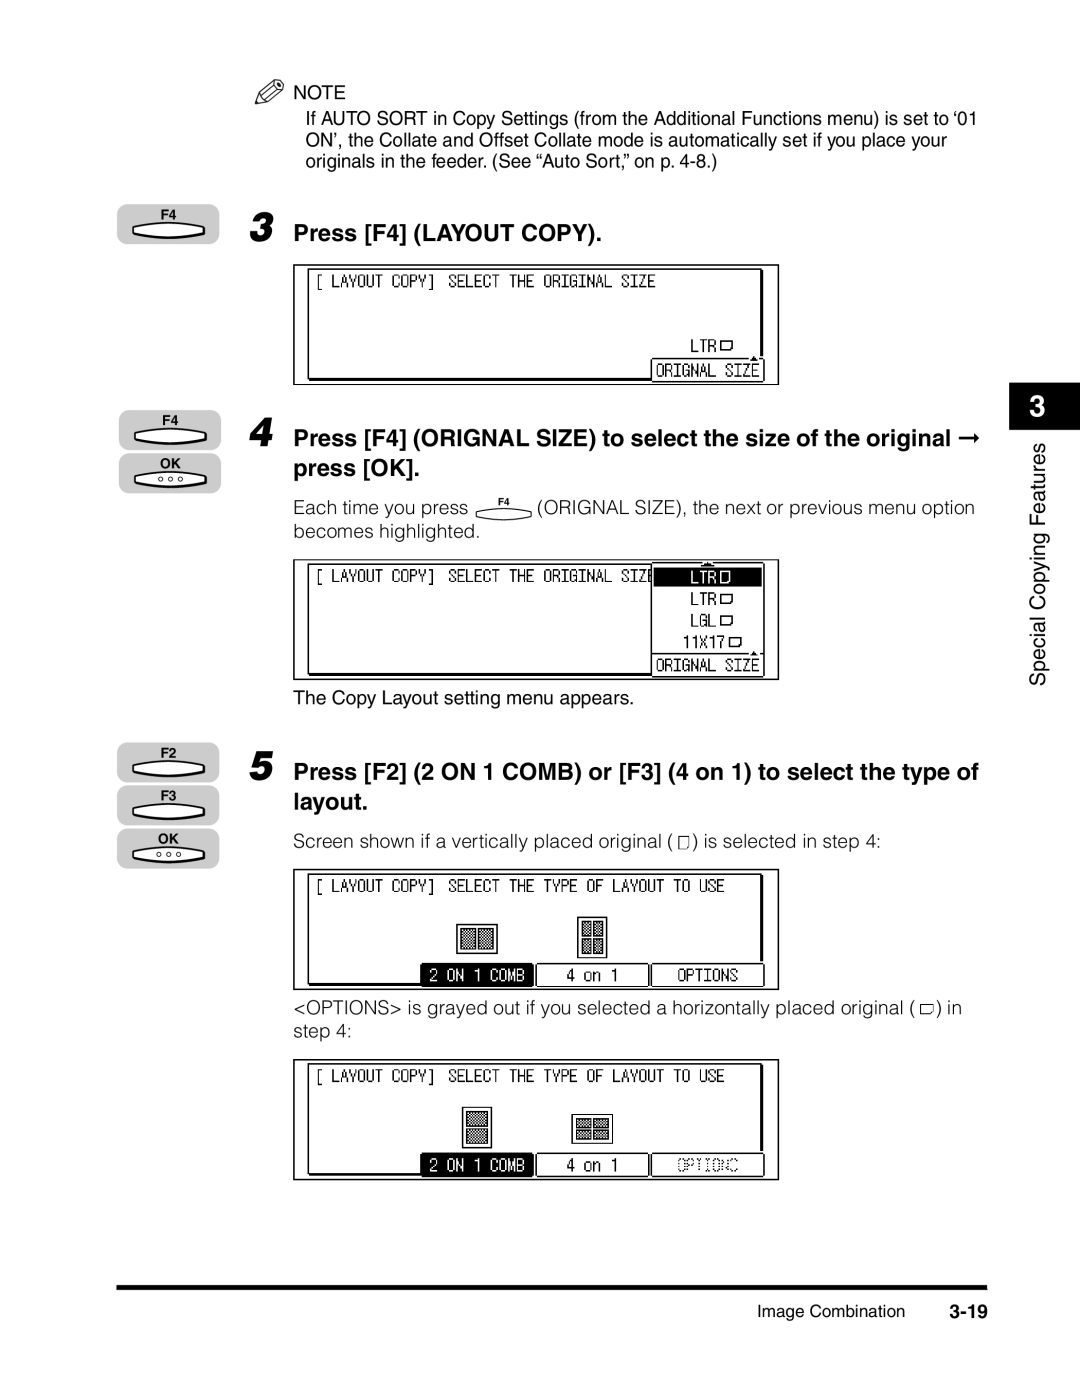
3 Press [F4] (LAYOUT COPY).
F4
OK
F2
F3
OK
4 Press [F4] (ORIGNAL SIZE) to select the size of the original ➞ press [OK].
Each time you press | F4 | (ORIGNAL SIZE), the next or previous menu option |
|
becomes highlighted.
The Copy Layout setting menu appears.
5 Press [F2] (2 ON 1 COMB) or [F3] (4 on 1) to select the type of layout.
Screen shown if a vertically placed original ( ![]() ) is selected in step 4:
) is selected in step 4:
<OPTIONS> is grayed out if you selected a horizontally placed original ( ![]() ) in step 4:
) in step 4:
3
Special Copying Features
Image Combination |