View Restriction Tool Display Screen
An overview of the functions of the GUI displayed when the View Restriction Tool starts up is
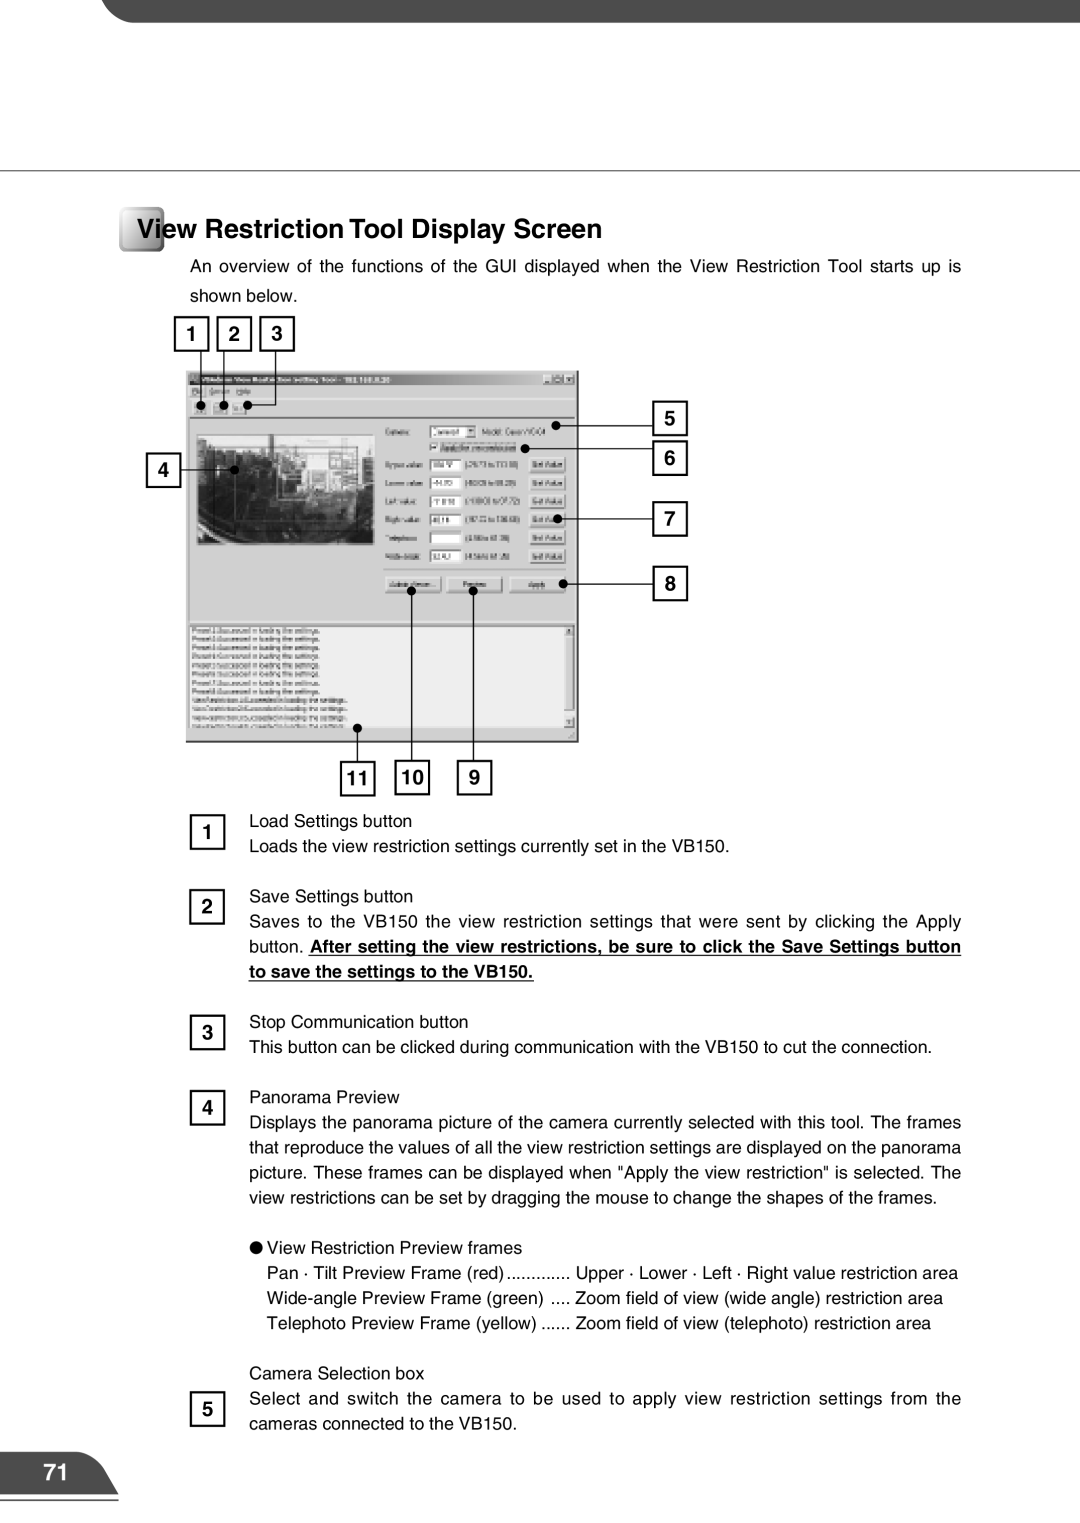
shown below.
1 ![]()
![]() 2
2 ![]()
![]() 3
3
4
5
6
7
8
11
10
9
1
2
Load Settings button
Loads the view restriction settings currently set in the VB150.
Save Settings button
Saves to the VB150 the view restriction settings that were sent by clicking the Apply button. After setting the view restrictions, be sure to click the Save Settings button
to save the settings to the VB150.
3
4
5
Stop Communication button
This button can be clicked during communication with the VB150 to cut the connection.
Panorama Preview
Displays the panorama picture of the camera currently selected with this tool. The frames that reproduce the values of all the view restriction settings are displayed on the panorama picture. These frames can be displayed when "Apply the view restriction" is selected. The view restrictions can be set by dragging the mouse to change the shapes of the frames.
●View Restriction Preview frames
Pan · Tilt Preview Frame (red) ............. Upper · Lower · Left · Right value restriction area
Camera Selection box
Select and switch the camera to be used to apply view restriction settings from the cameras connected to the VB150.
71