Motion Detection Setting Tool Display Screen
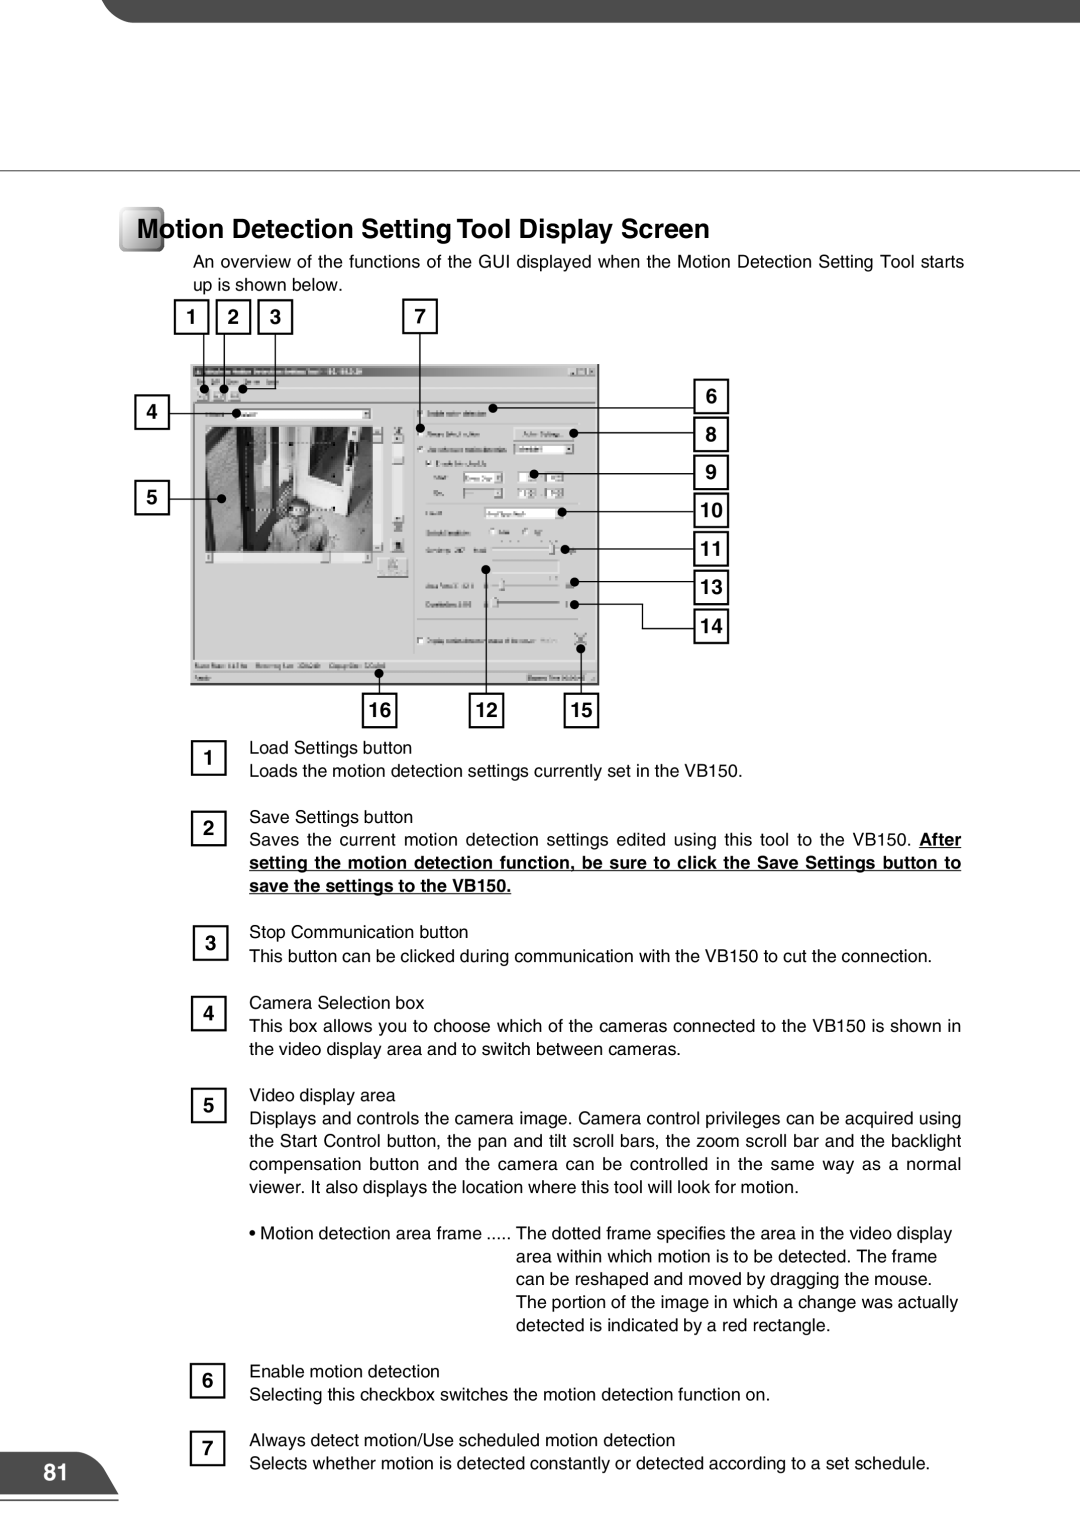
An overview of the functions of the GUI displayed when the Motion Detection Setting Tool starts up is shown below.
4
5
1
2
3
7
|
|
|
|
|
|
|
|
|
|
16 |
| 12 | ||
|
|
|
|
|
6
8
9
![]()
![]() 10
10 ![]()
![]() 11
11
13
![]() 14
14
15
1Load Settings button
Loads the motion detection settings currently set in the VB150.
2
Save Settings button
Saves the current motion detection settings edited using this tool to the VB150. After
setting the motion detection function, be sure to click the Save Settings button to save the settings to the VB150.
3
Stop Communication button
This button can be clicked during communication with the VB150 to cut the connection.
4
Camera Selection box
This box allows you to choose which of the cameras connected to the VB150 is shown in the video display area and to switch between cameras.
81
5
6
7
Video display area
Displays and controls the camera image. Camera control privileges can be acquired using the Start Control button, the pan and tilt scroll bars, the zoom scroll bar and the backlight compensation button and the camera can be controlled in the same way as a normal viewer. It also displays the location where this tool will look for motion.
•Motion detection area frame ..... The dotted frame specifies the area in the video display area within which motion is to be detected. The frame can be reshaped and moved by dragging the mouse. The portion of the image in which a change was actually detected is indicated by a red rectangle.
Enable motion detection
Selecting this checkbox switches the motion detection function on.
Always detect motion/Use scheduled motion detection
Selects whether motion is detected constantly or detected according to a set schedule.