Chapter 3 Mounting Instructions
Mounting Below a Suspended Ceiling
Mounting Below a Suspended Ceiling
Note To comply with NEC code, a
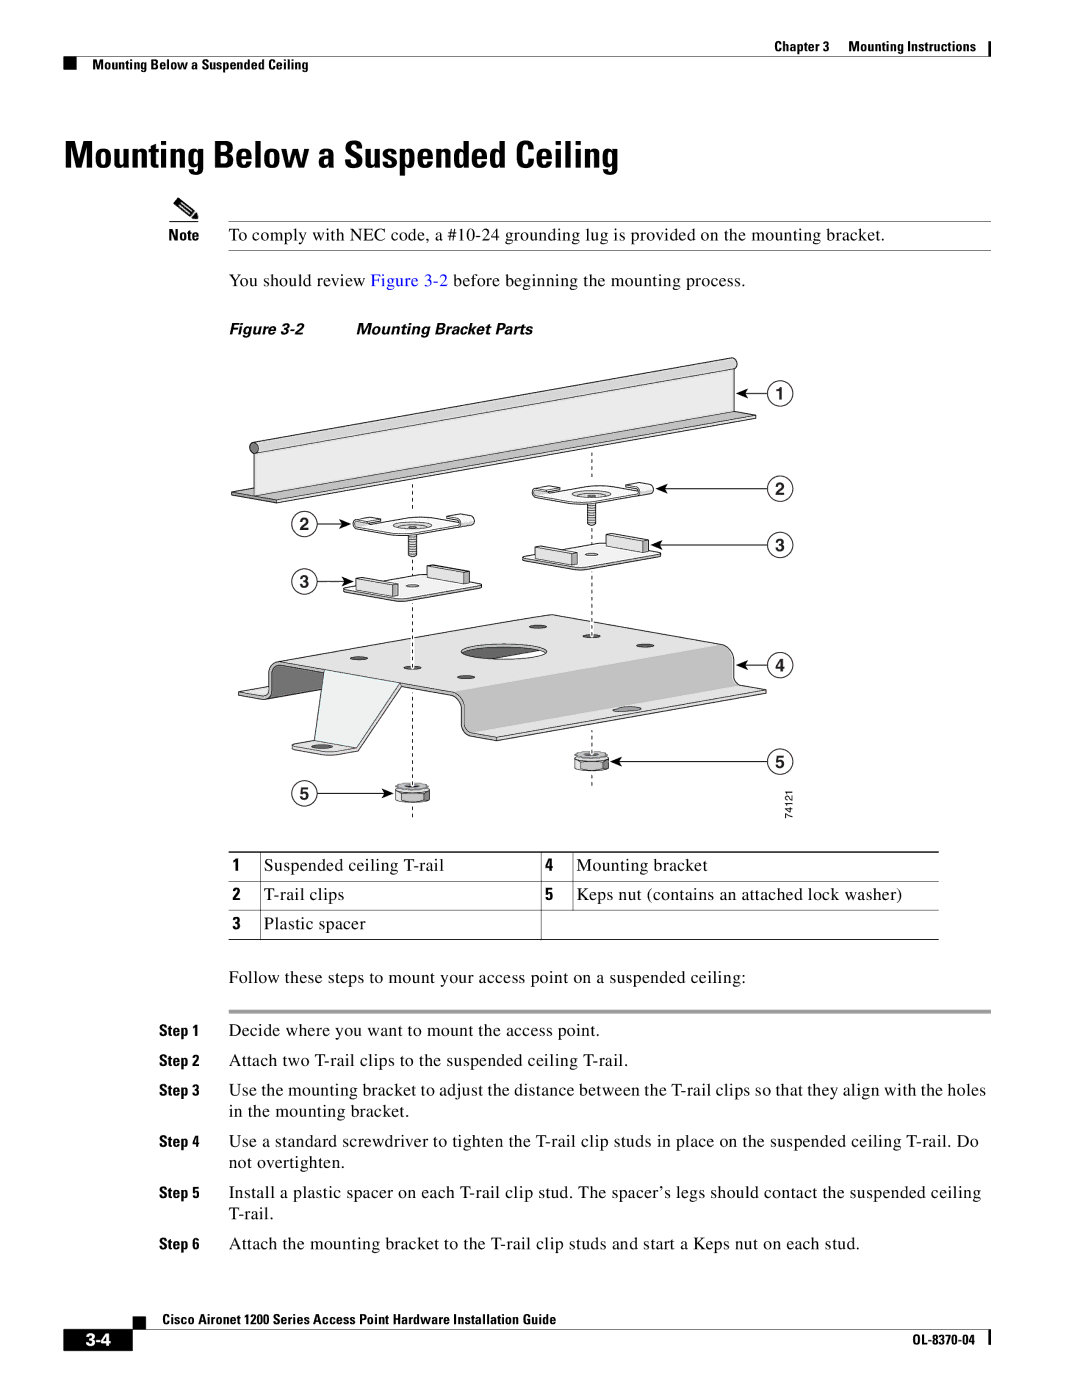
You should review Figure
Figure 3-2 Mounting Bracket Parts
1
2
2
![]()
![]() 3 3
3 3 ![]()
![]()
![]()
![]()
4
5
5
74121
|
|
|
| 1 | Suspended ceiling | 4 | Mounting bracket |
| |
|
|
|
|
|
|
|
|
| |
|
|
|
| 2 | 5 | Keps nut (contains an attached lock washer) | |||
|
|
|
|
|
|
|
|
|
|
|
|
|
| 3 | Plastic spacer |
|
|
|
|
|
|
|
|
|
|
|
|
| |
|
|
|
| Follow these steps to mount your access point on a suspended ceiling: | |||||
|
|
|
|
|
|
|
|
| |
|
|
| Step 1 | Decide where you want to mount the access point. | |||||
|
|
| Step 2 | Attach two | |||||
|
|
| Step 3 | Use the mounting bracket to adjust the distance between the | |||||
|
|
|
| in the mounting bracket. |
|
|
|
| |
|
|
| Step 4 | Use a standard screwdriver to tighten the | |||||
|
|
|
| not overtighten. |
|
|
|
| |
|
|
| Step 5 | Install a plastic spacer on each | |||||
|
|
|
|
|
|
|
| ||
|
|
| Step 6 | Attach the mounting bracket to the | |||||
|
|
| Cisco Aironet 1200 Series Access Point Hardware Installation Guide |
|
|
| |||
|
|
|
|
|
| ||||
|
|
|
|
|
|
|
| ||
|
|
|
|
|
|
| |||