Operating Your Oven – The Basics
GlideRacks™
WARNING: Rearrange the oven racks only when the oven is cool.
Your oven comes with a Dacor GlideRack™. You can pull the GlideRack™ out further than the standard racks and still support heavy pots and pans full of food. It is great for heavier foods and the baking stone.
How to Insert Your GlideRack™
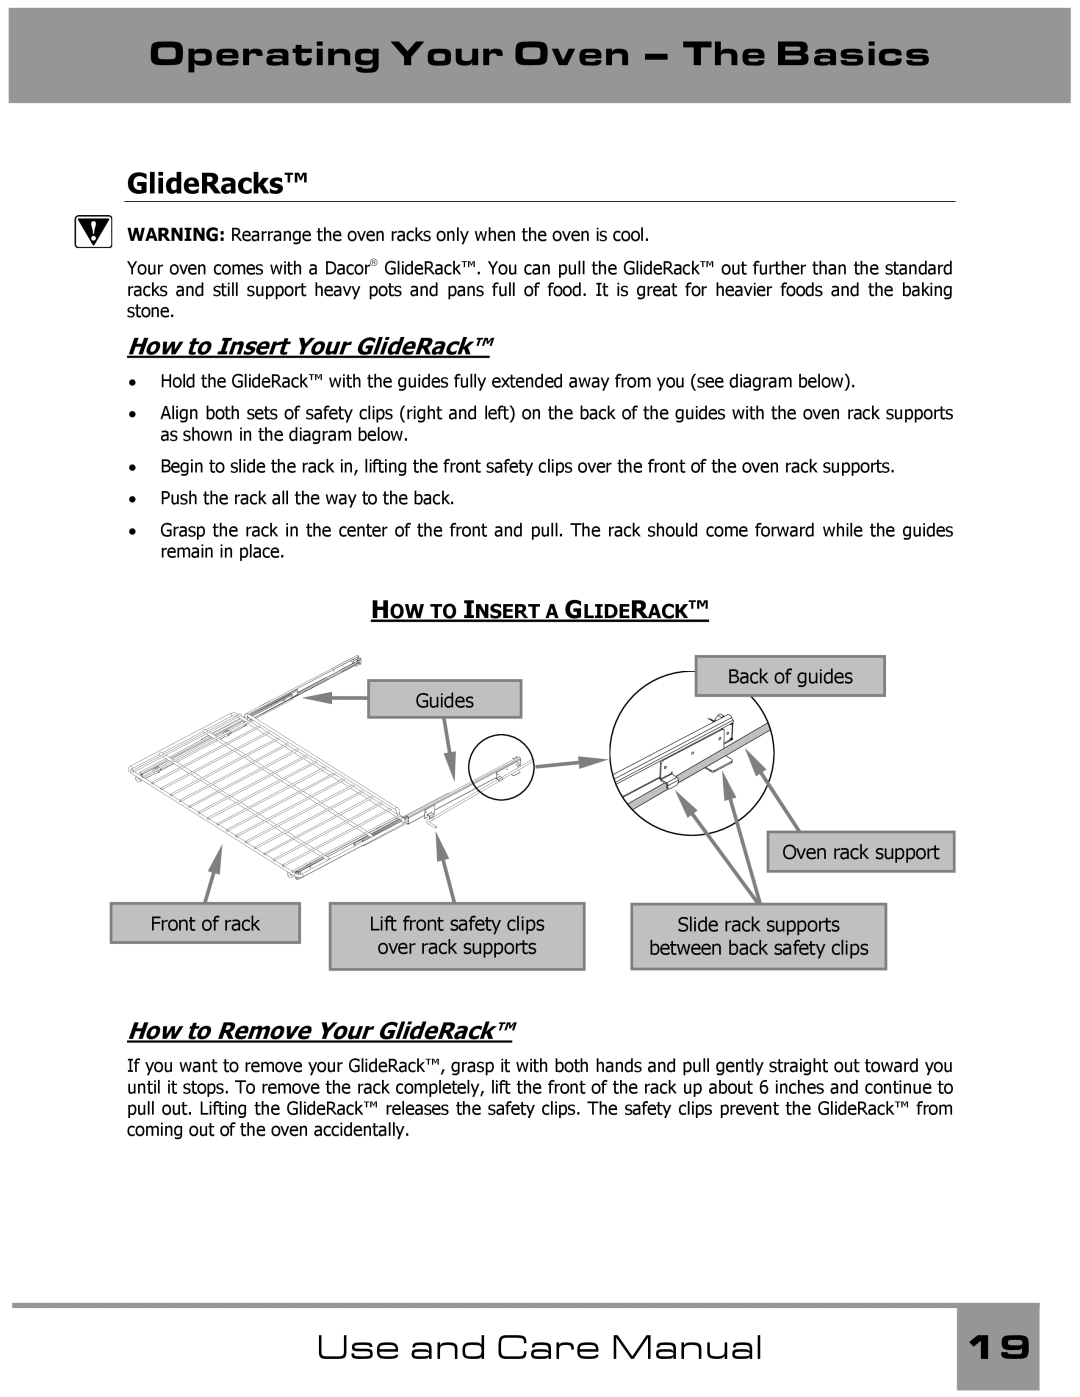
•Hold the GlideRack™ with the guides fully extended away from you (see diagram below).
•Align both sets of safety clips (right and left) on the back of the guides with the oven rack supports as shown in the diagram below.
•Begin to slide the rack in, lifting the front safety clips over the front of the oven rack supports.
•Push the rack all the way to the back.
•Grasp the rack in the center of the front and pull. The rack should come forward while the guides remain in place.
Front of rack
HOW TO INSERT A GLIDERACK™
![]()
![]() Back of guides Guides
Back of guides Guides
| Oven rack support |
Lift front safety clips | Slide rack supports |
over rack supports | between back safety clips |
How to Remove Your GlideRack™
If you want to remove your GlideRack™, grasp it with both hands and pull gently straight out toward you until it stops. To remove the rack completely, lift the front of the rack up about 6 inches and continue to pull out. Lifting the GlideRack™ releases the safety clips. The safety clips prevent the GlideRack™ from coming out of the oven accidentally.
Use and Care Manual | 19 |
|
|