Installing a RAC Card
CAUTION: Only trained service technicians are authorized to remove the system cover and access any of the components inside the system. See your Product Information Guide for complete information about safety precautions, working inside the computer, and protecting against electrostatic discharge.
The optional Remote Access Controller (RAC) provides a set of advanced features for managing the server remotely. The following procedure describes the steps for installing the optional RAC card.
1Turn off the system, including any attached peripherals, and disconnect the system from the electrical outlet.
2Open the system. See "Opening the System" on page 54.
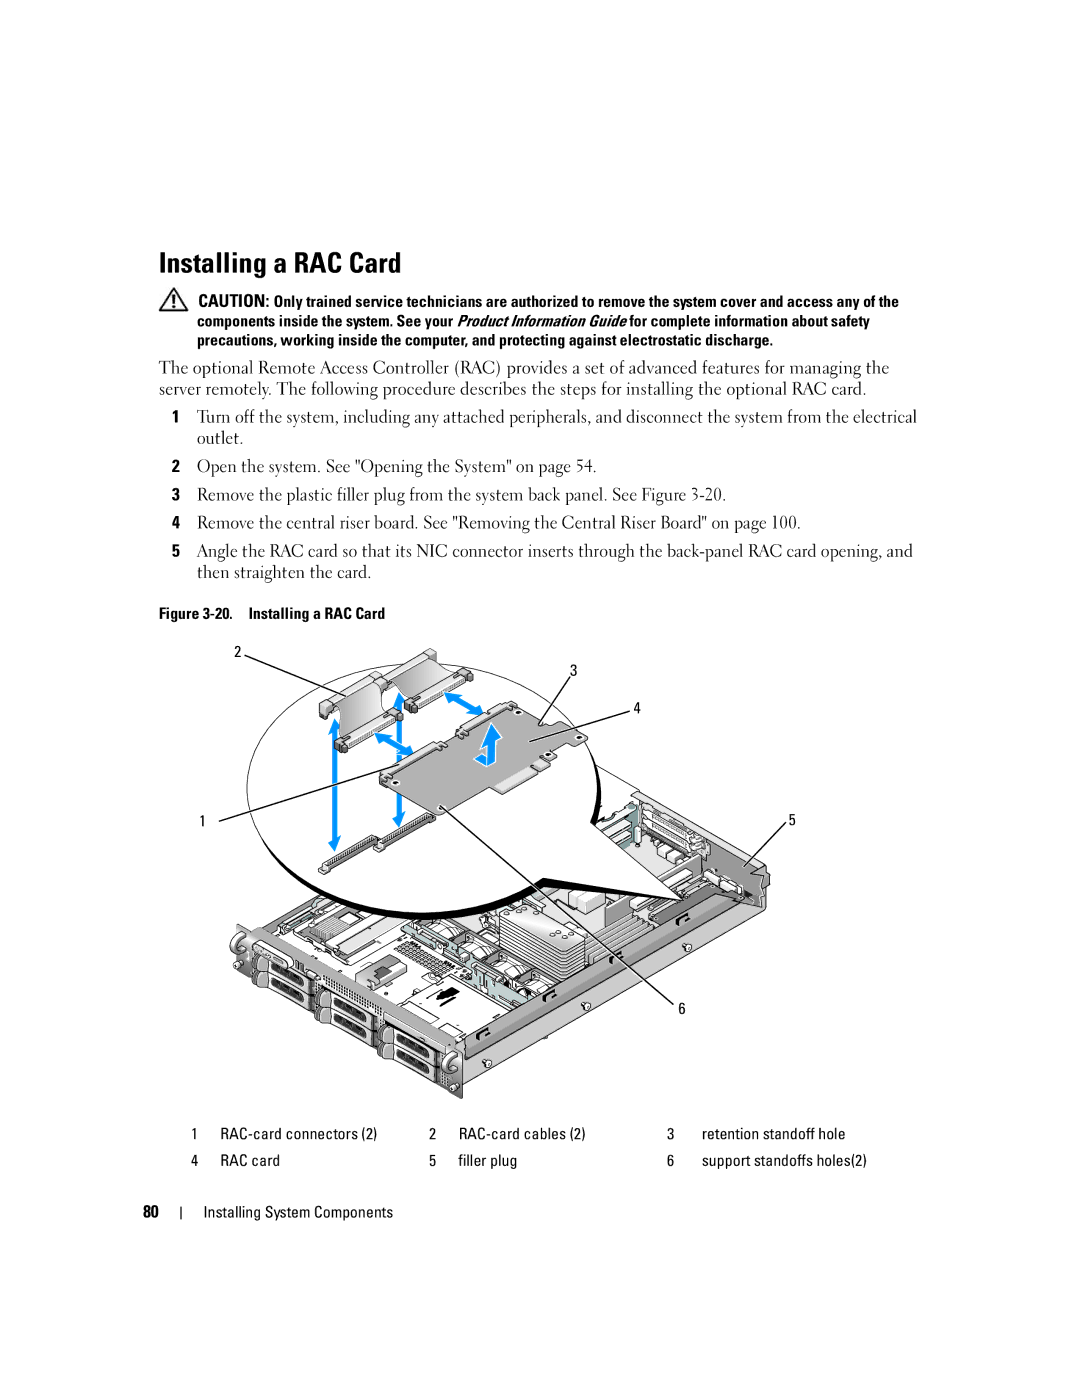
3Remove the plastic filler plug from the system back panel. See Figure
4Remove the central riser board. See "Removing the Central Riser Board" on page 100.
5Angle the RAC card so that its NIC connector inserts through the
Figure 3-20. Installing a RAC Card
2
3
4
1 | 5 |
6
1 |
| 2 |
| 3 | retention standoff hole |
4 | RAC card | 5 | filler plug | 6 | support standoffs holes(2) |
80
