7Replace the front bezel if removed in step 2. See "Replacing the Front Bezel" on page 54.
8Reconnect the system and peripherals to their electrical outlets.
Removing the Diskette Drive From the Drive Carrier
1Remove the diskette drive from the system. See "Removing the Diskette Drive From the System" on page 83.
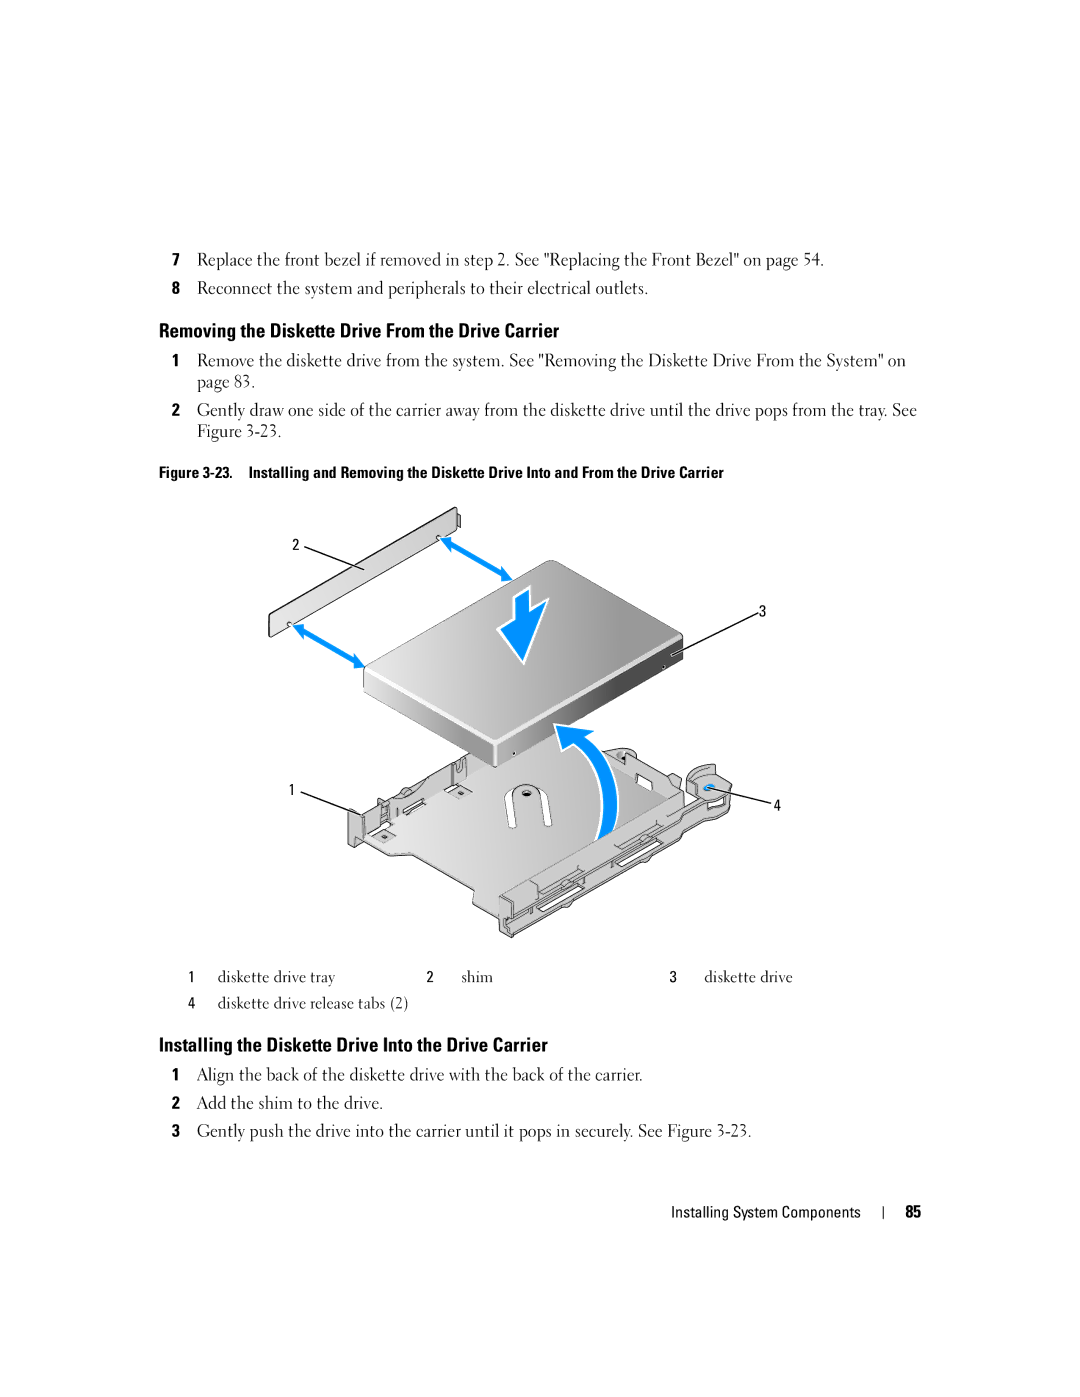
2Gently draw one side of the carrier away from the diskette drive until the drive pops from the tray. See Figure
Figure 3-23. Installing and Removing the Diskette Drive Into and From the Drive Carrier
2 ![]()
3
1
4
1 diskette drive tray | 2 | shim | 3 | diskette drive |
4diskette drive release tabs (2)
Installing the Diskette Drive Into the Drive Carrier
1Align the back of the diskette drive with the back of the carrier.
2Add the shim to the drive.
3Gently push the drive into the carrier until it pops in securely. See Figure
Installing System Components
85