![]() 1
1
2
![]() 3
3
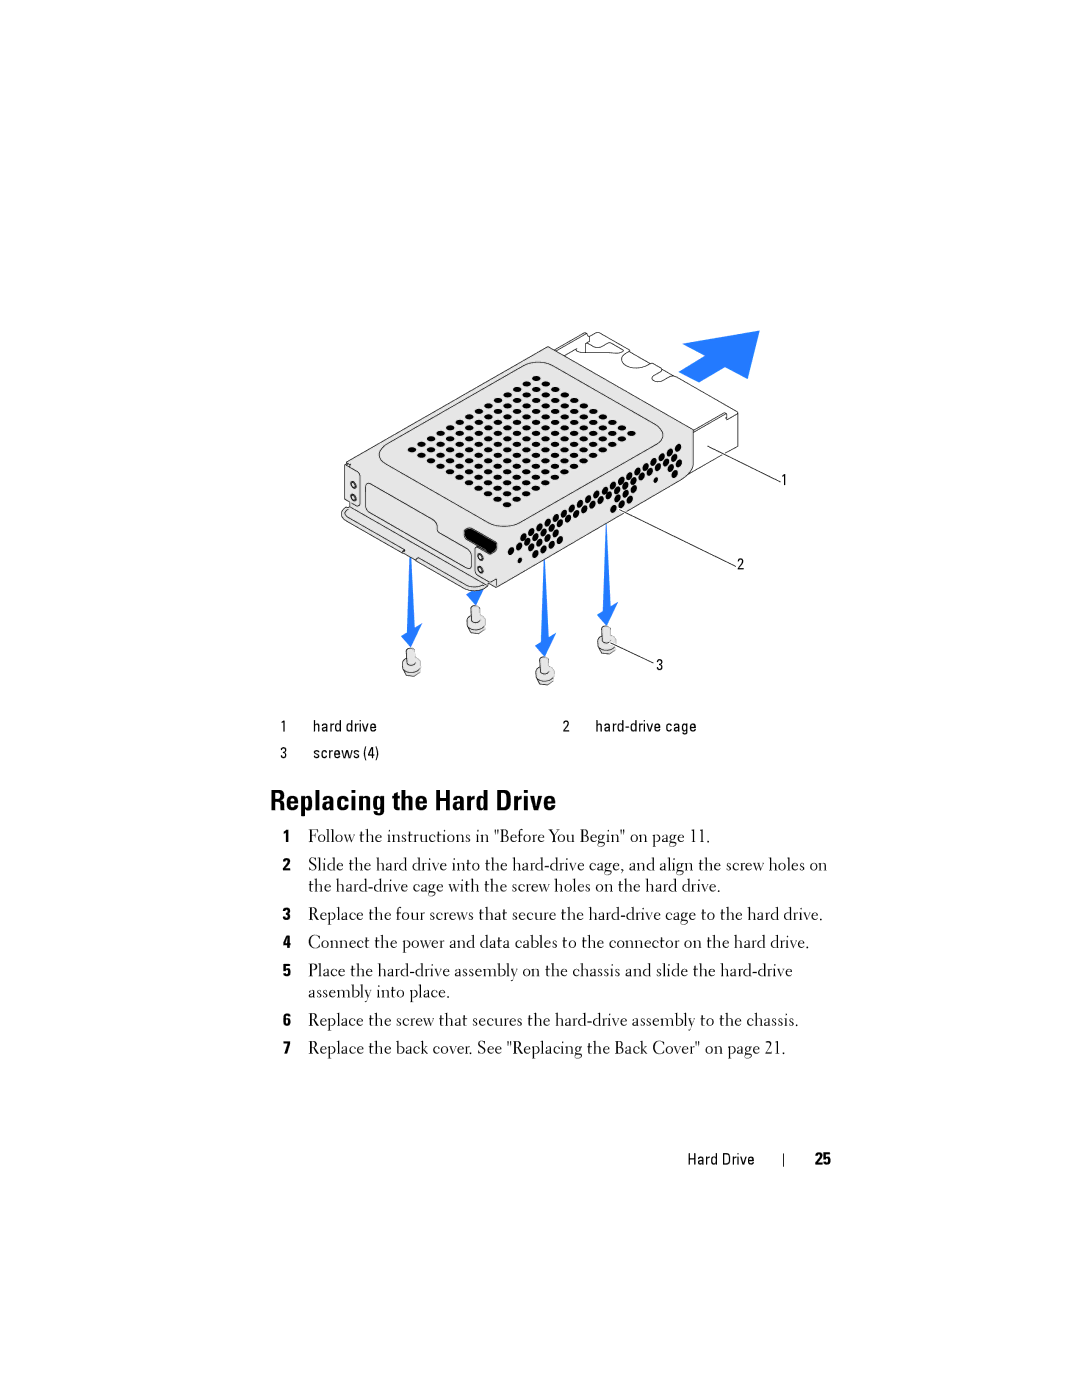
1 | hard drive | 2 | |
3 | screws (4) |
|
|
Replacing the Hard Drive
1Follow the instructions in "Before You Begin" on page 11.
2Slide the hard drive into the
3Replace the four screws that secure the
4Connect the power and data cables to the connector on the hard drive.
5Place the
6Replace the screw that secures the
7Replace the back cover. See "Replacing the Back Cover" on page 21.
Hard Drive
25
