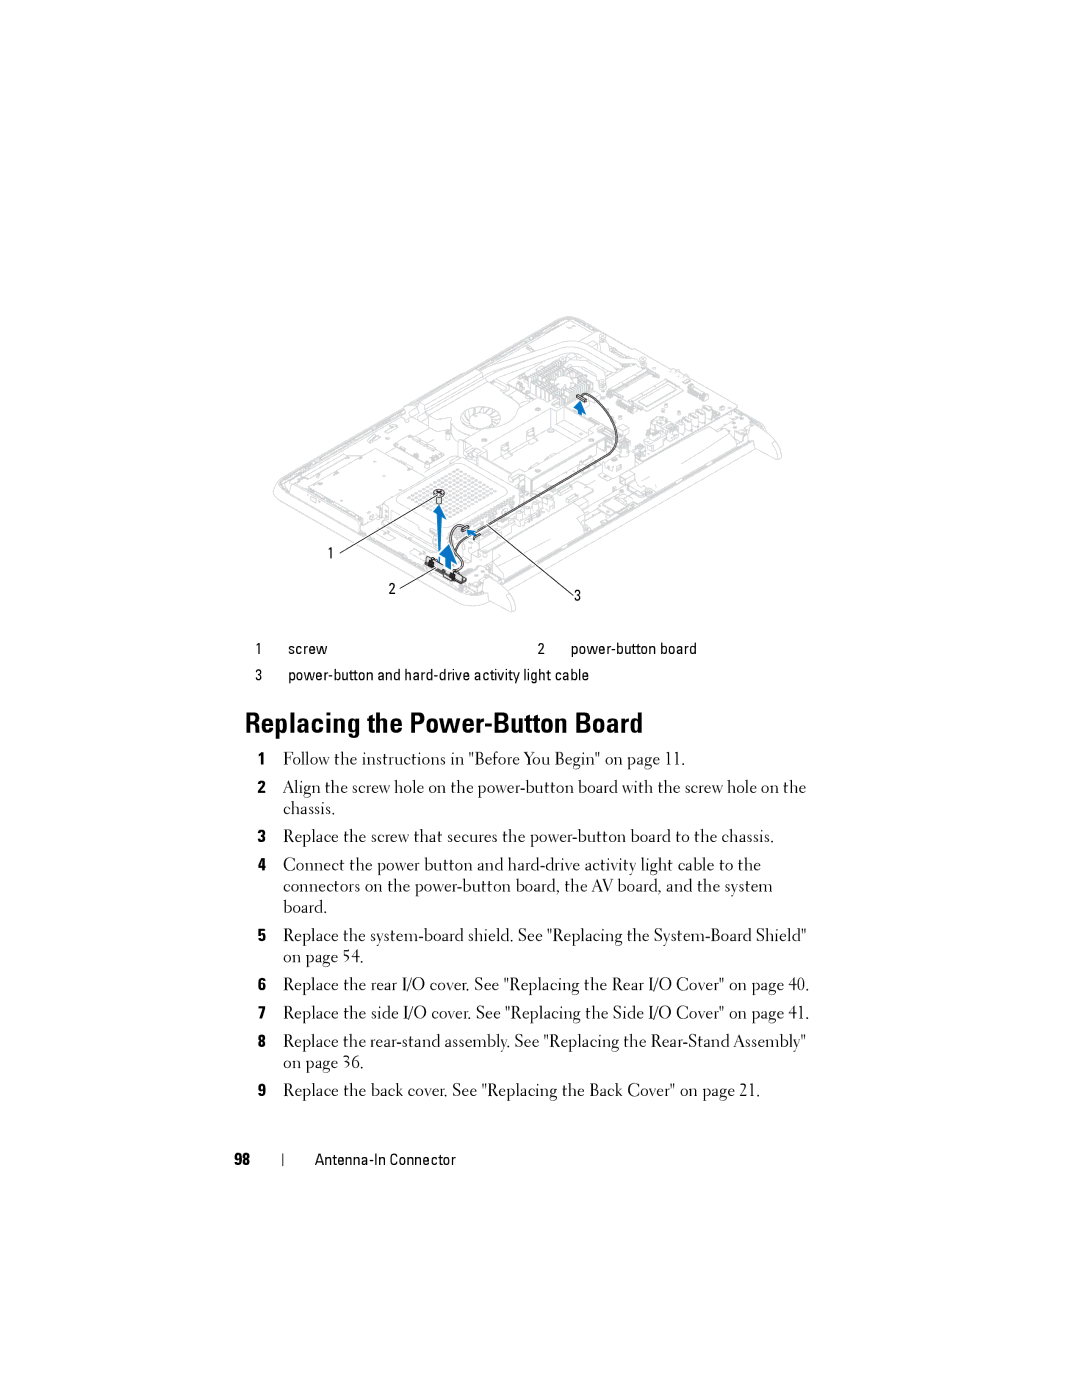
Dell W03C owner manual Replacing the Power-Button Board

Models: W03C

1 138
Download 138 pages 5.74 Kb
Page 98
Image 98

1

2

3


1

screw

2

power-button board

3

power-button and hard-drive activity light cable

Replacing the Power-Button Board

1Follow the instructions in "Before You Begin" on page 11.

2Align the screw hole on the power-button board with the screw hole on the chassis.

3Replace the screw that secures the power-button board to the chassis.

4Connect the power button and hard-drive activity light cable to the connectors on the power-buttonboard, the AV board, and the system board.

5Replace the system-board shield. See "Replacing the System-Board Shield" on page 54.

6Replace the rear I/O cover. See "Replacing the Rear I/O Cover" on page 40.

7Replace the side I/O cover. See "Replacing the Side I/O Cover" on page 41.

8Replace the rear-stand assembly. See "Replacing the Rear-Stand Assembly" on page 36.

9Replace the back cover. See "Replacing the Back Cover" on page 21.

98

Antenna-In Connector

Page 98
Image 98
Dell W03C owner manual Replacing the Power-Button Board