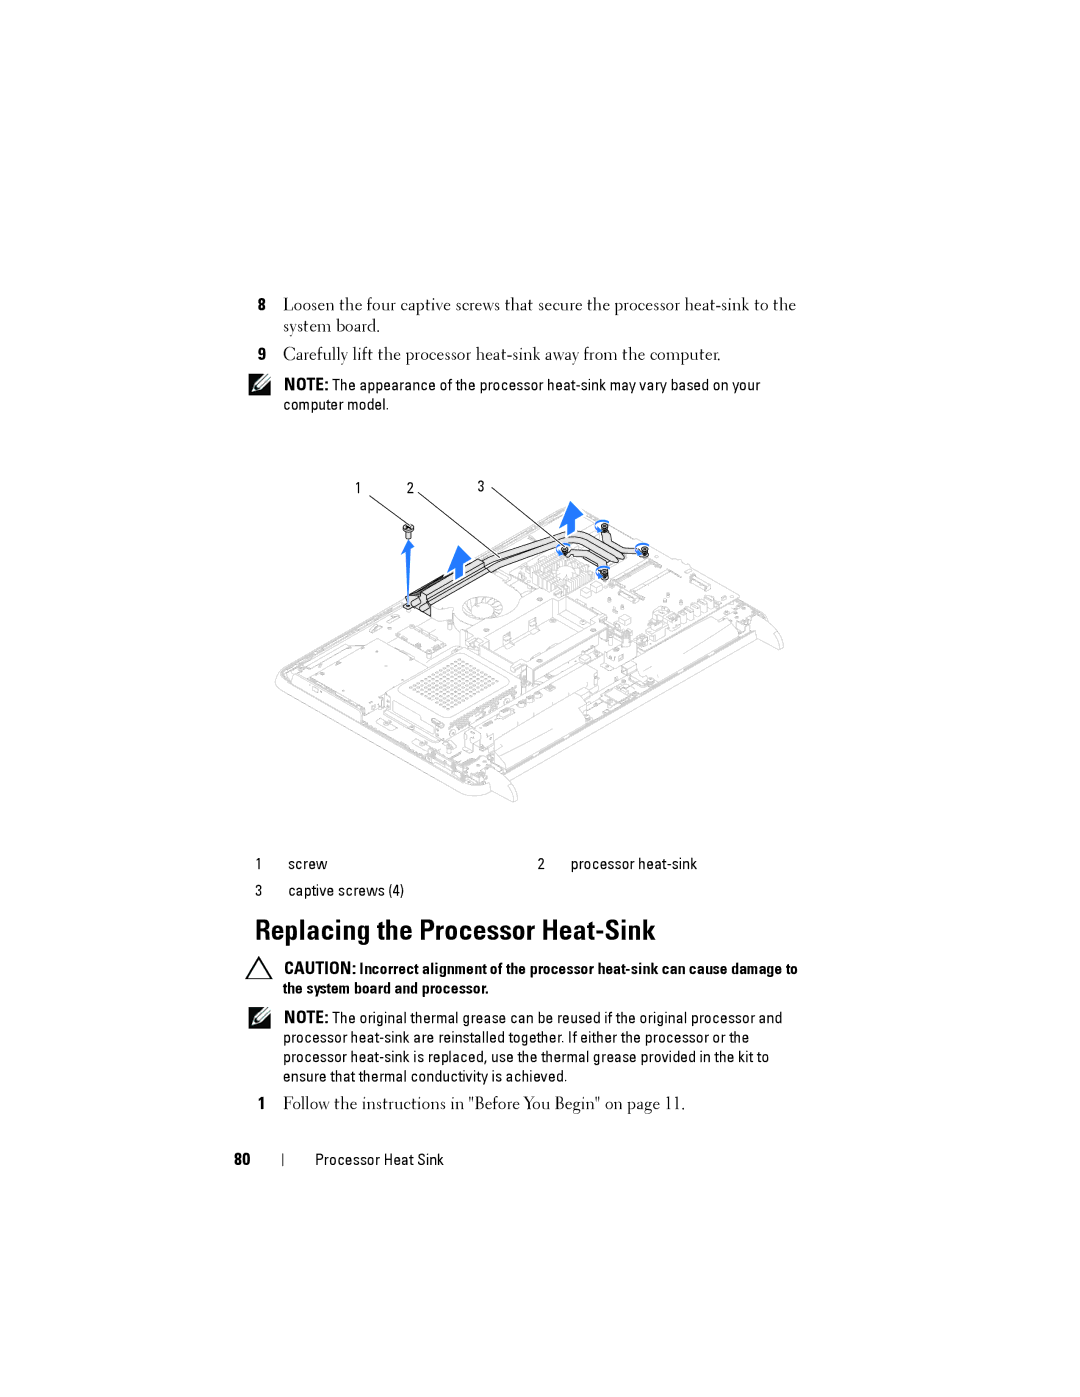
8Loosen the four captive screws that secure the processor
9Carefully lift the processor
NOTE: The appearance of the processor
1 | 2 | 3 |
| ||||||||
|
|
|
|
|
|
|
|
|
|
|
|
|
|
|
|
|
|
|
|
|
|
|
|
|
|
|
|
|
|
|
|
|
|
|
|
|
|
|
|
|
|
|
|
|
|
|
|
1 | screw | 2 | processor |
3 | captive screws (4) |
|
|
Replacing the Processor Heat-Sink
CAUTION: Incorrect alignment of the processor
NOTE: The original thermal grease can be reused if the original processor and processor
1Follow the instructions in "Before You Begin" on page 11.
80
Processor Heat Sink
