Roland Corporation
For the USA
For EU Countries
For Canada
Page
Page
Placement
Power Supply
Maintenance
Additional Precautions
Copyright
Handling CD-ROMs
Contents
Anschlüsse herstellen und Treiber installieren Macintosh
Anschlüsse herstellen und Treiber installieren Windows
Installation des pilotes et connexions Windows 125
Installation des pilotes et connexions Macintosh 146
Main Specifications 242
Resolución de problemas 238
Conexión e instalación de los controladores Windows
Conexión e instalación de los controladores Macintosh
Features of the UA-20
What is USB?
Check the contents of the package
Names of things and what they do
On Advanced mode
Advance mode select switch
Off Standard Driver mode
Input monitor switch
Block diagram
What is a driver?
Getting Connected and Installing Drivers Windows
Advanced mode and Standard driver mode
Advanced mode
Windows XP/2000 users
Installing the special driver
English Deutsch Français Italiano Español
Signing
Windows XP users
Action do you want Windows to take? is set to Ignore
\Driver\USBXP2K\WDM\SETUPINF.EXE
SetupInf dialog box will appear
Prepare the CD-ROM
Found New Hardware Wizard will
Please choose your Search and installation options
Files Needed
Insert Disk dialog
Copy files from
System Settings Change dialog box will appear
When driver installation has been completed,
Verify that Edirol UA-20 WDM or Edirol UA
Click Yes. Windows will restart automatically
If you changed What action do you want Windows to take?
Pick a category, click Performance and Maintenance
Signature
Windows 2000 users
Make sure that File signature verification is set to Ignore
If you changed File signature verification p
Insert the CD-ROM
\DRIVER\USBXP2K\WDM\SETUPINF.EXE
Insert Disk
When the Found New Hardware Wizard appears, click Finish
Dialog box will appear
If File signature verification is set to Warn
Find New Hardware
System Settings
Wizard may be displayed
Change dialog box may appear
Warn or Block, and click OK
If you changed File signature verification
Advance mode select switch to the on position
Open the SetupInf dialog box
Troubleshooting
Windows Me/98 users
New Hardware
SetupInf dialog box, and click OK
Found dialog box will appear
Copy files from field, type the folder name that is shown
Place the UA-20’s Advance mode select switch
Installing the OS-standard driver
When installation is complete, restart Windows
Settings and checking p
New Hardware Wizard
Windows Me users
Make sure that Automatic
Search for a better driver Recommended is selected,
USB composite device
Windows 98 users
Add New Hardware
Dialog box like the one shown will appear
When installation
File driver copying will begin
Check CD-ROM drive, and click Next
Wizard dialog box will appear
Next, the USB audio device will be detected automatically,
USB audio device driver
Specifying the audio and Midi input/output destination
Settings and checking
Windows XP/2000/Me users
English
Dialog box Click OK to complete the settings
Deutsch Français Italiano Español
Close the Sounds and Audio Devices Properties
Click the Audio tab Specify the Preferred device
Open the Multimedia Properties dialog box
Click the Midi tab
Set Midi output
Advanced mode Standard driver mode Midi output
Close the Multimedia Properties dialog box
Select Single instrument
Open the Volume Control
Volume Control setting
Raise or lower the slider to adjust the volume of the UA-20
Accessories Entertainment Volume Control
Open the Device Manager
Open the System Properties dialog box
Installing Drivers Windows p
Getting Connected and Installing Drivers Macintosh
Installing the special driver p
Installing the OS-standard driver p
Use either OMS or FreeMIDI as the Midi driver
Be sure to install the Midi driver
If the screen indicates
Dialog box will indicate Installation completed
Installing the UA-20 driver OMS
Insert the CD-ROM into the CD-ROM drive
Click Restart to restart your Macintosh
Driver E-OMS Driver
OMS settings
OMS Midi Setup
Create a New Studio Setup dialog
Choose Make Current
Installing the Asio driver p
Exit OMS Setup
From the Studio menu, choose
Test Studio
Must be installed on the hard disk from which you started up
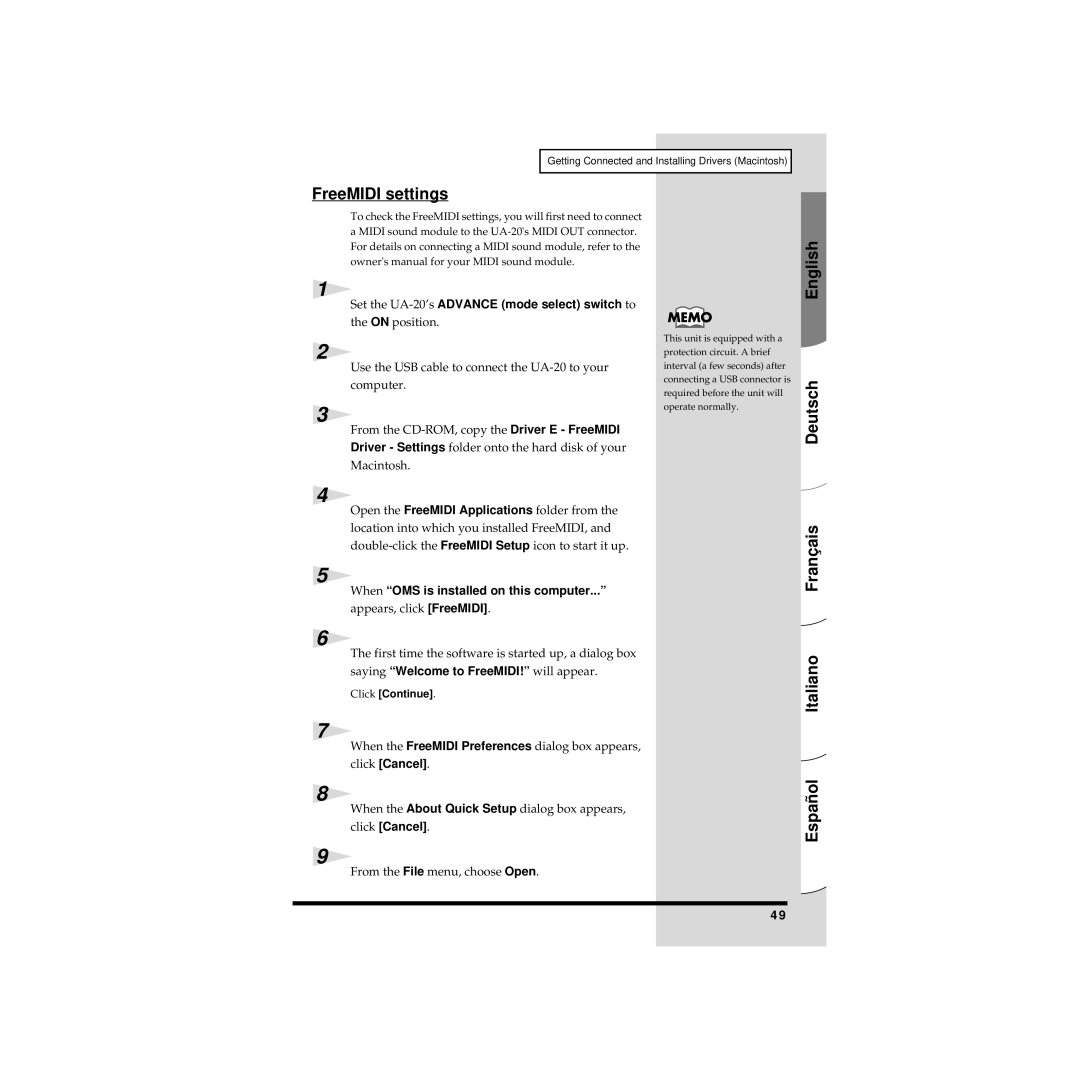
Installing the UA-20 driver FreeMIDI
Click Continue
FreeMIDI settings
Next you will install the Asio driver
Setup
From the Midi menu, choose Check Connections
Only audio on the UA-20.Be sure to install the Midi driver
Installing the Asio driver
Driver-Setting Asio Driver-E.HTM document on
ASIO-compatible software
Asio Driver folder
From the Driver E
CD-ROM
Wait for approximately five seconds
On position
Apple System Profiler dialog box will appear
Update all Information from the Commands menu
Settings the sound input/output
Speaker Settings
To Apple System
Sound dialog box, click the Input tab
Click Start Test
Choose a source for sound input Device, select USB audio
From the File menu, select Quit
UA-20 application guide
Signal flow
Basic use
Recording a guitar or bass
Recording from a mic
Recording from a keyboard
Be careful of looped connections
Recording an analog signal from an audio device
Recording a Midi device
Digitally recording the output of the UA-20 on an MD
Make connections as shown in the diagram
Adjust the driver buffer size
Adjusting the audio latency
Play back audio data on your application
Windows
Make the following settings
Using Asio Direct Monitor
Click OK to close the driver settings dialog box
Check the Use Asio Direct Monitor check box
If using the MME driver on Windows XP/2000
Opening the special driver settings dialog box
Audio Devices
Select Edirol UA-20, and click the Properties button
Problems related to the USB driver
Troubleshooting
Troubleshooting
Is USB enabled on your computer?
Does your computer meet the USB specifications?
Driver is not installed correctly
Settings Control Panel
Can’t install/delete/use the driver in Windows XP/2000
Did you make Driver Signing Options?
Windows XP p , Windows 2000 p
System Properties dialog box
Operating system becomes unstable
Problems when using the UA-20
No sound
Can’t play back / record Midi
Windows XP, enable background processing
Interrupted notes or delays occur during Midi playback
Are the track outputs set correctly?
Turn the knob clockwise to adjust the volume
Is the headphone volume set appropriately?
Are you using a cable that has a built-in resistor?
Is the Input volume raised appropriately?
Is a mic or guitar still connected?
Noise is heard during audio playback
Noise is sometimes heard in the line input or mic input
Does your sequencer software support Asio 2.0?
Sound is interrupted during audio playback
Are you using a USB device other than the UA-20?
Are many applications running on your computer?
Click the Device Manager tab
Use while the LAN cable is connected
After you have made the settings, restart your Macintosh
Recording produces a silent blank file
Try setting the bit rate to 16 bit or higher
Game background music does not play
Deleting the special driver
Turn on the UA-20sADVANCE mode select switch
Disconnect the USB cable from the UA-20 Restart Windows
Disconnect the USB cable from the UA-20
Click Close to close System Properties
Macintosh users
Was ist ein Treiber?
Anschlüsse herstellen und Treiber installieren Windows
Erweiterter Modus und Standardtreiber-Modus
Erweiterter Modus
Windows XP/2000-Anwender
Installation des speziellen Treibers
WDM-Treiber
Starten Sie Windows, wobei das UA-20 ausgesteckt ist
Windows XP-Anwender
Öffnen Sie das Dialogfeld Systemeigenschaften
MME-Treiber
Windows vorgehen? auf Ignorieren
Treibersignierung
Systemeigenschaften zu schließen
Option Ausführen
Das Dialogfeld SetupInf wird angezeigt
Geben Sie im angezeigten Dialogfeld Folgendes in das Feld
Öffnen ein und
Der Assistent für das Suchen neuer
Die Such- und Installationsoptionen
Modell
Einlegen wird
Das Dialogfeld Diskette
Angezeigt
Wenn für Wie soll Windows vorgehen? Warnen aktiviert wurde
Benötigte Dateien wird
Das Dialogfeld
Trotzdem fortsetzen
UA-20 WDM oder
Wenn Sie Wie soll Windows vorgehen? geändert haben
Nachdem der Treiber installiert wurde, wird das
Dialogfeld Geänderte Systemeinstellungen
Treibersignaturoptionen angezeigt
Windows 2000-Anwender
Systemsteuerung auf das System-Symbol
Stellen Sie sicher, dass für
Dateisignaturverifizie Rung Ignorieren
Klicken Sie auf OK, um das Dialogfeld
WDM\Setupinf.exe
Legen Sie die CD-ROM ein
Wenn Sie Dateisignaturverifizierung geändert
Das Dialogfeld SetupInf wird angezeigt
Wird angezeigt
Diskette einlegen
Das Dialogfeld Neue
Benötigte Dateien
Hardware gefunden wird
Eventuell angezeigt
Möglicherweise wird das Dialogfeld
Wenn Sie Dateisignaturverifizierung geändert haben
Geänderte Systemeinstellungen angezeigt
Dass sich SETUPINF.EXE im
SetupInf
Windows Me/98-Anwender
Öffnen Sie das Dialogfeld
Hardware gefunden
Dialogfeld SetupInf gezeigt wird und klicken Sie auf OK
Das Dialogfeld Diskette einlegen wird nicht angezeigt S
Hardware gefunden nicht
Angabe des Audio- und MIDI-Eingabe Ausgabeziels
Einstellungen und Überprüfung
Windows XP/2000/Me-Anwender
Sounds und Audiogeräte bzw. in Windows
Sounds und Audiogeräte
Musikwiedergabe auf das
100
Multimedia
Windows 98-Anwender
Gerät an
101
Schließen Sie das Dialogfeld Eigenschaften für
Konfigurieren Sie die MIDI-Ausgabe
102
Ausgabe
Öffnen Sie die Lautstärkeregelung
Einstellung der Lautstärke
103
Konfigurierbare Optionen
Öffnen Sie das Dialogfeld Systemeigenschaften
104
Digitale CD-Wiedergabe für dieses CD-Gerät aktivieren
Installation des speziellen Treibers S
Anschlüsse herstellen und Treiber installieren Macintosh
Erweiterter Modus und Standardtreiber- Modus
105
106
Installiert sein
Installation des UA-20-Treibers OMS
Verwenden Sie entweder OMS oder FreeMIDI als MIDI-Treiber
107
Ein Dialogfeld zeigt Folgendes an Installation
Install
Completed
108
109
OMS-Einstellungen
Turn It Off
New Studio Setup
Wählen Sie Open im Menü File
110
Wählen Sie im Menü File Die Option Make Current
Wählen Sie im Menü Edit die Option OMS Midi
111
Midi in background und klicken Sie auf OK
Installation des ASIO-Treibers S
Installation des UA-20-Treibers FreeMIDI
Driver-E Installer das sich im Ordner
112
113
114
Einstellungen für FreeMIDI
Klicken Sie auf Continue
115
Als nächstes muss der ASIO-Treiber installiert werden
Wählen Sie im Menü Midi die Option Check Connections
116
Installation des ASIO-Treibers
ASIO-kompatible Software
Zu verwendende Treiber
Asio Driver auf
Kopieren Sie vom Ordner Driver
Der CD-ROM
117
Spielen Sie die Audiodaten in ihrer Anwendung ab
Regelung der Audio-Latenz
Folgende Einstellung erzeugt die kürzeste Latenz
119
Verwendung des Asio Direct Monitor
Aktivieren Sie das Kontrollkästchen Use Asio Direct Monitor
120
Fehlerbehebung
Probleme in Verbindung mit dem USB-Treiber
Fehlerbehebung
Wurde USB auf Ihrem Computer aktiviert?
122
Der Treiber wurde nicht korrekt installiert
Entspricht Ihr Computer den USB-Spezifikationen?
Klicken Sie auf die Registerkarte Geräte-Manager
Haben Sie die Treibersignatureinstellungen vorgenommen?
123
Windows XP S , Windows 2000 S
Systemeigenschaften angezeigt
124
Mode Avancé et mode Standard
Installation des pilotes et connexions Windows
Mode Avancé
Mode Standard
Windows XP/2000
Installation du pilote spécial
126
Sur Signature du pilote
Windows XP
Paramètre Que voulez- vous faire ? est défini sur Ignorer
127
128
Propriétés système
Assistant ajout de Nouveau matériel
Veuillez choisir vos Options de recherche et d’installation
129
Vérifiez que le champ
Cliquez sur Suivant. L’installation du pilote commence
Modèle indique Edirol SD-20 puis
Insérez le disque
Saffiche. Tapez ce qui Suit dans le champ
Fichiers nécessaires
Copier les fichiers
Depuis, puis cliquez sur OK
Si vous avez modifié Que voulez-vous faire ?
Une fois l’installation du pilote terminée, la boîte de
Dialogue Modification des paramètres système
’affiche
Signature des pilotes
Windows
Vérification des signatures de fichiers est
133
Insérez le CD-ROM
WDM\SETUPINF.EXE signifie
134
La signature des fichiers à
Si l’option Vérification de la signature des pilotes
135
Dialogue Signature numérique introuvable
Safficher
Assistant Nouveau matériel détecté peut
136
Vérifiez que Edirol UA-20 WDM ou Edirol UA-20
Modification des Paramètres système
Administrateur
Peut safficher
137
SETUPINF.EXE se trouve
Ouvrez la boîte de dialogue SetupInf
Windows Me/98
138
Insérez le disque s’affiche
Une fois le pilote installé, la boîte de dialogue
Détecté saffiche
Nouveau matériel détecté se ferme
Ouvrez le Panneau de configuration
Configuration et contrôle
Windows XP/2000/Me
140
Périphériques multimédia
Périphérique par défaut
141
Multimédia
Windows
142
Spécifiez la Sortie
Mode Avancé Mode Standard Sortie Midi
Fermez la boîte de dialogue Propriétés de
143
Ouvrez le Contrôle du volume
Réglages du Contrôle du volume
144
Options pouvant être activées Lecteur de CD
Windows XP/2000/XP
145
Ouvrez la boîte de dialogue Propriétés Système
Ouvrez la boîte de dialogue Propriétés de Multimédia
Installation du pilote spécial p
Installation des pilotes et connexions Macintosh
Connexions Windows p
Utilisation d’OMS ou de FreeMIDI comme pilote Midi
Noubliez pas dinstaller le pilote Midi
147
Si lécran affiche
148
Installation du pilote UA-20 OMS
De démarrage
Paramètres OMS
Une boîte de dialogue s’affiche Installation
149
Cliquez sur Redémarrer pour redémarrer le Macintosh
Create a New Studio
Setup saffiche
Choisissez Open dans le menu File
Dans le menu Edit, sélectionnez OMS Midi
Installation du pilote Asio p
Quittez OMS Setup
Dans le menu File, sélectionnez Make Current Rendre actif
151
Completed. Cliquez sur Redémarrer pour
Installation du pilote UA-20 FreeMIDI
Redémarrer le Macintosh
152
153
Paramètres FreeMIDI
Cliquez sur Continue
Vous devez ensuite procéder à linstallation du pilote Asio
FreeMIDI Setup
Installation du pilote Asio p 154
Dans le menu MIDI, sélectionnez Check Connections
Quavec de laudio. Noubliez pas dinstaller le pilote Midi
Installation du pilote Asio
Document Driver E-ASIO Driver-Setting Asio Driver
155
Driver E-ASIO
Partir du dossier
Driver du CD-ROM, copiez UA-20
156
Modifiez la taille des buffers du pilote buffer size
Réglage de la latence audio
Lisez des données audio depuis votre application
Réglez Audio Buffer Size au maximum vers la gauche Min
Effectuez les réglages suivants
Utilisation d’ASIO Direct Monitor
Cliquez sur OK dans la boîte de dialogue
158
159
Problèmes liés au pilote USB
En cas de problème
En cas de problème
160
161
Le pilote n’est pas correctement installé
Votre ordinateur répond-il aux normes USB ?
Avez-vous réglé les Options de signature des pilotes ?
162
Cliquez sur longlet Gestionnaire de périphériques
Supprimer
163
Definizione di un driver
Collegamenti e installazione dei driver Windows
Modo driver Advanced e Standard
Modo Advanced
Utenti Windows XP/2000
Installazione del driver speciale
165
Scegliere una delle seguenti opzioni sia
Utenti Windows XP
166
167
Proprietà del sistema
Selezionare le opzioni Di ricerca e di installazione
Installazione guidata nuovo hardware
168
169
Inserire il disco
Copia file da e fare clic su OK
Richiesta file Immettere
Finestra di dialogo Modifica impostazioni di sistema
170
171
Accertarsi che Verifica firma file sia impostato su
Utenti Windows
Ignora
172
Inserire il CD-ROM
Appare la finestra di dialogo SetupInf
Impostare l’interruttore Advance selezione del
Modo dell’UA-20 in posizione on
Eseguire l’installazione come descritto nella sezione
Fare clic su Sì Continuare l’installazione
174
Se Verifica firma digitale è impostato su Avvisa
Richiesta file
Dialogo Installazione Guidata nuovo hardware
Potrebbe essere visualizzata la finestra di
175
Modifica Impostazioni di sistema
Se è stata modificata l’impostazione Verifica firma file
176
Se la finestra di dialogo Modifica impostazioni di sistema
Utenti Windows Me/98
Aprire la finestra di dialogo SetupInf
177
Appare la finestra di dialogo Trovato
Una volta che il driver è stato installato, la finestra
Nuovo hardware
Trovato nuovo hardware si chiude
Utenti Windows XP/2000/Me
Configurazione e verifica
Aprire il Pannello di controllo
Proprietà Suoni e multimedia
Di Periferica predefinita
Per Riproduzione musica
Me, Periferica preferenziale, e
Periferiche audio
Preferenziale
Utenti Windows
181
Chiudere la finestra di dialogo Proprietà
Impostare l’Uscita
Multimediali
182
Aprire il Controllo volume
Impostazioni Controllo volume
Accessori Svago Controllo volume
Elementi che possono essere configurati Lettore CD
Aprire la finestra di dialogo Proprietà del sistema
184
Utenti Windows
Aprire la finestra di dialogo Proprietà multimediali
Dei driver Windows pag
Collegamenti e installazione dei driver Macintosh
Fare clic su Cancel Se appare il seguente messaggio
Non dimenticare di installare il driver Midi
Utilizzare come driver Midi OMS o FreeMIDI
186
Essere già stato installato sul disco fisso di avvio
Installazione del driver UA-20 OMS
187
Inserire il CD-ROM nell’unità CD-ROM
Impostazioni OMS
Installation completed
Verrà visualizzata una finestra di dialogo indicante
188
Selezionare Open nel menu File
Create a New Studio Setup
Nel menu Edit selezionare
189
Installazione del driver Asio pag
Chiudere OMS Setup
Nel menu File selezionare
Make Current
Installation completed. Fare clic su Restart per
Installazione del driver UA-20 FreeMIDI
Installato sul disco fisso di avvio
Riavviare il Macintosh
192
Impostazioni FreeMIDI
Fare clic su Continue
193
Successivamente sarà necessario installare il driver Asio
Nel menu Midi selezionare Check Connections
194
Installazione del driver Asio
Software Asio compatibile
Driver da utilizzare
Asio Driver sul
Dalla cartella Driver
CD-ROM, copiare
UA-20 ASIO1.0
Riprodurre i dati audio con l’applicazione
Regolazione della latenza audio
La seguente impostazione specifica la latenza più corta
Impostare Buffer Size completamente a sinistra Min
197
Uso di Asio Direct Monitor
Selezionare la casella di controllo Use Asio Direct Monitor
198
Edirol UA-20 Driver Settings Se si utilizza Macintosh
Problemi relativi al driver USB
Ricerca e soluzione dei problemi
Ricerca e soluzione dei problemi
La porta USB è stata attivata sul computer?
200
Il driver non è installato correttamente
Il computer soddisfa le specifiche tecniche USB?
Sono state impostate le Opzioni firma driver?
201
Opzioni firma driver Windows XP pag , Windows 2000 pag
Impostazioni Pannello di controllo
202
¿Qué es un controlador?
Conexión e instalación de los controladores Windows
Modo avanzado y Modo de controlador estándar
Modo avanzado
Usuarios de Windows XP o
Instalación del controlador especial
204
Controlador WDM
Usuarios de Windows XP
Prepare el CD-ROM
Aparecerá el cuadro de diálogo SetupInf
206
Para hardware nuevo encontrado
Sitúe el Interruptor de selección de modo
Elija sus opciones de Búsqueda e instalación
Campo Modelo
Diálogo Insertar disco
Aparecerá el cuadro de
208
Prosiga con la instalación
Copiar archivos de y haga clic en Aceptar
Configuración del sistema
209
Edirol UA-20 WDM o Edirol UA-20 MME y
210
Si ha modificado ¿Qué acción desea que realice Windows?
Firma de controlador
Usuarios de Windows
Verificación de la firma de archivo en Ignorar
211
Advance del UA-20 en la posición on
Inserte el CD-ROM
212
Disco
Aparecerá el cuadro de diálogo Insertar
213
Haga clic en Sí Prosiga con la instalación
Es posible que aparezca el
Diálogo Archivos necesarios
Asistente para encontrar nuevo hardware
214
Si ha modificado Verificación de la firma del archivo
Cambio de Configuración del sistema
Puede que aparezca el cuadro de diálogo
215
SETUPINF.EXE se encuentra
Abra el cuadro de diálogo SetupInf
Usuarios de Windows Me/98
216
Una vez se haya instalado el controlador, se cerrará el
Diálogo Hardware nuevo encontrado
Cuadro de diálogo Hardware nuevo encontrado
217
Usuarios de Windows XP/2000/Me
Configuración y comprobación
Abra el Panel de control
Dispositivos de audio o Propiedades de sonidos
Dispositivo predeterminado o Dispositivo preferido, en
Para la reproducción de
Dispositivos de audio
219
Abra el cuadro de diálogo Propiedades de
Usuarios de Windows
Haga clic en la ficha Midi
220
Cierre el cuadro de diálogo Propiedades de
Especifique la Salida de
221
Abra el Control de volumen
Configuración del control de volumen
Programas Accesorios Entretenimiento Control de volumen
Elementos que se pueden configurar Reproductor
Administrador de dispositivos
Abra el Administrador de dispositivos
223
Abra el cuadro de diálogo Propiedades del sistema
224
Conexión e instalación de los controladores Macintosh
Instalación del controlador especial pág
225
Utilice OMS o FreeMIDI como controlador Midi
Asegúrese de instalar el controlador Midi
Continue
Instalación del controlador del UA-20 OMS
226
Inserte el CD-ROM en la unidad de CD-ROM
Aparecerá un cuadro de diálogo que indica
Configuración de OMS
227
Haga clic en Restart para reiniciar el Macintosh
Elija Open en el menú File
Studio Setup
En el menú Edit, seleccione
228
En el menú File, elija
Salga de OMS Setup
Instalación del controlador Asio pág
229
Instalación del controlador del UA-20 FreeMIDI
Installation completed. Haga clic en Restart para
Reiniciar el Macintosh
230
FreeMIDI Driver Settings en el disco duro del Macintosh
Configuración de FreeMIDI
231
Haga clic en Continue
232
Continuación, debe instalar el controlador Asio
En el menú MIDI, seleccione Check Connections
Instalación del controlador Asio
Driver-Setting Asio Driver-E.HTM del CD-ROM
233
Software compatible con Asio
Asio Driver del
De la carpeta Driver
CD-ROM, copie
234
Ajuste el tamaño del búfer del controlador
Ajuste del tiempo de recuperación de datos
Reproduzca los datos en la aplicación
Fije el Buffer Size lo más a la izquierda posible Min
Utilización de Asio Direct Monitor Monitor directo Asio
Configúrelo de la siguiente manera
236
Edirol UA-20 Driver Settings Si utiliza Windows Me/98
Aparecerá el cuadro de diálogo Edirol UA-20 Driver Settings
Edirol UA-20 Driver Settings Si utiliza Macintosh
237
Problemas relacionados con el controlador
Resolución de problemas
Resolución de problemas
¿Puede utilizar el cable USB en su PC?
239
Póngase en contacto con el fabricante del PC
¿Cumple su PC las especificaciones USB?
El controlador no se ha instalado correctamente
¿Ha configurado las Opciones de firma del controlador?
240
Universal
241
No aparece el cuadro de diálogo Insertar disco
Aceptar en el cuadro de diálogo Propiedades del sistema
Conexión e instalación de los controladores Windows pág
UA-20 USB Audio/MIDI Interface
Main Specifications
Page
Information