7 The “Serial Port Settings” screen appears. Configure the settings of the Serial port and click the [Next] button.
Setting
Description
Printer name | The printer name you entered at Step 6 is displayed. This cannot be |
| changed. |
|
|
COM Port | Specify the number of serial port used for connecting the printer. |
|
|
Baud Rate | Specify the baud rate. |
|
|
Data Bits | Specify the data bits. |
|
|
Stop Bits | Specify the stop bits. |
|
|
Flow Control | Specify the method of data flow between the computer and the printer. |
|
|
Parity | Specify the parity. |
|
|
8
9
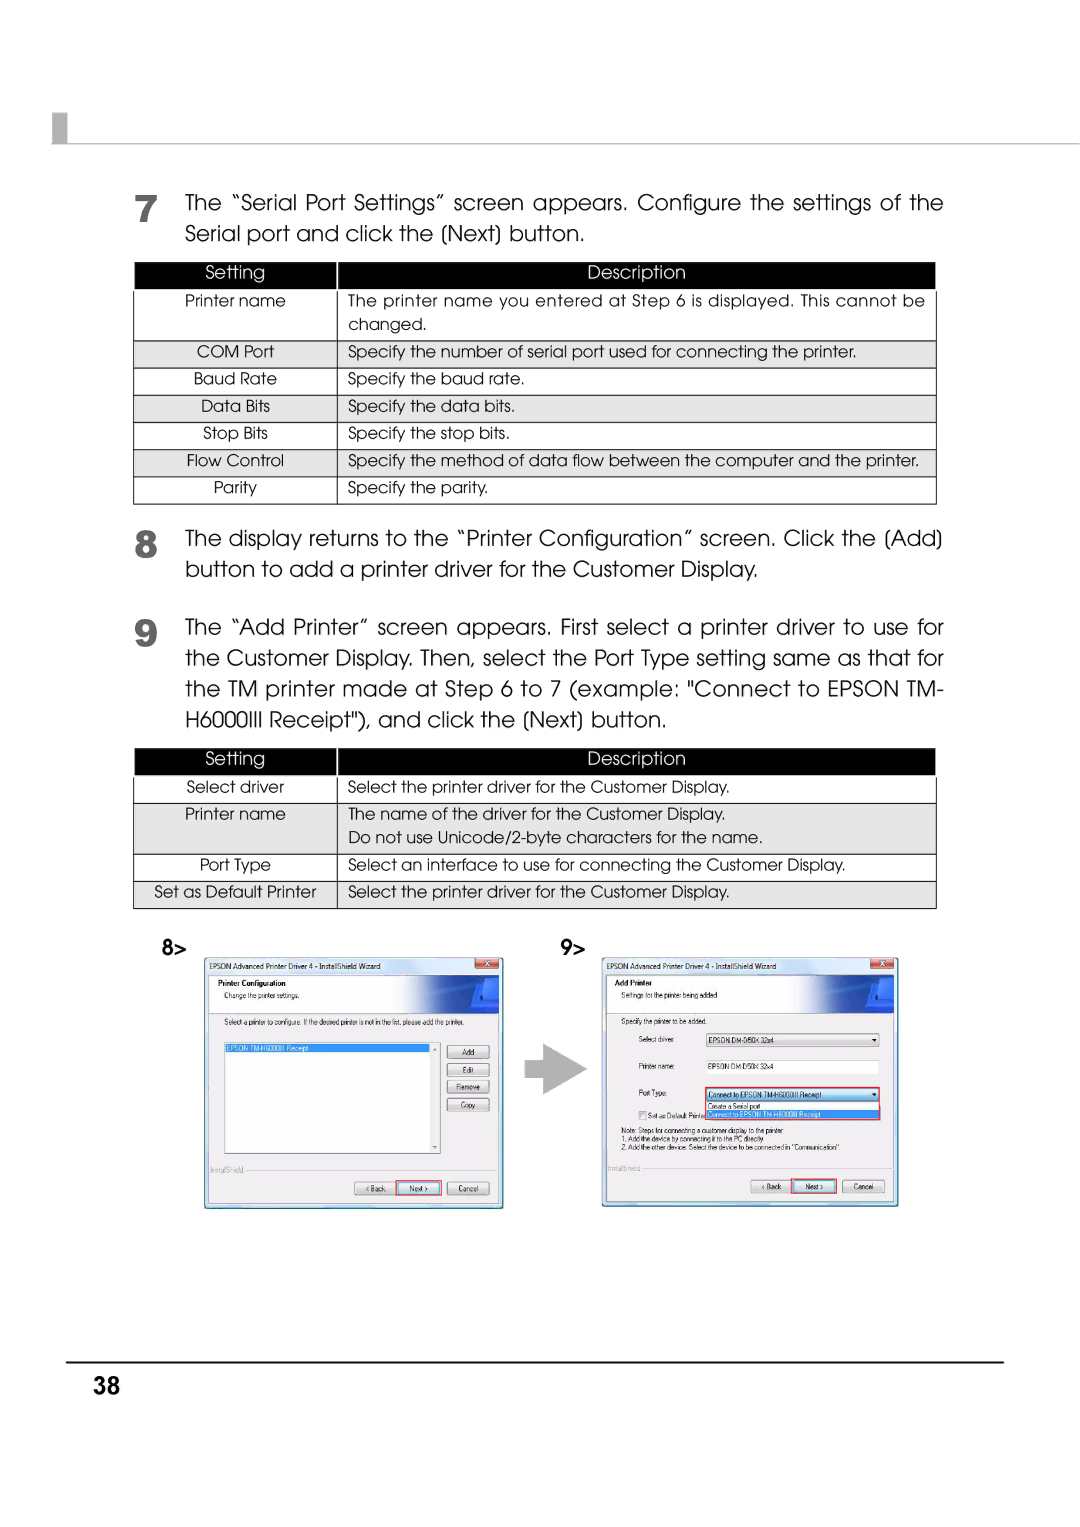
The display returns to the “Printer Configuration” screen. Click the [Add] button to add a printer driver for the Customer Display.
The “Add Printer” screen appears. First select a printer driver to use for the Customer Display. Then, select the Port Type setting same as that for the TM printer made at Step 6 to 7 (example: "Connect to EPSON TM- H6000III Receipt"), and click the [Next] button.
Setting
Description
| Select driver | Select the printer driver for the Customer Display. |
| ||||||||
|
|
|
|
|
|
|
|
|
|
|
|
| Printer name | The name of the driver for the Customer Display. |
| ||||||||
|
| Do not use |
| ||||||||
|
|
|
|
|
|
|
|
|
|
|
|
| Port Type | Select an interface to use for connecting the Customer Display. |
| ||||||||
|
|
|
|
|
|
|
|
|
|
|
|
| Set as Default Printer | Select the printer driver for the Customer Display. |
| ||||||||
|
|
|
|
|
|
|
|
|
|
|
|
| 8> | 9> |
|
|
|
|
| ||||
|
|
|
|
|
|
|
|
|
|
|
|
|
|
|
|
|
|
|
|
|
|
|
|
|
|
|
|
|
|
|
|
|
|
|
|
|
|
|
|
|
|
|
|
|
|
|
|
|
|
|
|
|
|
|
|
|
|
|
|
|
|
|
|
|
|
|
|
|
|
|
|
|
|
|
|
|
|
|
|
|
|
|
|
|
|
|
|
|
|
|
|
|
|
|
|
|
|
|
|
|
|
|
|
|
|
|
|
38
