Voyager 3000 User Guide
1.View Drive Information: this option gives information relating to the drive selected. Information about the drive Revision No., Serial No., and Disk Capacity is shown.
2.Scan SCSI Drive: this option is covered in detail on page
3.Set Slot Number: this option allows you to assign a slot number for each of the drives in the Voyager 3000 system.
4.Add Drive Entry: this option allows you to assign a slot number to an empty carrier with no drive when using the fault bus. In the future if a new drive is added to this slot it is not necessary to assign the lot number again.
5.Clear Drive Status: this option allows the user to delete an empty drive entry. If there is a drive in the slot or if a slot number has been assigned to the empty slot then this option will not clear the drive entry.
6.Toggle Failure Signal: this option allows the user to either switch On or Off the failure LEDS on the front of the carrier for the purpose of testing the failure LED’s.
View and Edit SCSI Channels
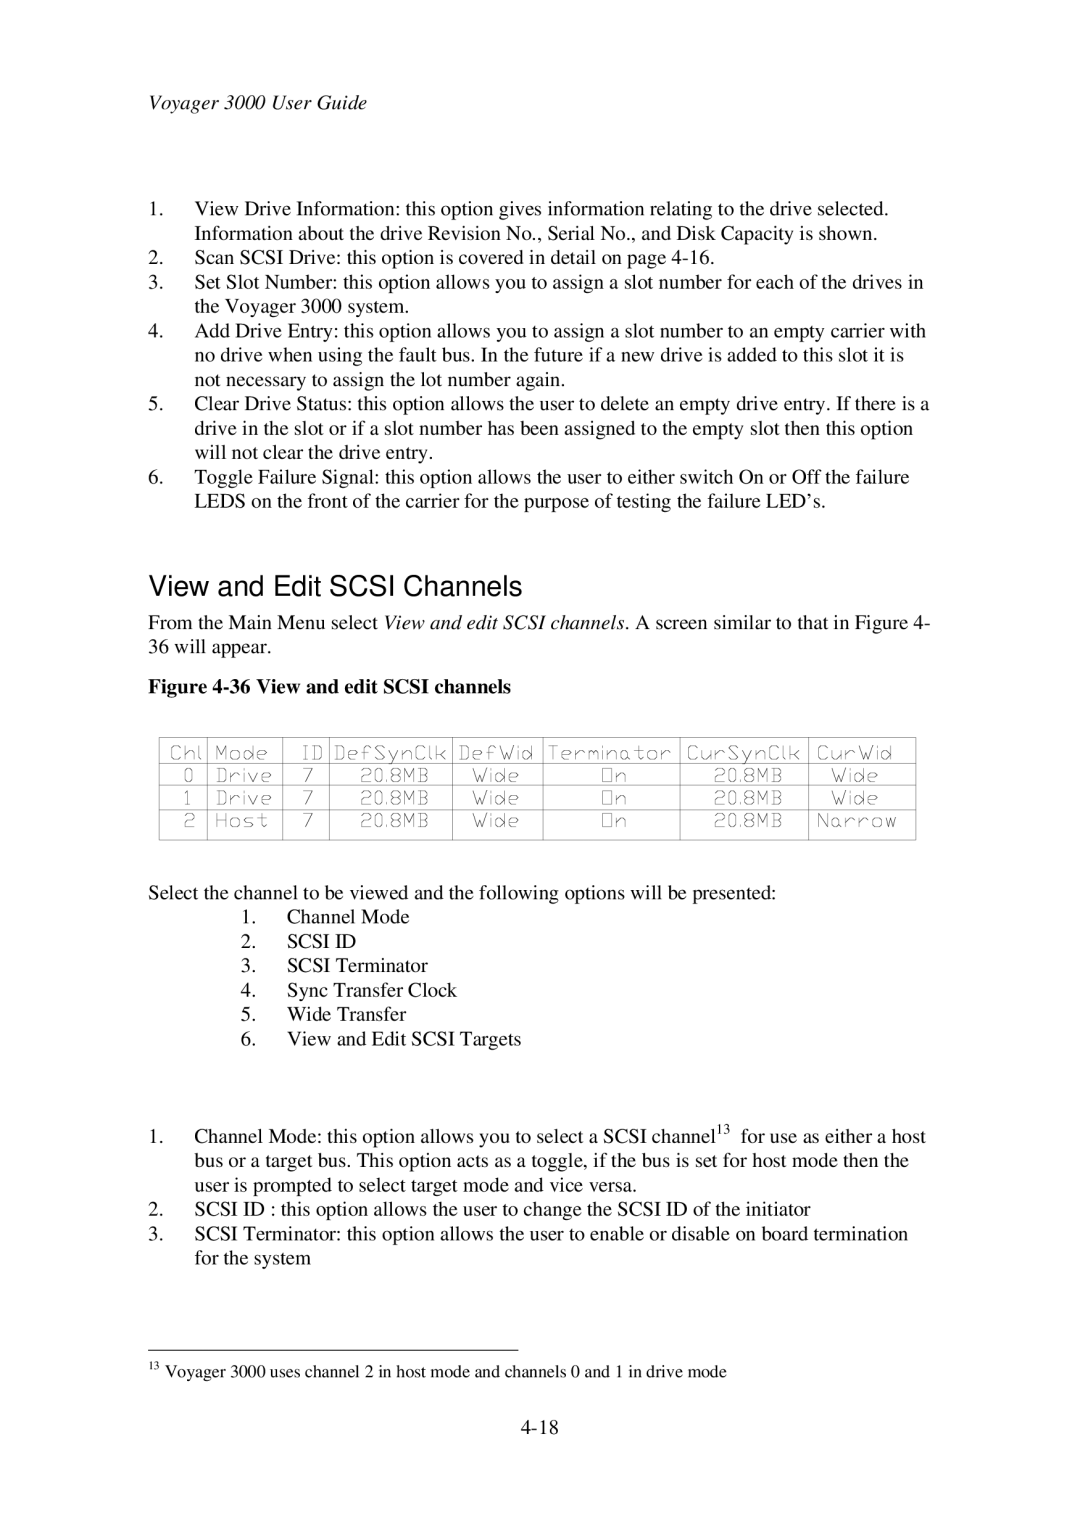
From the Main Menu select View and edit SCSI channels. A screen similar to that in Figure 4- 36 will appear.
Figure 4-36 View and edit SCSI channels
Select the channel to be viewed and the following options will be presented:
1.Channel Mode
2.SCSI ID
3.SCSI Terminator
4.Sync Transfer Clock
5.Wide Transfer
6.View and Edit SCSI Targets
1.Channel Mode: this option allows you to select a SCSI channel13 for use as either a host bus or a target bus. This option acts as a toggle, if the bus is set for host mode then the user is prompted to select target mode and vice versa.
2.SCSI ID : this option allows the user to change the SCSI ID of the initiator
3.SCSI Terminator: this option allows the user to enable or disable on board termination for the system
13Voyager 3000 uses channel 2 in host mode and channels 0 and 1 in drive mode